May 2008
stephanie & jeff
05.30.08 | weddings
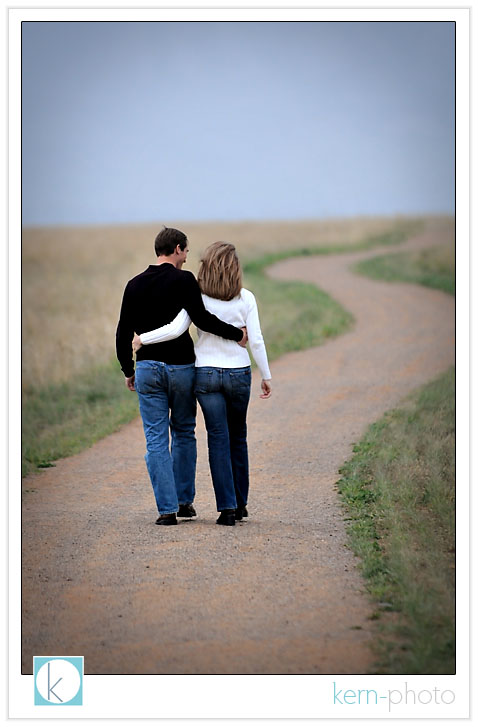
stephanie & jeff grew up miles apart in a
small-town in nebraska and never knew it until
they met years later on the golf course in
colorado. since they both love the game of golf,
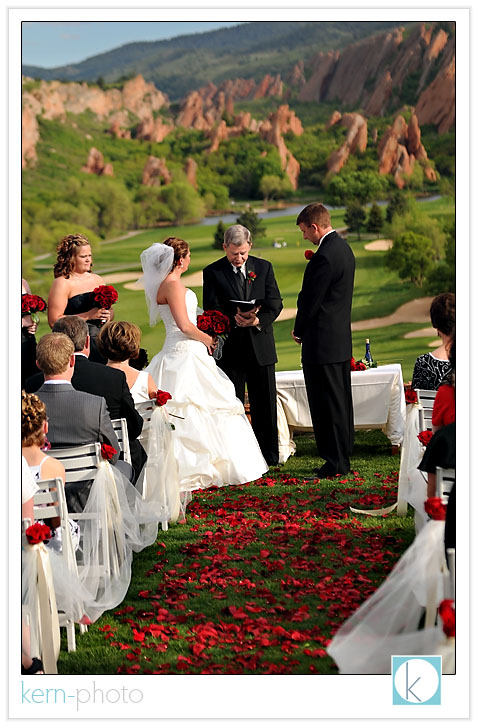
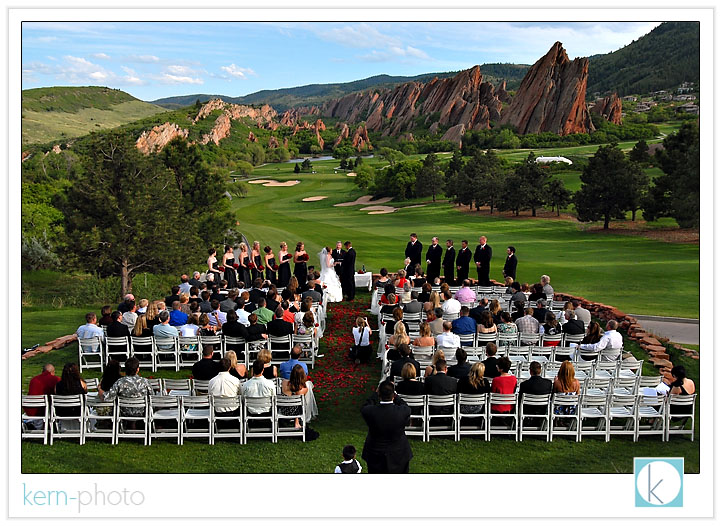
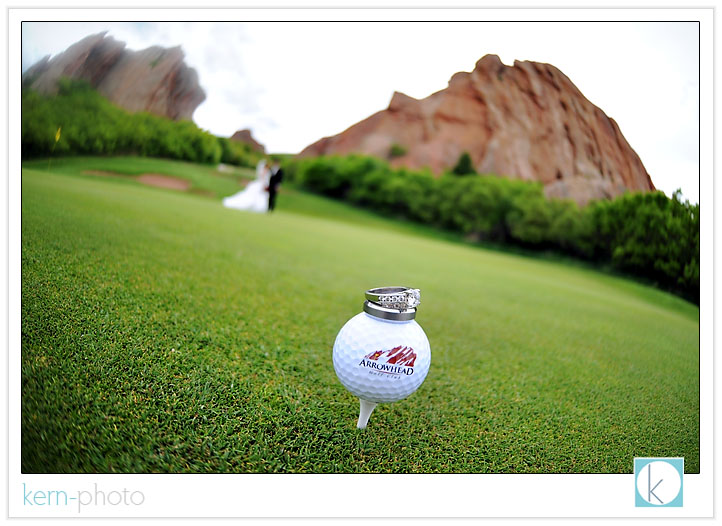
arrowhead
golf club seemed the perfect place for
them to tie the big knot on may 25, 2008.
jeff wanted to admire stephanie in her dress so bad. part of the excitement lies in the anticipation of seeing exactly how beautiful the dress is :)
view their slideshow HERE and sign their guestbook on pictage to see more by clicking HERE.
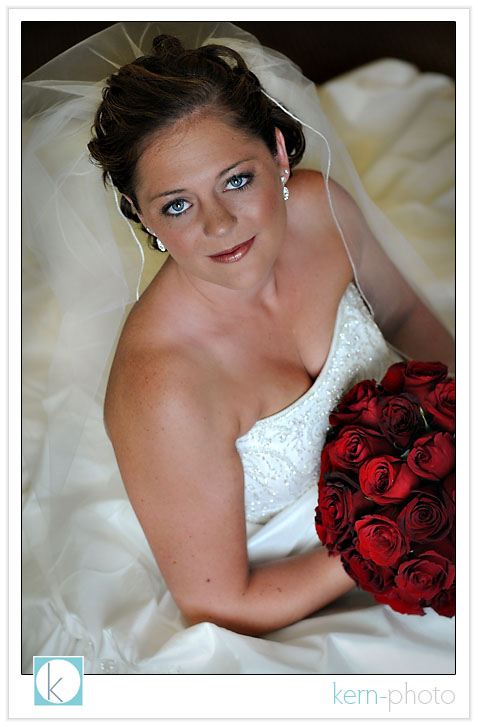
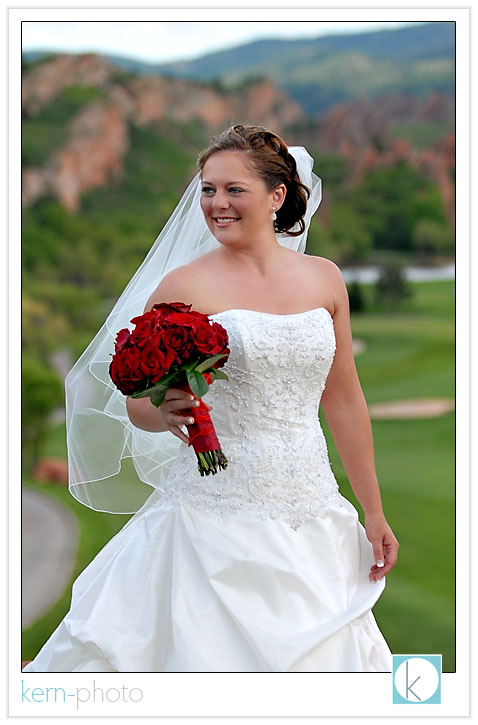
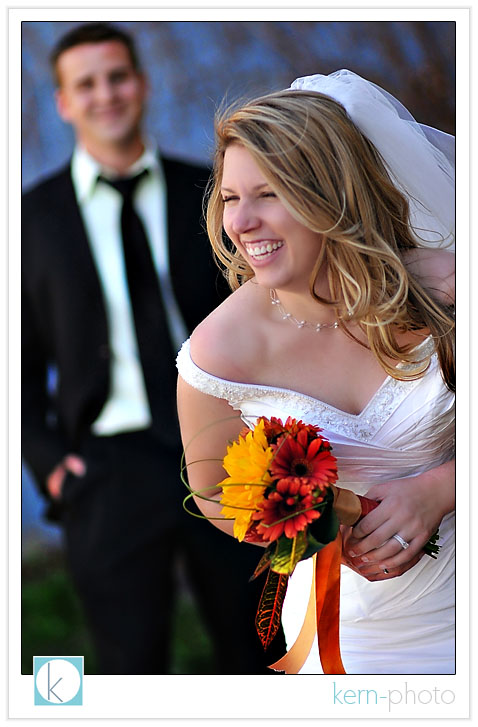
stephanie loves the color red... and it shows!
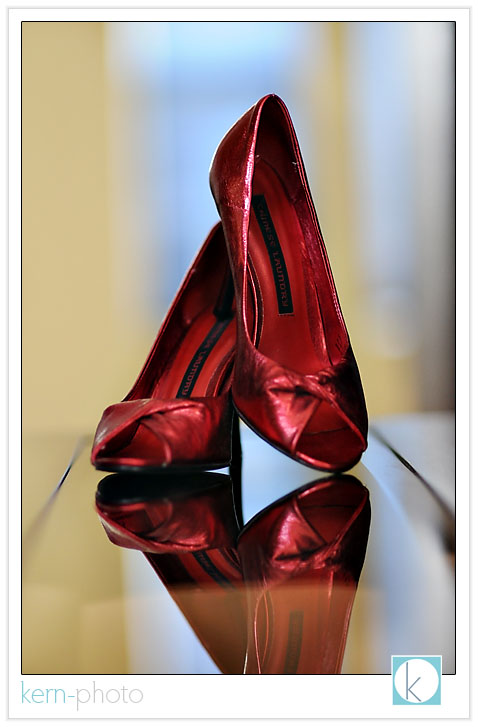
all the girls signed her shoes:

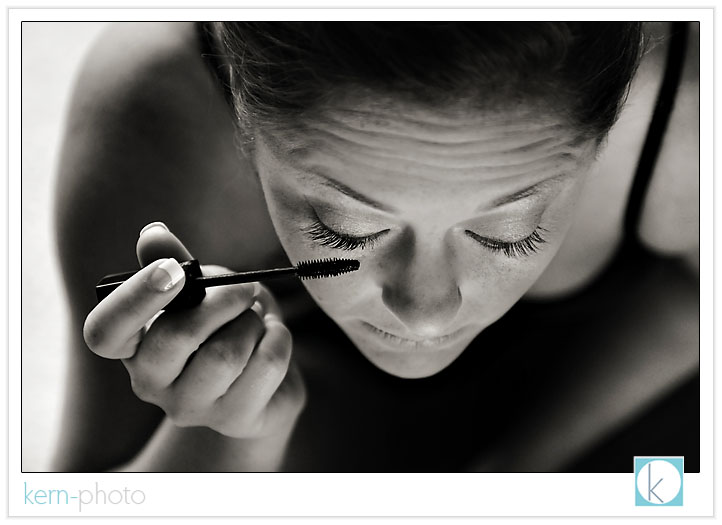
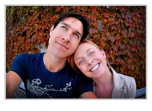
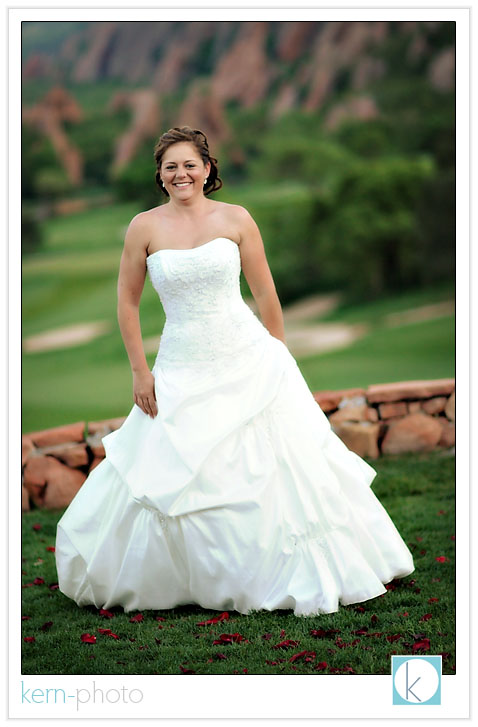
stephanie looked radiant:
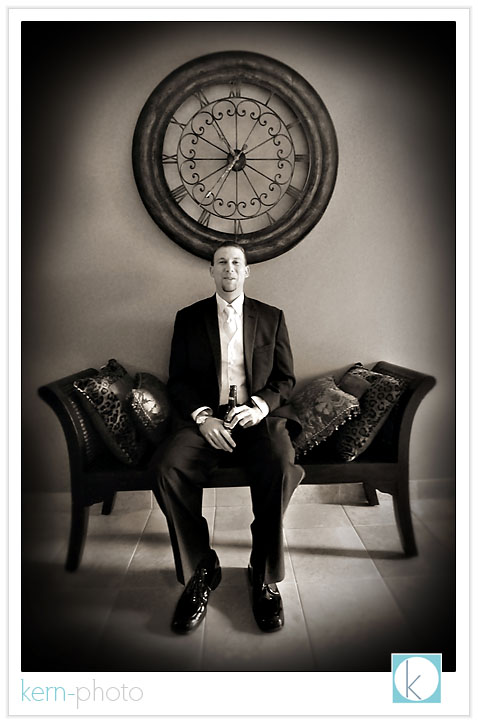
and here's jeff:
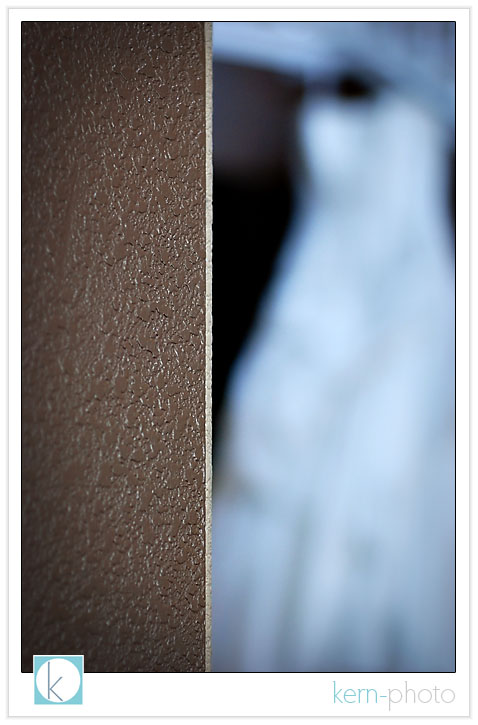
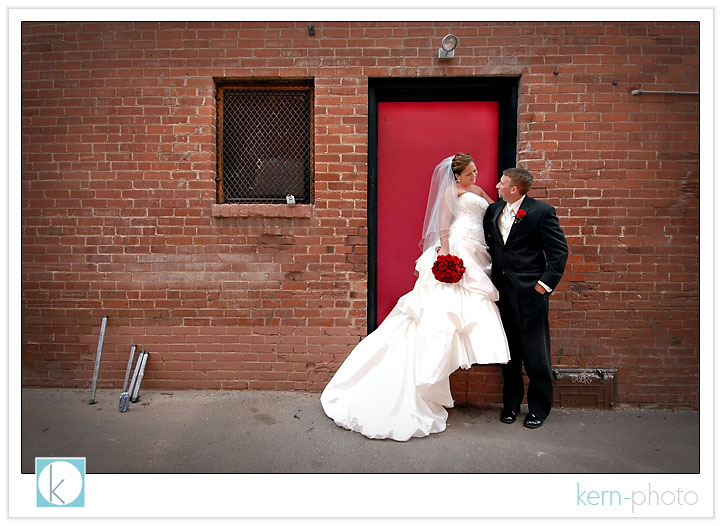
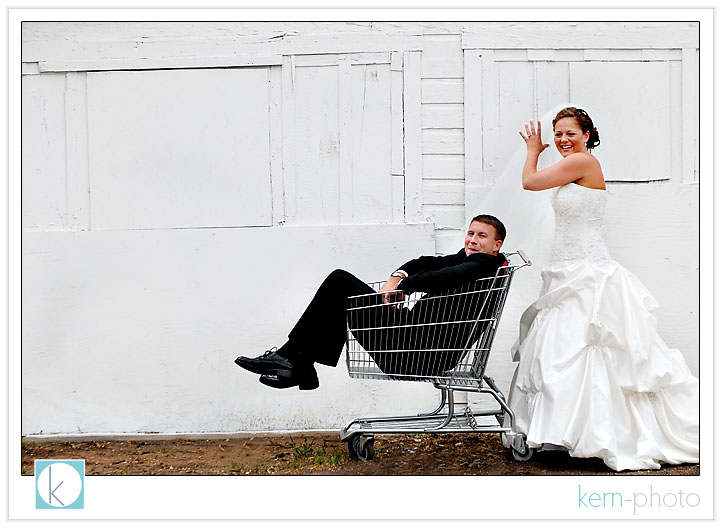
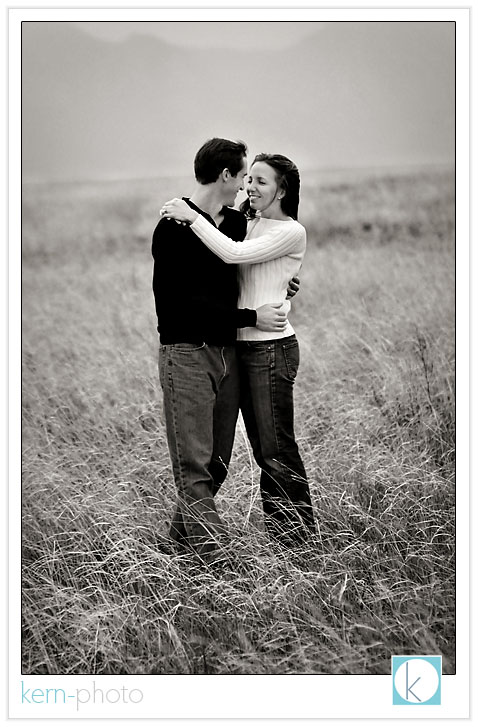
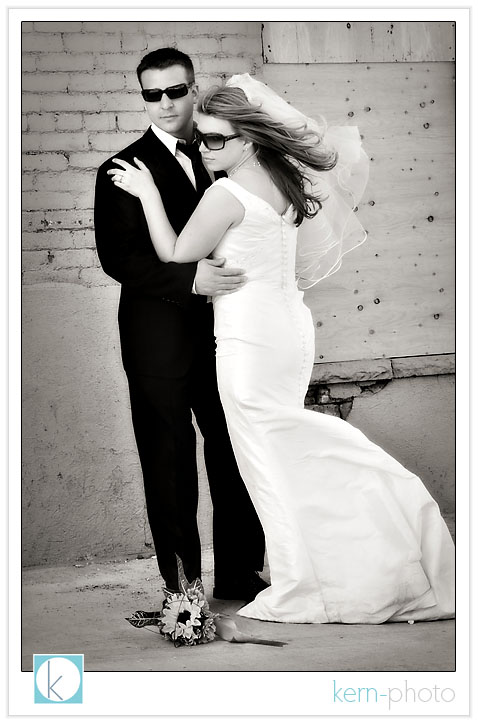
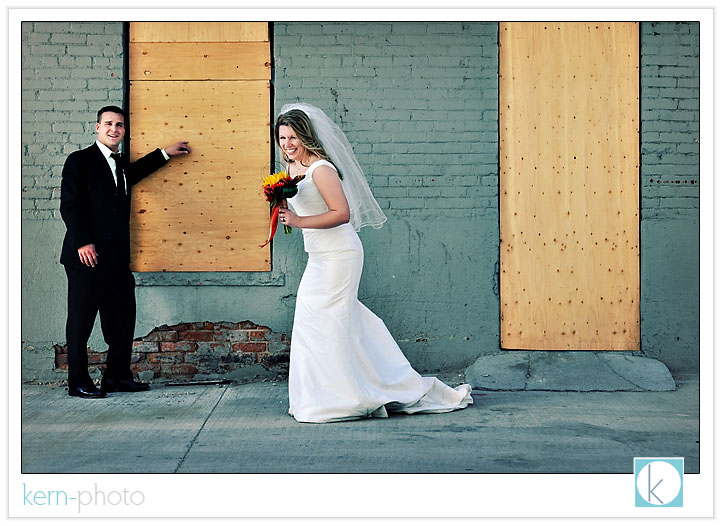
after their First Look in downtown littleton, we wandered the streets in search of some textured backgrounds, a kern-photo favorite:
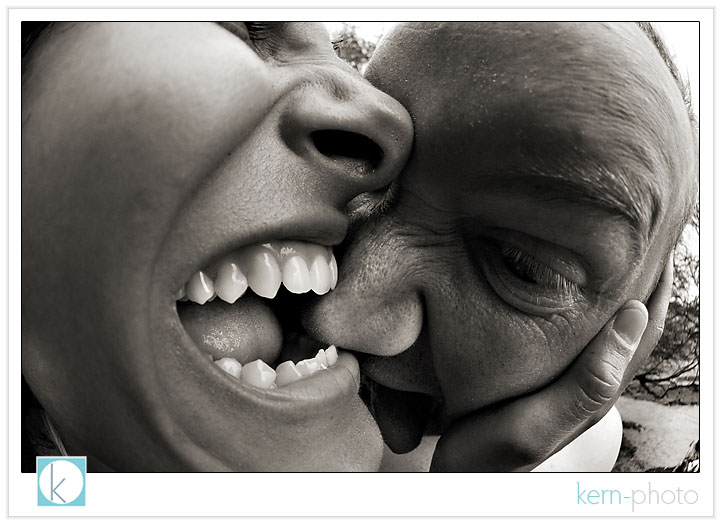
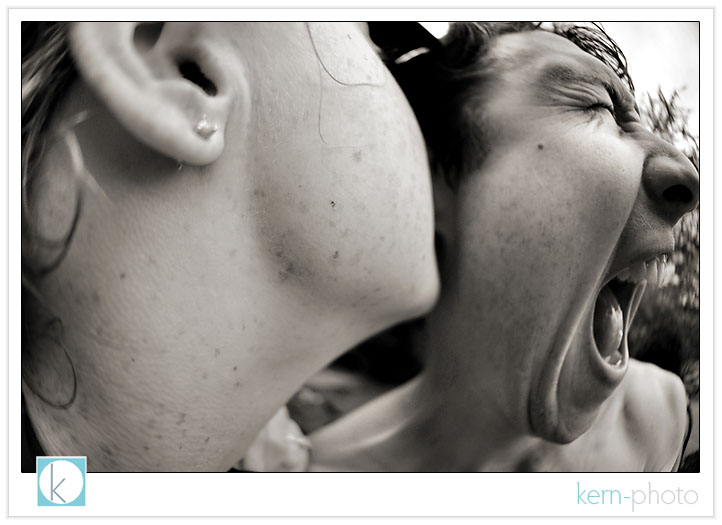
a candid moment:
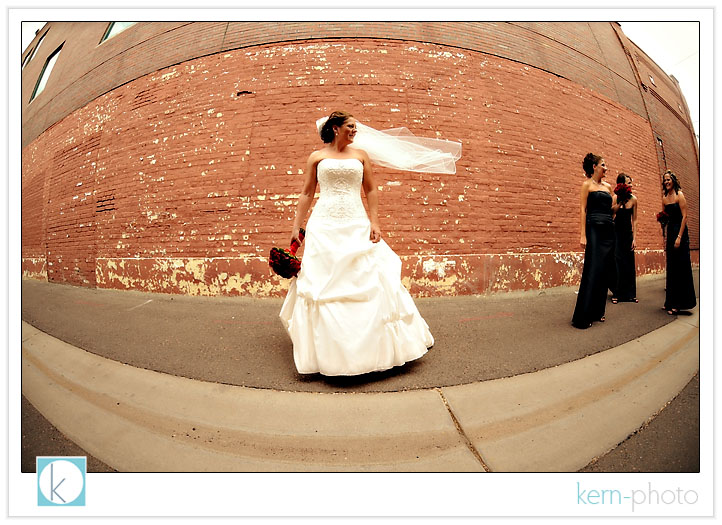
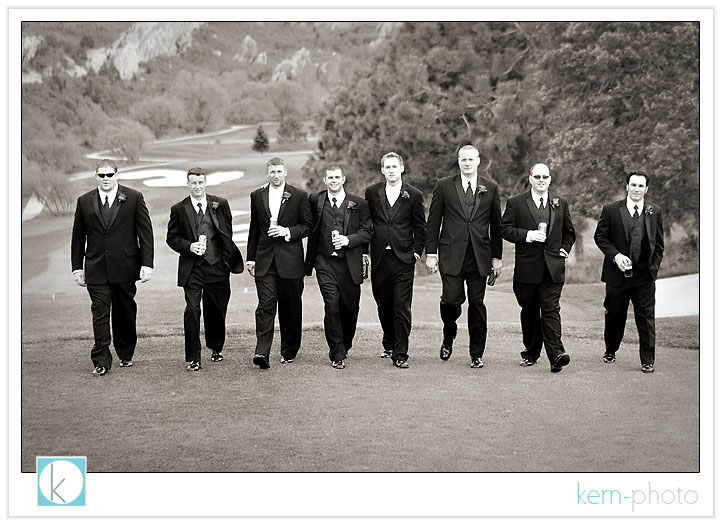
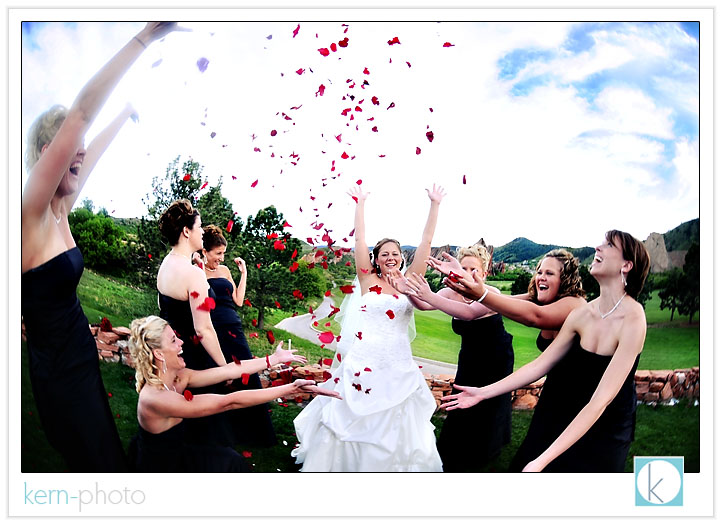
super fun, super chill was the order of the day:
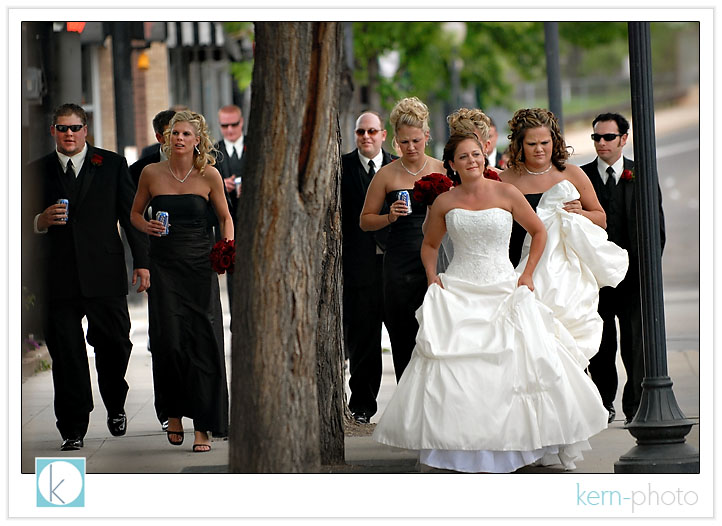
nebraskan's love their bud light.

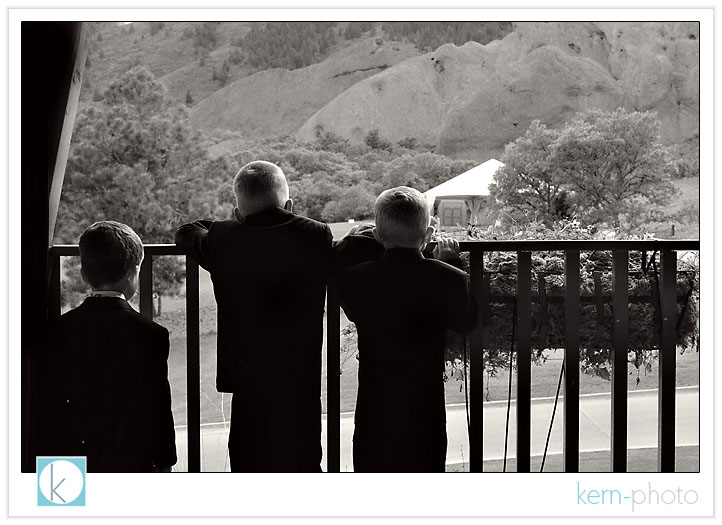
just before the ceremony, i caught this a candid moment of the boys scoping out the colorado geography.
we had a few moments to wander the course and savor the views.

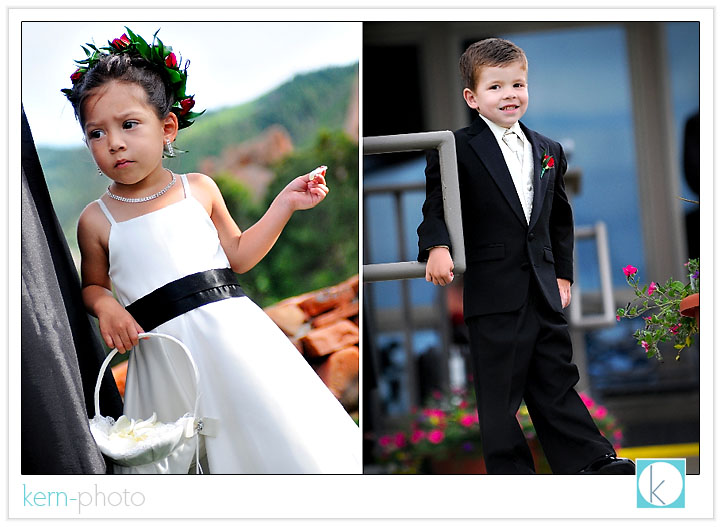
proudly displaying the latest spring fashions in junior sizes:
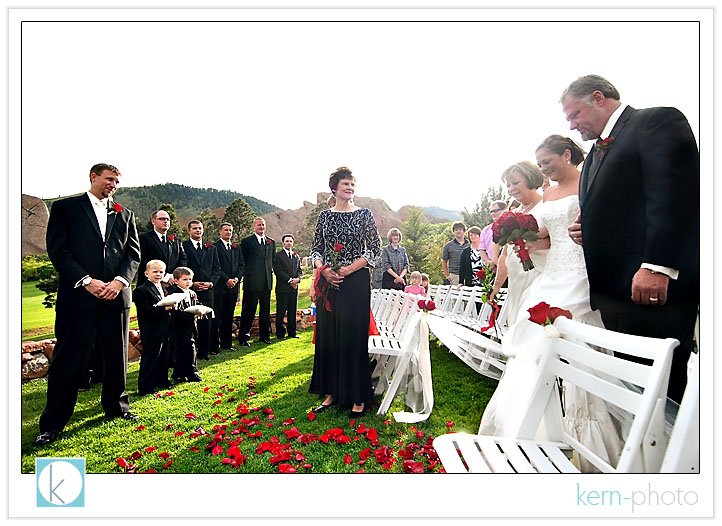
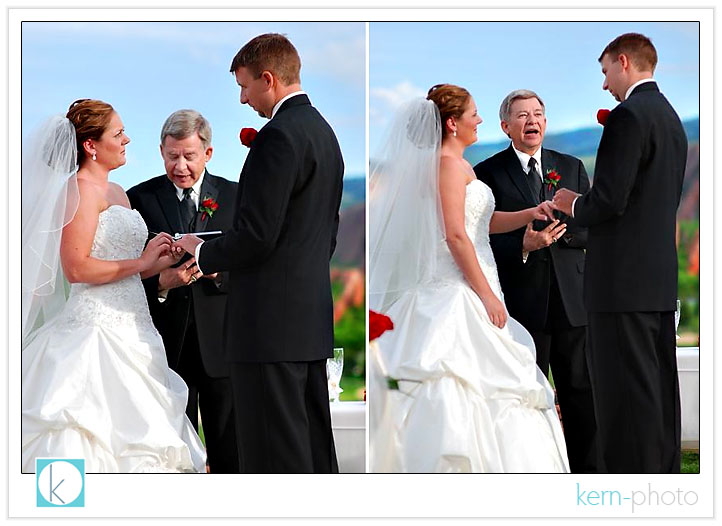
stephanie chose both her parents to give her away, which brought out the emotion in jeff.
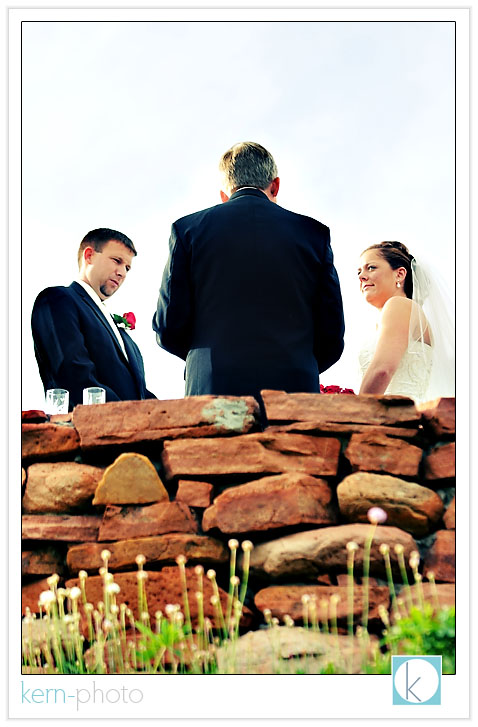
jeff's father did a wonderful job as the officiate.
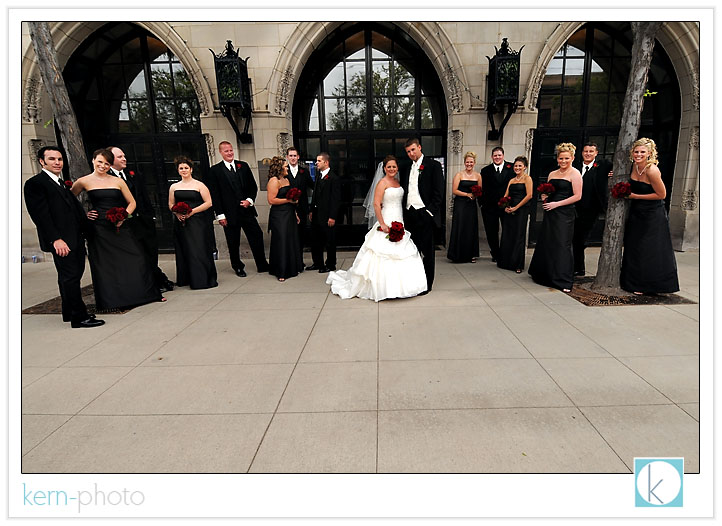
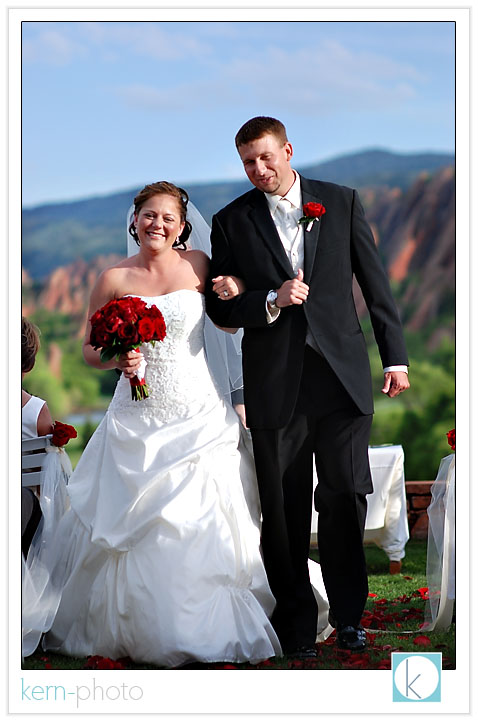
beaming with joy in front of friends & family:
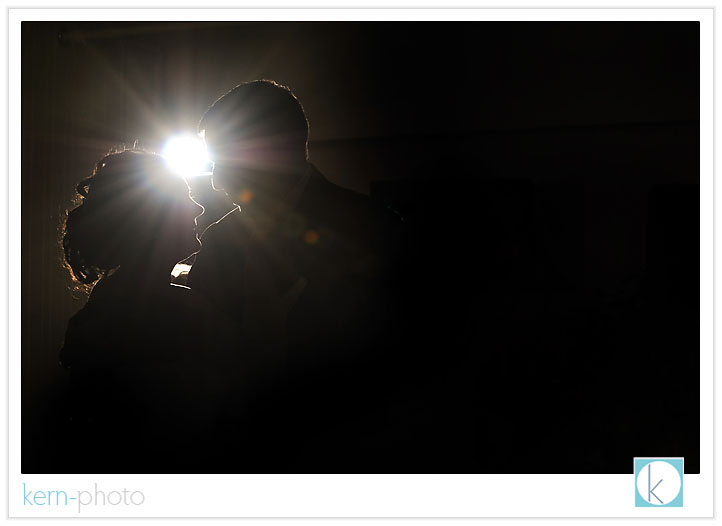
here's our rock shot:
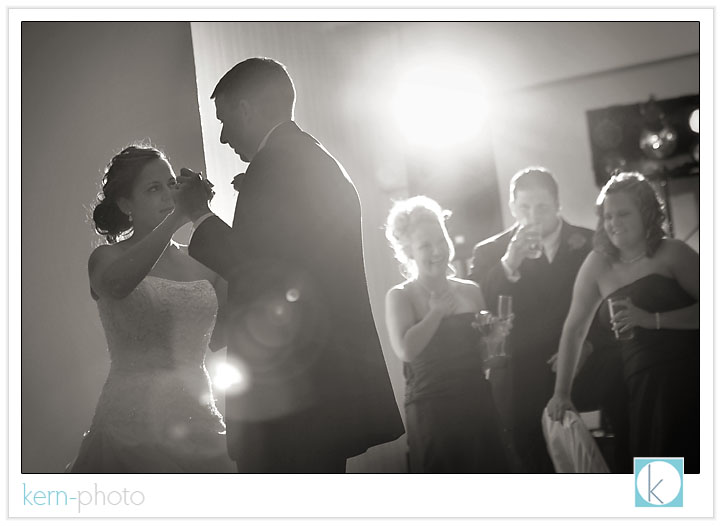
the first dance:
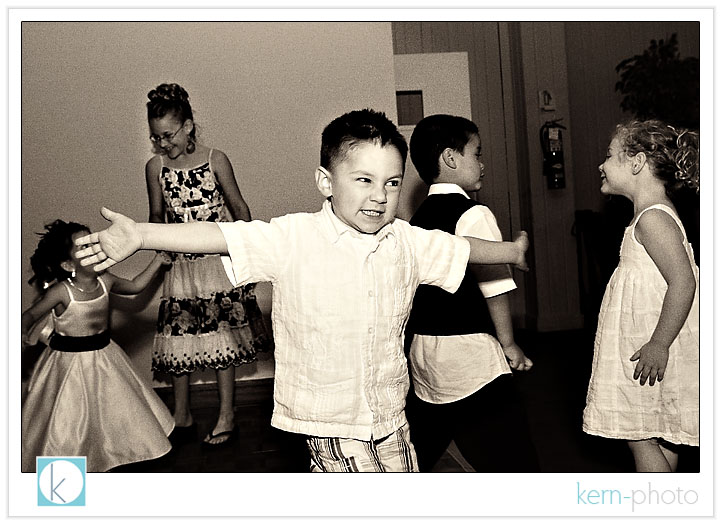
kids are such fun at weddings when the adults are doing their own thing:
their party continued well-past midnight:

jeff wanted to admire stephanie in her dress so bad. part of the excitement lies in the anticipation of seeing exactly how beautiful the dress is :)
view their slideshow HERE and sign their guestbook on pictage to see more by clicking HERE.
stephanie loves the color red... and it shows!
all the girls signed her shoes:
stephanie looked radiant:
and here's jeff:
after their First Look in downtown littleton, we wandered the streets in search of some textured backgrounds, a kern-photo favorite:
a candid moment:
super fun, super chill was the order of the day:
nebraskan's love their bud light.
just before the ceremony, i caught this a candid moment of the boys scoping out the colorado geography.
we had a few moments to wander the course and savor the views.
proudly displaying the latest spring fashions in junior sizes:
stephanie chose both her parents to give her away, which brought out the emotion in jeff.
jeff's father did a wonderful job as the officiate.
beaming with joy in front of friends & family:
here's our rock shot:
the first dance:
kids are such fun at weddings when the adults are doing their own thing:
their party continued well-past midnight:
...
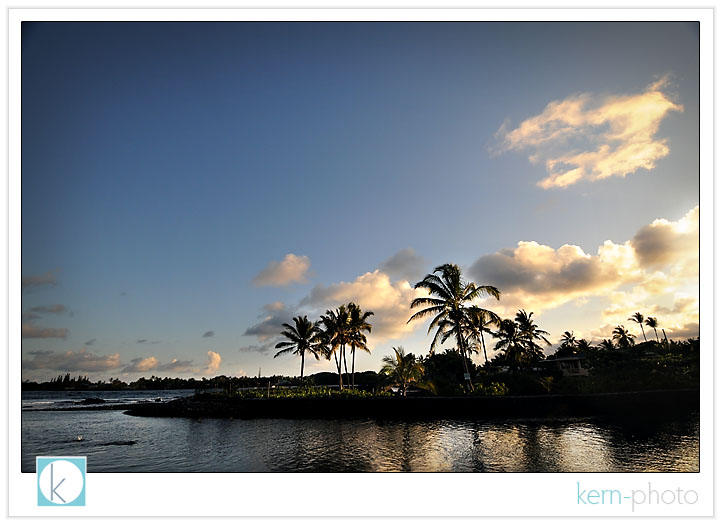
kona vacation
05.29.08 | travel &
escapes
ahhhh. nothing like a little r & r to
recharge the creative juices. we spent a glorious
week on the big island of hawaii exploring the
off-beat paths leading to adventure with our good
friends ryan & desi. highlights include night
lava sightings, watching the sun sink into the
sea, tasting many different roasts of kona
coffee, spotting dolphins, turtles and some
mischievous feral goats :)
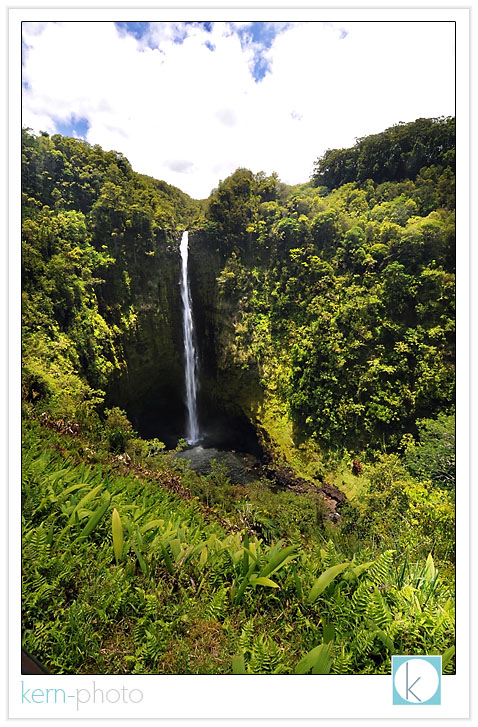
442 ft akaka falls in akaka falls state park:
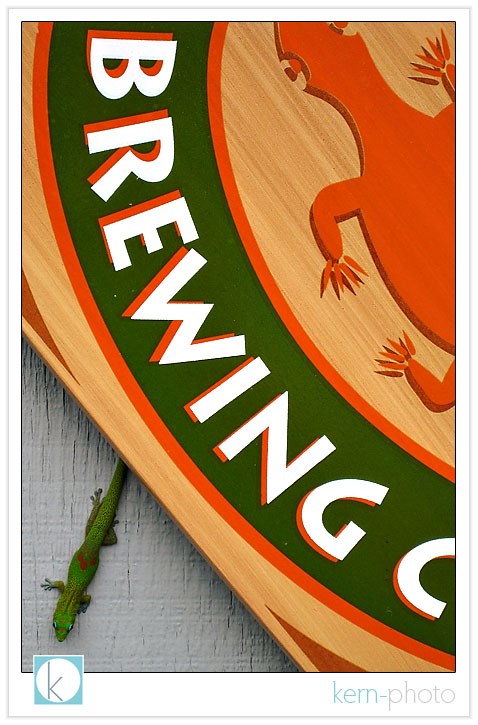
the kona brewing company's gecko mascot shot while on an nationalgeographic kern-photo
assignment by ryan:
i love this shot, also taken by ryan on his 2 megapixel waterproof point-and-shoot:
exploring the volcanic wonders of hawaii volcanoes national park, trying to spell "L.O.V.E"... but it was difficult to make the letter "L" while shooting.
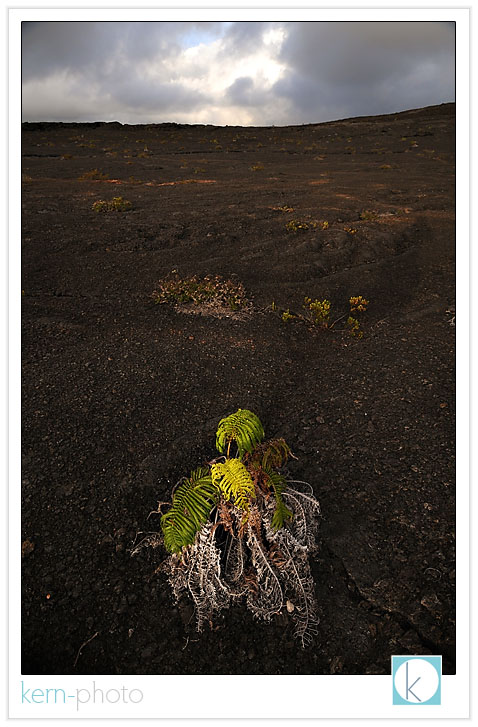
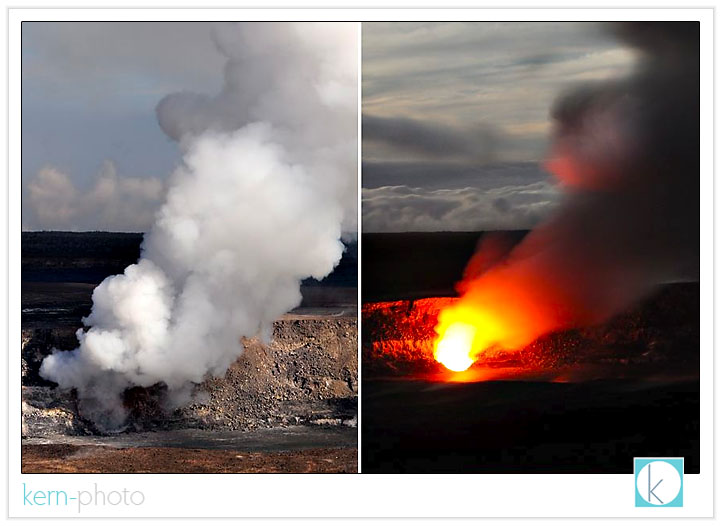
it is amazing that life grows on the land of recent volcanic activity:
it has been over 25 years since volcanic activity has occurred at the kilauea volcano, so we were in luck to view it both during the day (left) and night (right):
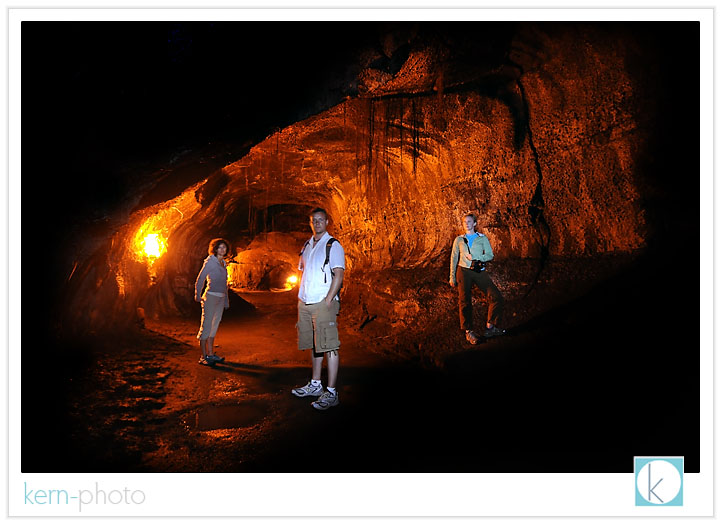
hiking inside thurston lava tube at night was a cross between sh*t scary and halloween giddy (taken with only a halogen flashlight, a tripod, and 4 second exposure).
'we see dead people':
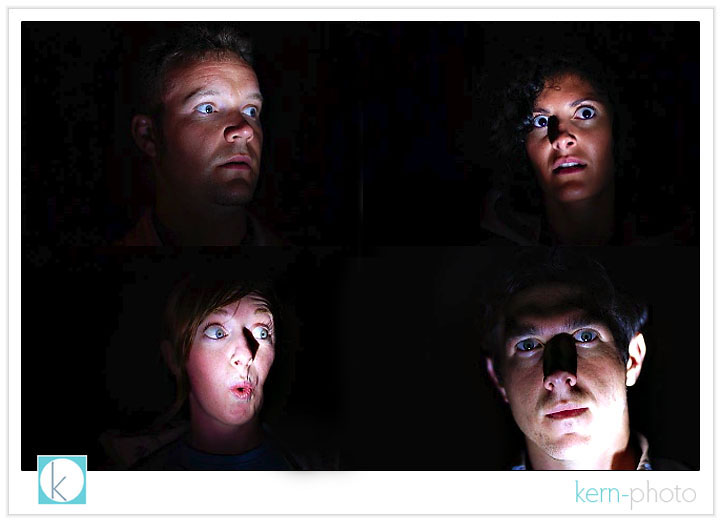
as the thick vog (volcanic fog) rolls in, we pondered if this could be the last shot of us if the sulfuric gas blew our direction.

we walked away normal... or did we?
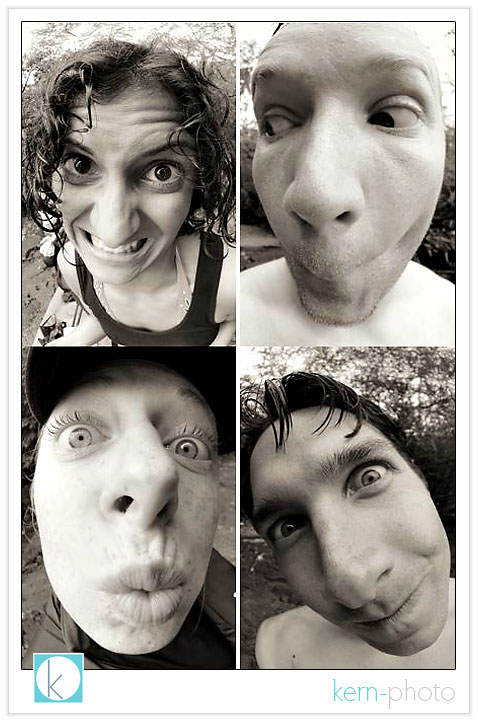
back to regular programming....
here's desi holding the world's biggest avocado we've ever seen and could call our very own :)

and part of the delicious salad (sorry, the guac didn't make the photo because it got eaten too fast :)

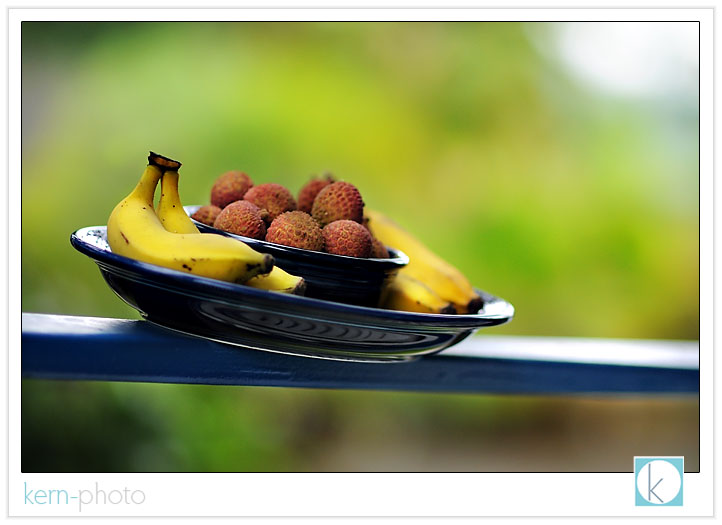
apple-bananas and lychee fruit.
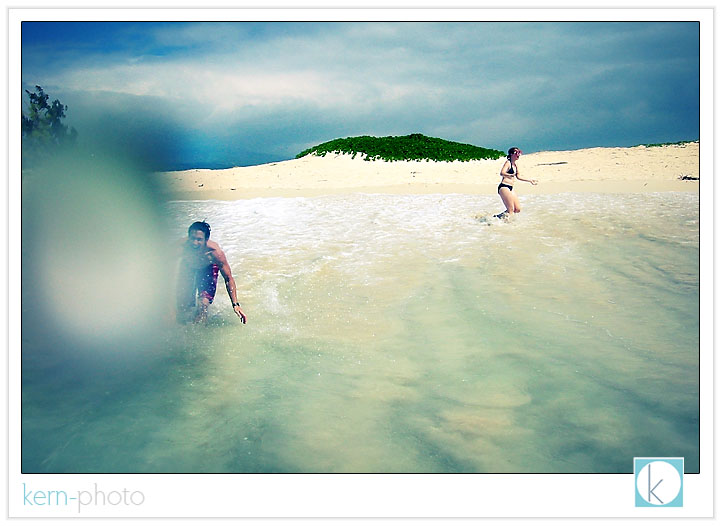
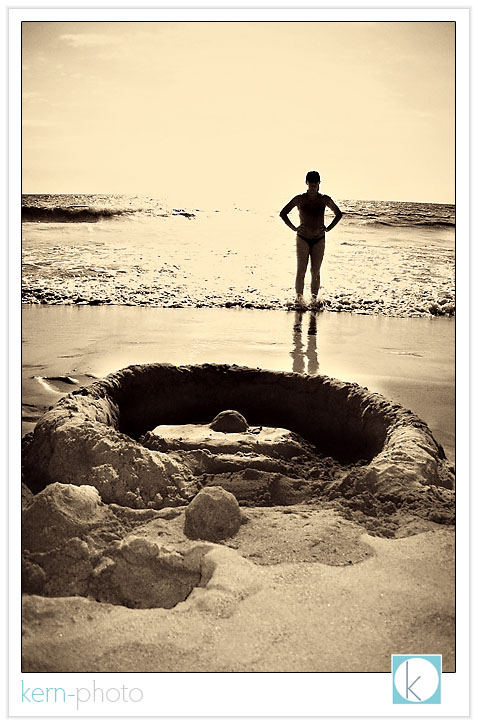
nicole defends the sand castle wall of sand before waves destroy her masterpiece.
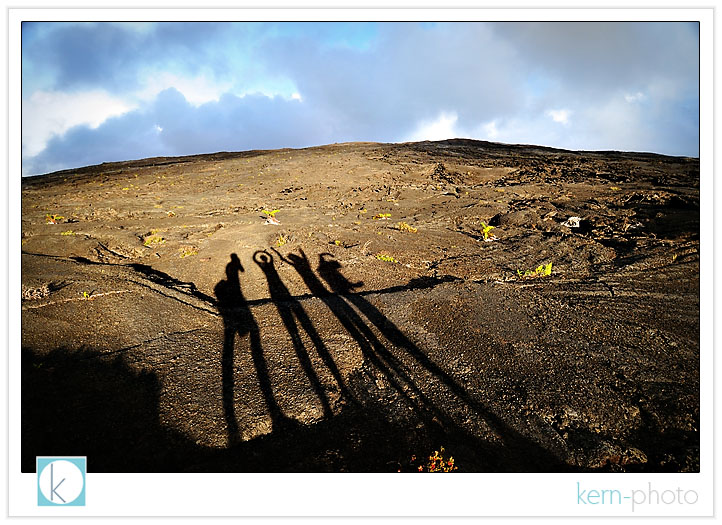
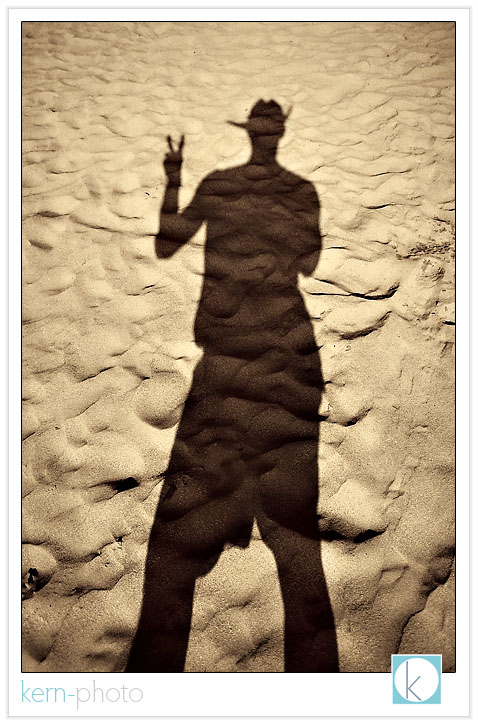
living in denver, we are about as far as one can get from the ocean in the continental u.s... so when we see a beach, we come running. here's my shadow-self portrait, something i've been shooting for over 10 years.
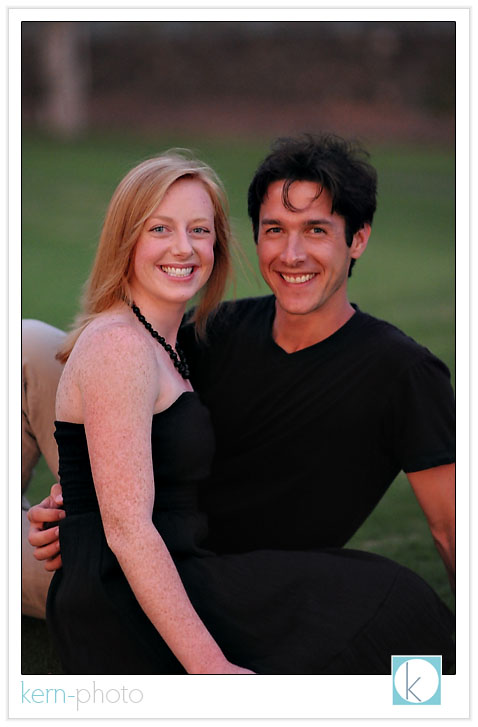
a cheesy portrait (we actually do not have that many shots of us not taken by us, so thanks, ryan for this one!)
panoramic view of the waip'o valley taken with a circular poloarizing filter and a 2-stop neutral density graduated filter.

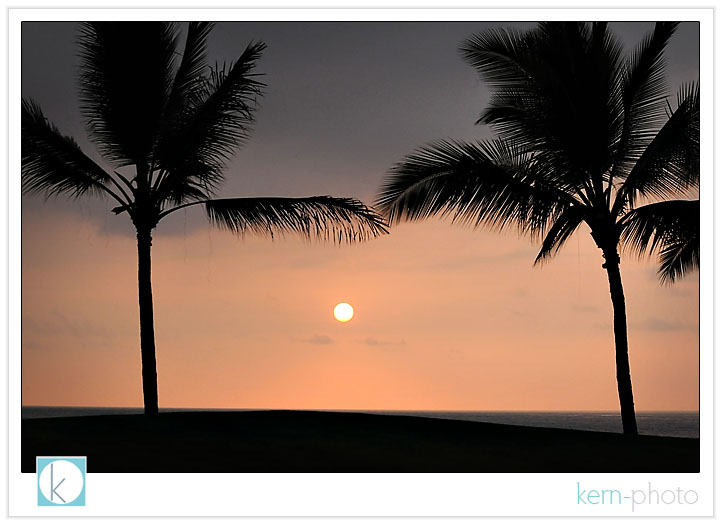
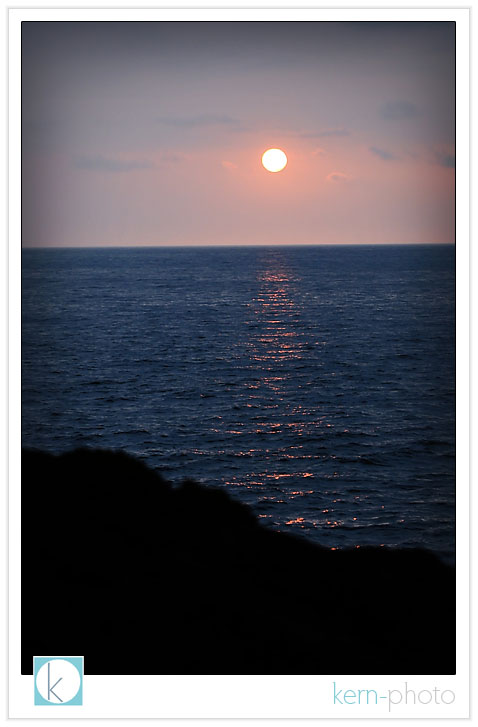
kona sunset.
another cheesy photo to show our grandparents that we actually did have a really good trip:

shot off the road on the hawaiian scenic belt loop
i dig the the clean lines of this shot... which might make a good deskop shot.

ditto for this one:

the champagne ponds, where the sea water blends with fresh, volcanic-warmed waters.... ideal for an evening dip.
another sunset... alas not green flash. i asked a few locales and because of the vog, they haven't seen the 'green flash' in about 6 months :(
442 ft akaka falls in akaka falls state park:
the kona brewing company's gecko mascot shot while on an national
i love this shot, also taken by ryan on his 2 megapixel waterproof point-and-shoot:
exploring the volcanic wonders of hawaii volcanoes national park, trying to spell "L.O.V.E"... but it was difficult to make the letter "L" while shooting.
it is amazing that life grows on the land of recent volcanic activity:
it has been over 25 years since volcanic activity has occurred at the kilauea volcano, so we were in luck to view it both during the day (left) and night (right):
hiking inside thurston lava tube at night was a cross between sh*t scary and halloween giddy (taken with only a halogen flashlight, a tripod, and 4 second exposure).
'we see dead people':
as the thick vog (volcanic fog) rolls in, we pondered if this could be the last shot of us if the sulfuric gas blew our direction.
we walked away normal... or did we?
back to regular programming....
here's desi holding the world's biggest avocado we've ever seen and could call our very own :)
and part of the delicious salad (sorry, the guac didn't make the photo because it got eaten too fast :)
apple-bananas and lychee fruit.
nicole defends the sand castle wall of sand before waves destroy her masterpiece.
living in denver, we are about as far as one can get from the ocean in the continental u.s... so when we see a beach, we come running. here's my shadow-self portrait, something i've been shooting for over 10 years.
a cheesy portrait (we actually do not have that many shots of us not taken by us, so thanks, ryan for this one!)
panoramic view of the waip'o valley taken with a circular poloarizing filter and a 2-stop neutral density graduated filter.
kona sunset.
another cheesy photo to show our grandparents that we actually did have a really good trip:
shot off the road on the hawaiian scenic belt loop
i dig the the clean lines of this shot... which might make a good deskop shot.
ditto for this one:
the champagne ponds, where the sea water blends with fresh, volcanic-warmed waters.... ideal for an evening dip.
another sunset... alas not green flash. i asked a few locales and because of the vog, they haven't seen the 'green flash' in about 6 months :(
southwestern colorado landscapes
05.16.08 | travel &
escapes
finding time to create meaning, personal work is
an important challenge for every photographer.
personal work is what many photographers dream
about and love to get inspired to create. yet,
that same meaningful personal work is something
very little of us get to do 100% of the time. or
even 10% of the time.
that's why on my way back from durango, colorado two weeks ago, i made sure i stopped along the road to smell the flowers, savor the sights, and get back to my landscape photography roots. while there were not an abundance of flowers, there were plenty of stunning landscapes that reminded me about the greatness of wild colorado. part of the love of landscape photography is the solitude. the other is the search for the good light and composition and then using photographic tools to attempt to 'capture the moment.'
95% of the time i find myself waiting for hours or days in patience and perseverance while traveling, planning, and scouting locations. the remainder 5% can be pure adrenaline experience measured in minutes. ahhh, that's when the elusive 'it' happens.
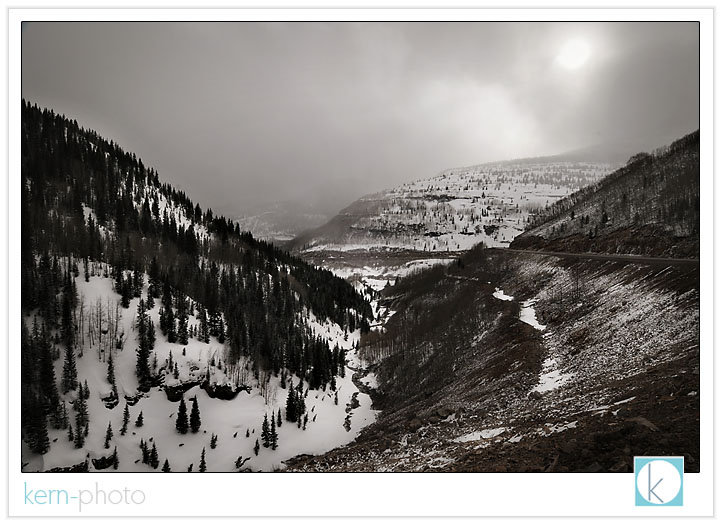
this image was photographed literally standing next to the road for 1/2 second exposure, f/22, iso 100 at 12 mm focal length near red mountain pass.
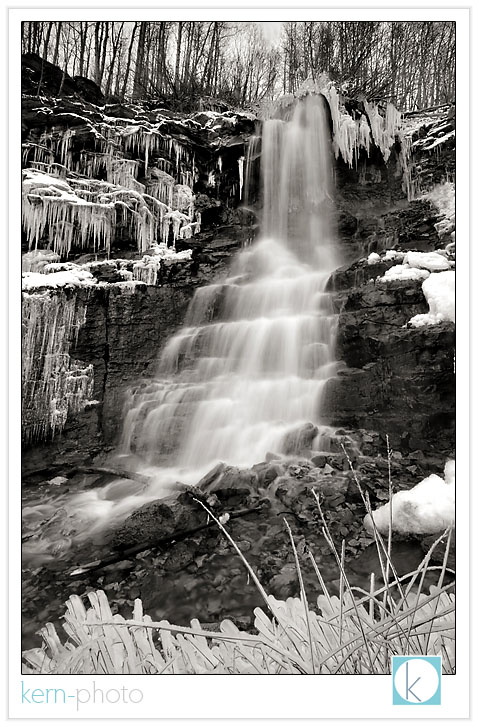
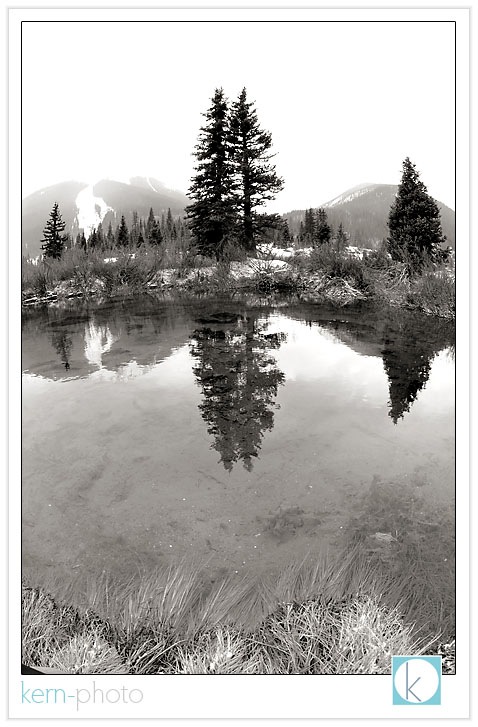
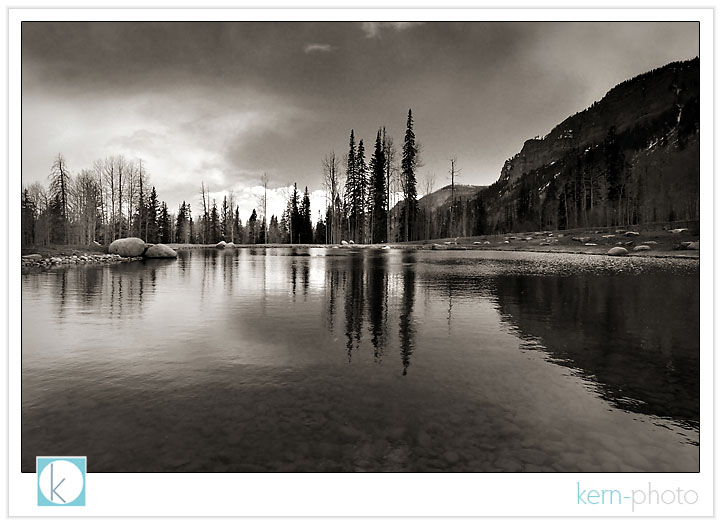
just outside of silverton, colorado, this landscape reflection was photographed for 1/750 second exposure @ f/9.5, iso 800 at 14 mm.
red mountain pass photographed for 1/60 second exposure @ f/16, iso 200 at 12 mm focal length.
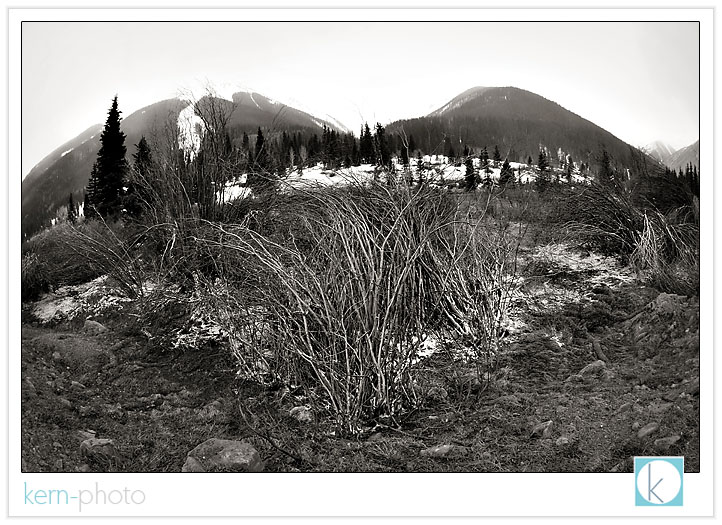
i dig the dramatic perspective with the 10.5 mm fisheye while i was hanging out for 1/90 second at f/9.5, iso 280.
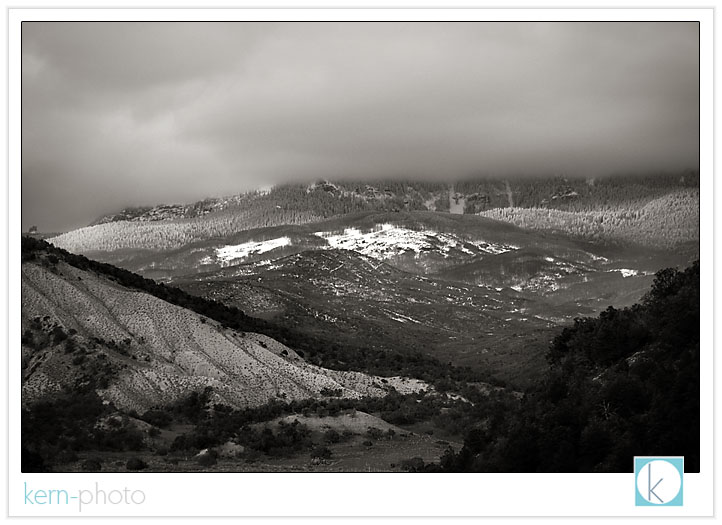
minutes before sunset, the light skimmed across these distant hills located south of montrose, colorado. the image was shot at f/2.8 at 1/250 sec , iso 280, and focal length of 125mm.
that's why on my way back from durango, colorado two weeks ago, i made sure i stopped along the road to smell the flowers, savor the sights, and get back to my landscape photography roots. while there were not an abundance of flowers, there were plenty of stunning landscapes that reminded me about the greatness of wild colorado. part of the love of landscape photography is the solitude. the other is the search for the good light and composition and then using photographic tools to attempt to 'capture the moment.'
95% of the time i find myself waiting for hours or days in patience and perseverance while traveling, planning, and scouting locations. the remainder 5% can be pure adrenaline experience measured in minutes. ahhh, that's when the elusive 'it' happens.
this image was photographed literally standing next to the road for 1/2 second exposure, f/22, iso 100 at 12 mm focal length near red mountain pass.
just outside of silverton, colorado, this landscape reflection was photographed for 1/750 second exposure @ f/9.5, iso 800 at 14 mm.
red mountain pass photographed for 1/60 second exposure @ f/16, iso 200 at 12 mm focal length.
i dig the dramatic perspective with the 10.5 mm fisheye while i was hanging out for 1/90 second at f/9.5, iso 280.
minutes before sunset, the light skimmed across these distant hills located south of montrose, colorado. the image was shot at f/2.8 at 1/250 sec , iso 280, and focal length of 125mm.
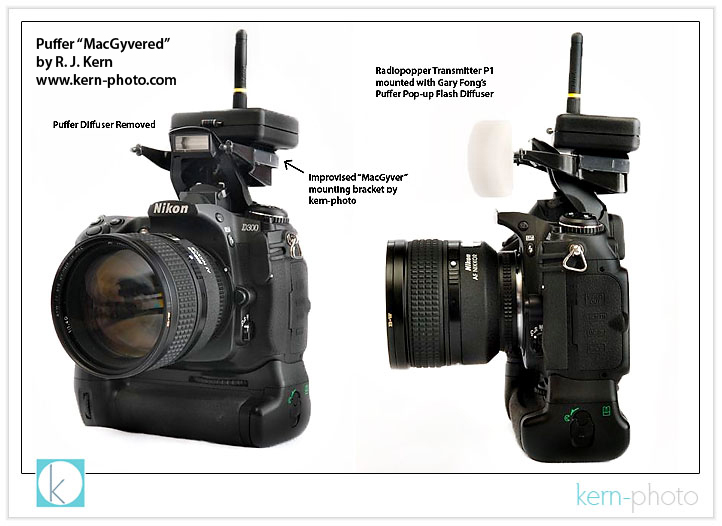
mounting a radiopopper on a puffer
05.15.08 | photo-resources
no, folks, we're not breeding anything illegal
here... just making the minor under-the-hood
modification to gary fong's $20 puffer
pop-up flash diffuser that is required
to safely mount a radiopopper p1 transmitter
behind a camera's pop-up flash.
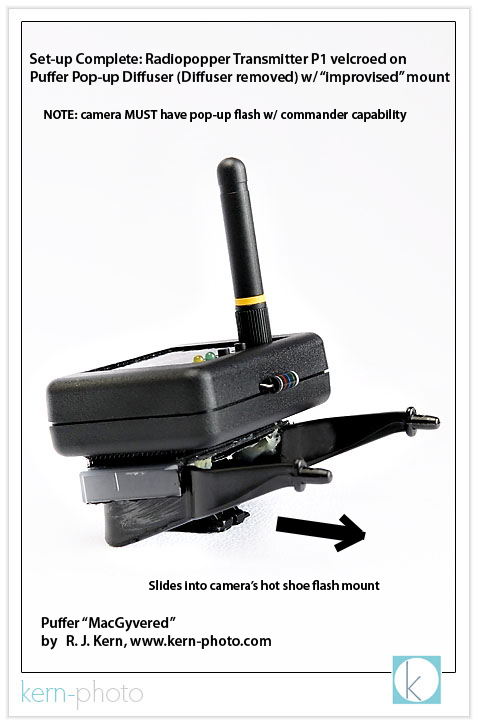
with a little macgyver inspiration, some glue, velcro, and a spare battery cover we're able to do the unthinkable: use our wonderful in-camera pop-up flash as a commander to trigger an off-camera flash using absolute brilliant radiopopper p1 functionality.
paper clips and chewing gum not needed on this mission :)
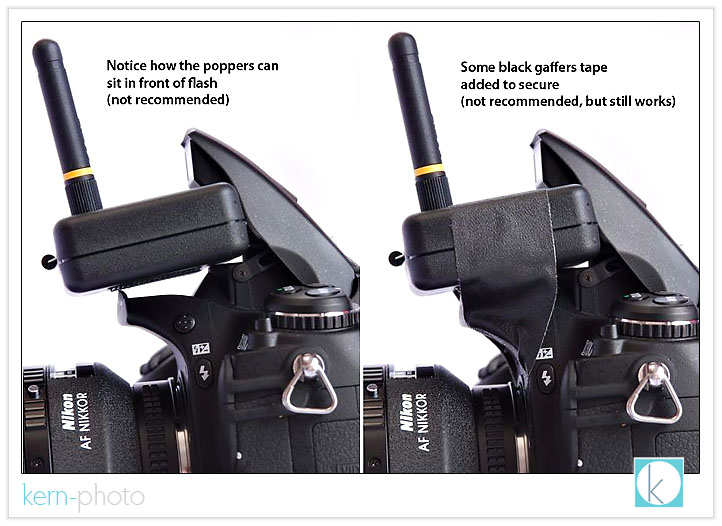
the radiopopper p1 owner's manual states: "The P1 system was never designed to work with the so called “pop-up” flash on some Nikon cameras, but it does indeed function and activate. Mounting is somewhat “improvised” at the user’s discretion. A mount may be available in the future. Improvised mounting should attempt to place the external pickup sensor directly behind the flash tube inside the pop-up flash."
uh, "may be available," makes me impatient. so, i macgyvered an "improvised" mount to change the phrase "is available." btw, this works waaaay better than the piece of black gaffer's tape illustrated in my full radiopopper review. you all are smart, so with a few photos, you'll be off making your own radiopopper bracket in no time.
the ingredients are rather simple:
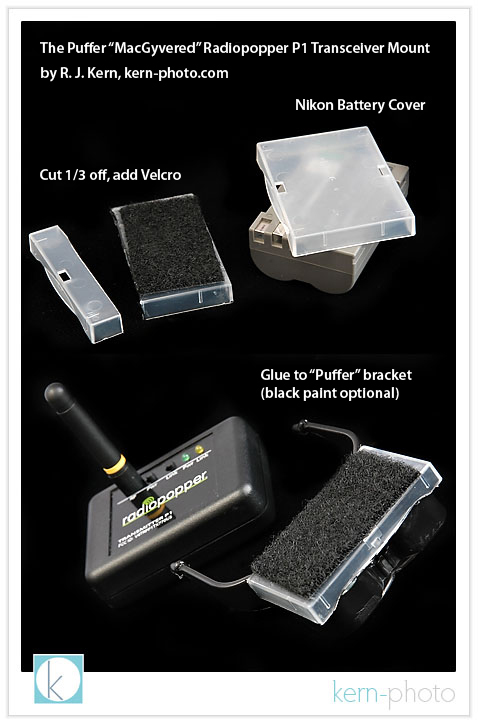
here's the skinny:
1. the plastic welder can be found for about $5 at your local hardware store. super glue is not recommended, as the hold is not as strong. you do not want to rip off your bracket while trying to remove your velcroed radiopopper p1 transmitter. schmear it on good. allow plenty of time to dry.
2. the rechargeable lithium-ion plastic battery cover is the secret. it is supplied with any new nikon d50, d70, d70s, d80, d100, d200, and d300 camera which all use the same e-nel3e (if you purchase a spare, it ships with that, too) . i never use mine since my batteries are either in the camera on a recharger. the reason battery cover is ideal: it ain't too big or small, is rectangular, and has a nice 1/4" lip to bolster the surface area you'll want when you are gluing. you have limited real estate on the base of the transmitter and do not want to cover up the screws sealing access to the single AA battery compartment (poor design). using an sharp blade, cut the battery cover 1/3 lengthwise. you'll want to use the remaining 2/3 portion for the mount. if you can think of something cool to do with the remaining end, be sure to contact us and comment in the blog below.
if you do not have a battery cover, those little, clear compact flash card cases work almost just as well. i say almost because they are a little larger and do not make as snug of a fit as the battery cover. you'll want a close fit to ensure a solid gluing surface.
3. industrial-strength velcro... you might as well purchase some industrial-strength velcro while you are at the hardware store. you can buy it by the foot for about $1 or so. don't get the cheap stuff, which picks up lint and over time the strength of the fastener will decrease. adhere the "fuzzy end" on your old battery cover and the "hook end" on your poppers. if you want mounting velcro on another flash, use the "fuzzy end" as well. if you don't , the "hook end" of the velcro will stick to the inside of your camera bag in a big way :)
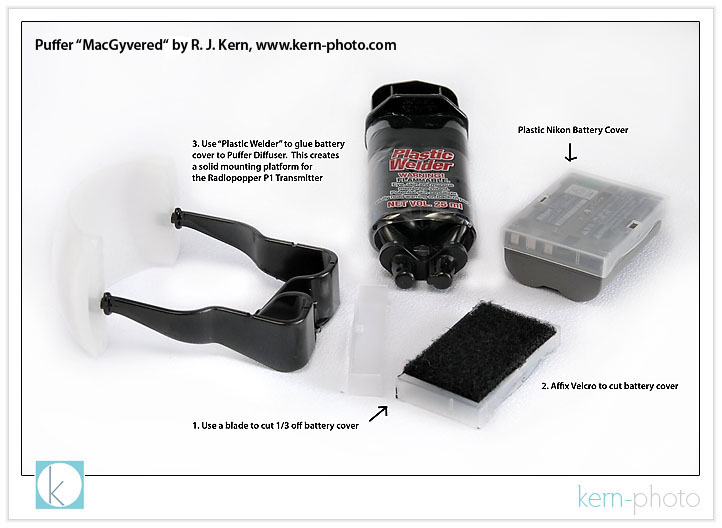
before & after:
after the newly-cut battery cover was glued to the puffer bracket, i used some black acrylic paint with a small brush and painted the underneath to conceal the "clear" color and the ugly dried paint, making the whole shebang a bit more uniformly "black."
now, it is ready for mounting :)
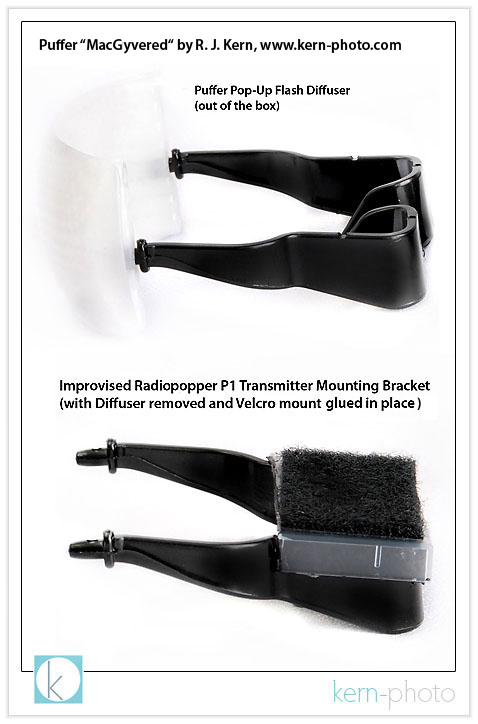
you can use the puffer as it was intended or remove it. however, if people are paying you to take their picture, i would gently recommend removing the white diffusion dome :)
my initial thoughts on the puffer:
1. you get what you pay for. too bad you spend $8 to ship $19.95 in plastic.
2. the plastic is brittle. i would not use in cold conditions.
3. the puffer doesn't stay secured very well on its own, so it might need some strong glue to adhere it. however, that would make it prone to break if you toss it in a bag. totally up to you.
4. the puffer works decent to diffuse the apuny low-powered pop-up flash and
ideal uses might include a fill-light for a close
subject. otherwise, i'd turn the flash off (read
your owner's manual for details. for nikon users,
ensure the "--" marks are shown in the commander
menu and not any of the alphabet soup settings,
i.e. ttl, aa, m, etc.)
5. i experienced some trouble with quality assurance & control at gary fong, inc's customer service department. after placing my order (initially, shipping was *free*), i got a phone call the following day informing me that their "system" goofed and didn't charge shipping and that i now needed to pay the shipping charges of $8. huh? a few hours later after speaking with a supervisor, they agreed to reduce the shipping charges to $4. cool. then two boxes show up on my doorstep a few days later with two full-priced invoices enclosed. i only ordered one unit. after another phone call, the customer service rep was very kind and professional. they allowed me to keep the second unit at no cost, far more pleasant than a trip to the post office and return postage.
the bracket, on the other hand, is worth the $20. my guess is the plastic mold used in manufacturing cost lots of pretty pennies. it would be difficult to macgyver that from scratch.
overall, this solution seems to work. i would say that this whole set-up is not a bombproof as a pocketwizard set-up, but at least it works. and remember, the "ideal" scenario would be to mount the transceiver to another speedlight and mount that on the camera. but for strobists on a dime, this solution should buy you time until you can afford the complete joe "nikon likes me" mcnally setup for several thousand dollars.
_______
and for giggles, here is a list of problems solved by the REAL macgyver. if you missed it, be sure to watch last week's SNL pee-your-pants hilarious "macgruber" skit here.
_______
if you've found this review help, feel free to add your comments below. think of it as our tip :)
with a little macgyver inspiration, some glue, velcro, and a spare battery cover we're able to do the unthinkable: use our wonderful in-camera pop-up flash as a commander to trigger an off-camera flash using absolute brilliant radiopopper p1 functionality.
paper clips and chewing gum not needed on this mission :)
the radiopopper p1 owner's manual states: "The P1 system was never designed to work with the so called “pop-up” flash on some Nikon cameras, but it does indeed function and activate. Mounting is somewhat “improvised” at the user’s discretion. A mount may be available in the future. Improvised mounting should attempt to place the external pickup sensor directly behind the flash tube inside the pop-up flash."
uh, "may be available," makes me impatient. so, i macgyvered an "improvised" mount to change the phrase "is available." btw, this works waaaay better than the piece of black gaffer's tape illustrated in my full radiopopper review. you all are smart, so with a few photos, you'll be off making your own radiopopper bracket in no time.
the ingredients are rather simple:
here's the skinny:
1. the plastic welder can be found for about $5 at your local hardware store. super glue is not recommended, as the hold is not as strong. you do not want to rip off your bracket while trying to remove your velcroed radiopopper p1 transmitter. schmear it on good. allow plenty of time to dry.
2. the rechargeable lithium-ion plastic battery cover is the secret. it is supplied with any new nikon d50, d70, d70s, d80, d100, d200, and d300 camera which all use the same e-nel3e (if you purchase a spare, it ships with that, too) . i never use mine since my batteries are either in the camera on a recharger. the reason battery cover is ideal: it ain't too big or small, is rectangular, and has a nice 1/4" lip to bolster the surface area you'll want when you are gluing. you have limited real estate on the base of the transmitter and do not want to cover up the screws sealing access to the single AA battery compartment (poor design). using an sharp blade, cut the battery cover 1/3 lengthwise. you'll want to use the remaining 2/3 portion for the mount. if you can think of something cool to do with the remaining end, be sure to contact us and comment in the blog below.
if you do not have a battery cover, those little, clear compact flash card cases work almost just as well. i say almost because they are a little larger and do not make as snug of a fit as the battery cover. you'll want a close fit to ensure a solid gluing surface.
3. industrial-strength velcro... you might as well purchase some industrial-strength velcro while you are at the hardware store. you can buy it by the foot for about $1 or so. don't get the cheap stuff, which picks up lint and over time the strength of the fastener will decrease. adhere the "fuzzy end" on your old battery cover and the "hook end" on your poppers. if you want mounting velcro on another flash, use the "fuzzy end" as well. if you don't , the "hook end" of the velcro will stick to the inside of your camera bag in a big way :)
before & after:
after the newly-cut battery cover was glued to the puffer bracket, i used some black acrylic paint with a small brush and painted the underneath to conceal the "clear" color and the ugly dried paint, making the whole shebang a bit more uniformly "black."
now, it is ready for mounting :)
you can use the puffer as it was intended or remove it. however, if people are paying you to take their picture, i would gently recommend removing the white diffusion dome :)
my initial thoughts on the puffer:
1. you get what you pay for. too bad you spend $8 to ship $19.95 in plastic.
2. the plastic is brittle. i would not use in cold conditions.
3. the puffer doesn't stay secured very well on its own, so it might need some strong glue to adhere it. however, that would make it prone to break if you toss it in a bag. totally up to you.
4. the puffer works decent to diffuse the a
5. i experienced some trouble with quality assurance & control at gary fong, inc's customer service department. after placing my order (initially, shipping was *free*), i got a phone call the following day informing me that their "system" goofed and didn't charge shipping and that i now needed to pay the shipping charges of $8. huh? a few hours later after speaking with a supervisor, they agreed to reduce the shipping charges to $4. cool. then two boxes show up on my doorstep a few days later with two full-priced invoices enclosed. i only ordered one unit. after another phone call, the customer service rep was very kind and professional. they allowed me to keep the second unit at no cost, far more pleasant than a trip to the post office and return postage.
the bracket, on the other hand, is worth the $20. my guess is the plastic mold used in manufacturing cost lots of pretty pennies. it would be difficult to macgyver that from scratch.
overall, this solution seems to work. i would say that this whole set-up is not a bombproof as a pocketwizard set-up, but at least it works. and remember, the "ideal" scenario would be to mount the transceiver to another speedlight and mount that on the camera. but for strobists on a dime, this solution should buy you time until you can afford the complete joe "nikon likes me" mcnally setup for several thousand dollars.
_______
and for giggles, here is a list of problems solved by the REAL macgyver. if you missed it, be sure to watch last week's SNL pee-your-pants hilarious "macgruber" skit here.
_______
if you've found this review help, feel free to add your comments below. think of it as our tip :)
coffee-shop class #5: wrap-up
05.15.08 | coffee-shop
class
thanks to all who came out to the coffee-shop
class #5 last night. funny thing, no one
got coffee (darn, those happy hour prices :)
we all got some good learning on using those radiopoppers. a few even got a chance to fire off a few shots using high-speed flash sync, which seemed super contagious.
here's the role call of a few of denver's wedding, portrait, and sport photographers that made it to the class as pictured top left to bottom right: zach wear, trish eberlein, katie van buren, brad peterson, moi, rachel olsen, ashleigh weber, shannon kaple, and ross bothwell (invisible).

image below taken with a nikon d-300 using a nikon 28-70 f/2.8 lens zoomed out to 28mm with a shutter speed of 1/1000 sec @ f/2.8, iso 400 with a single sb-600 triggered in ttl mode (triggered with the radiopopper p1). try that with a pocketwizard!

we all got some good learning on using those radiopoppers. a few even got a chance to fire off a few shots using high-speed flash sync, which seemed super contagious.
here's the role call of a few of denver's wedding, portrait, and sport photographers that made it to the class as pictured top left to bottom right: zach wear, trish eberlein, katie van buren, brad peterson, moi, rachel olsen, ashleigh weber, shannon kaple, and ross bothwell (invisible).
image below taken with a nikon d-300 using a nikon 28-70 f/2.8 lens zoomed out to 28mm with a shutter speed of 1/1000 sec @ f/2.8, iso 400 with a single sb-600 triggered in ttl mode (triggered with the radiopopper p1). try that with a pocketwizard!
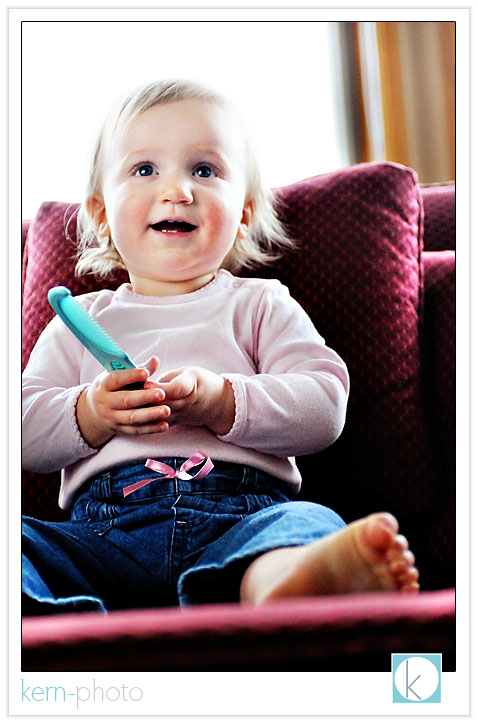
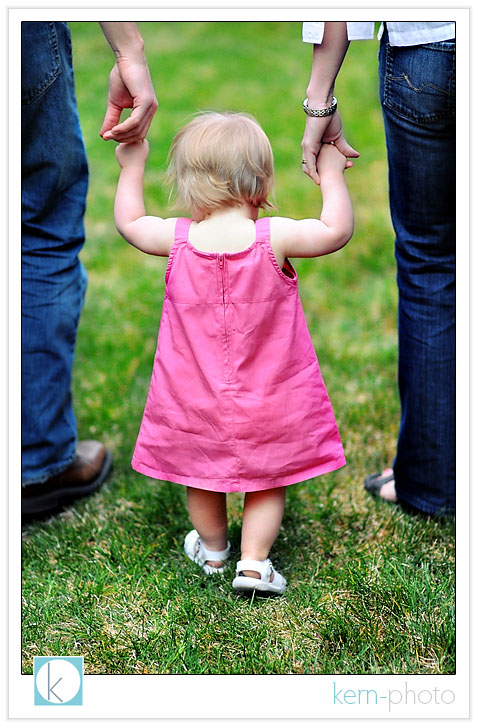
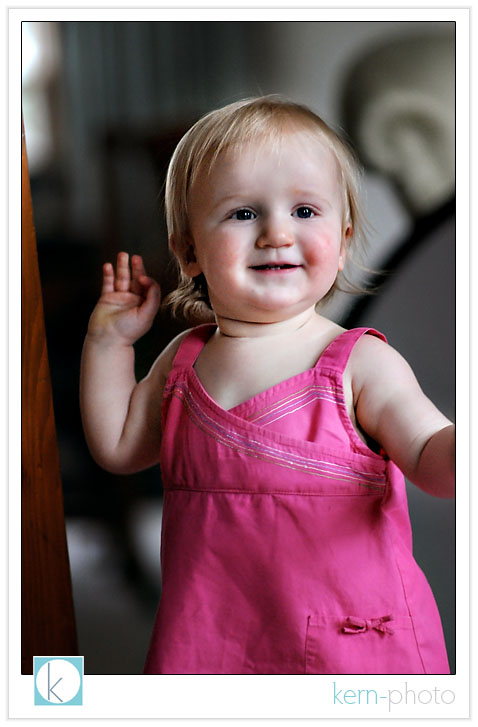
the bradley family
05.14.08 | portraits
1 y.o. maren hammed it up during the bradley
family portrait session this week. she's a beauty
queen in the making just dying to show
us what she's all about :)
view their slideshow here.
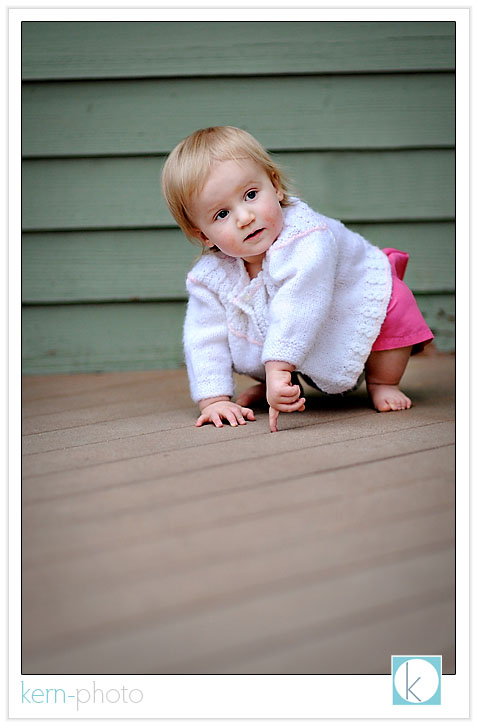
a favorite candid moment:
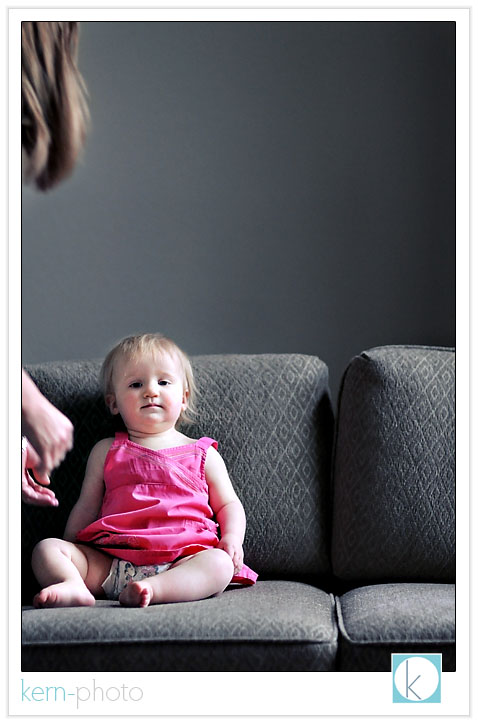
'there's something down there!" in 1 y.o. speak.
some real moments:
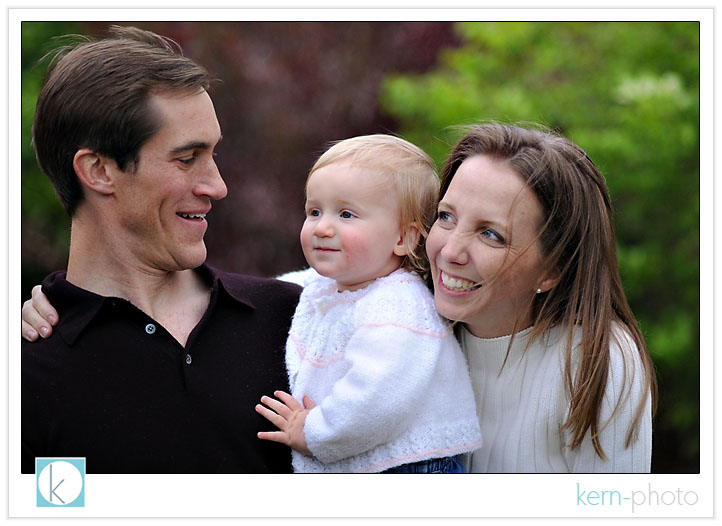
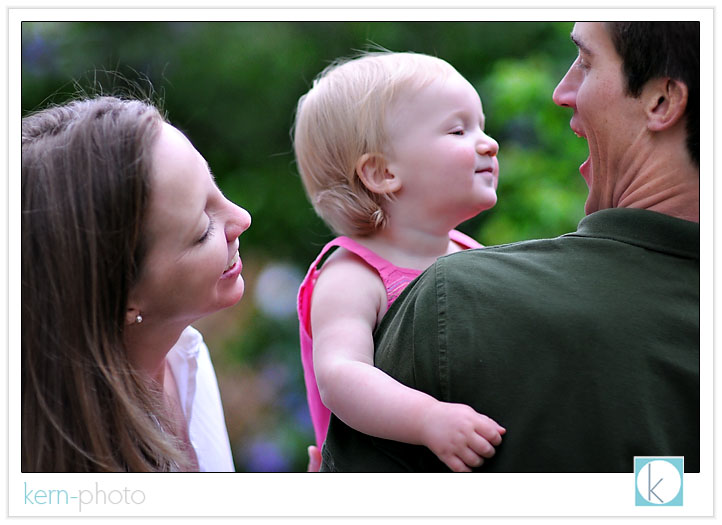
after we finished all the group family portraits, truman & nisa had shared some romantic time in a nearby open space park in louisville, colorado.
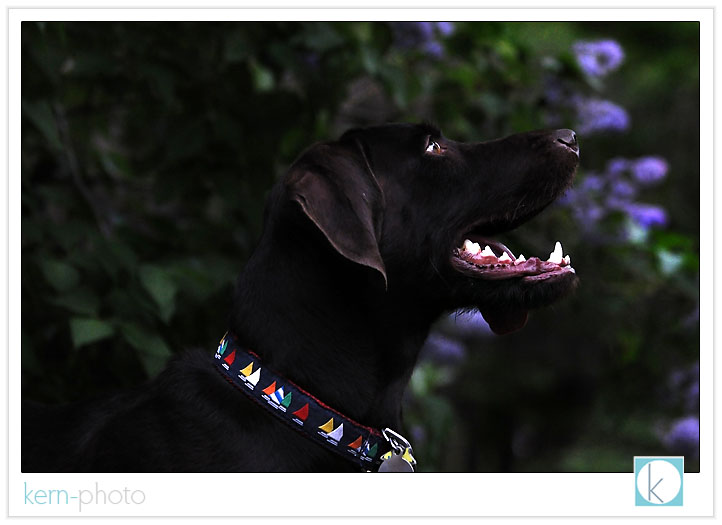
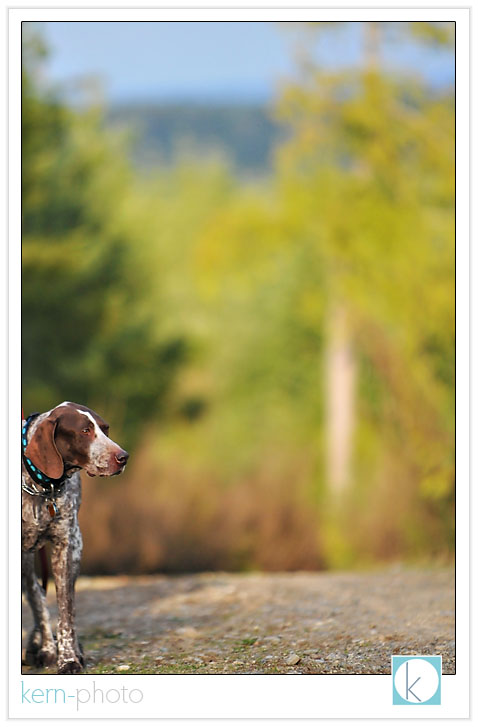
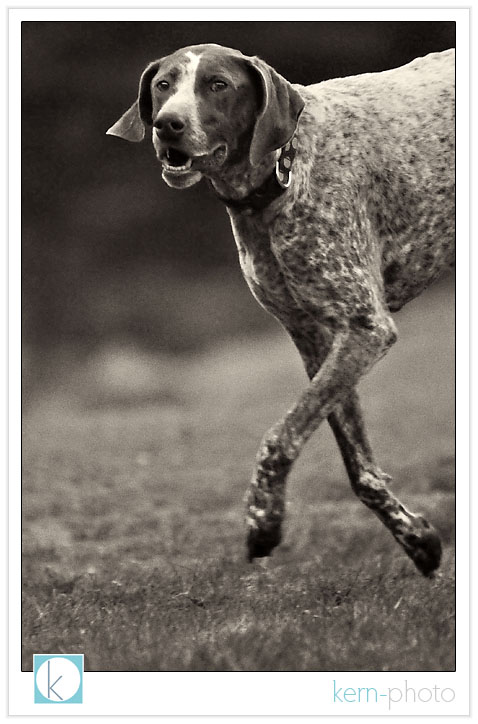
of course when i met indy, i decided we had to include him in our portrait session :) he's is a gregarious english pointer with handsome taste in dog collars :)
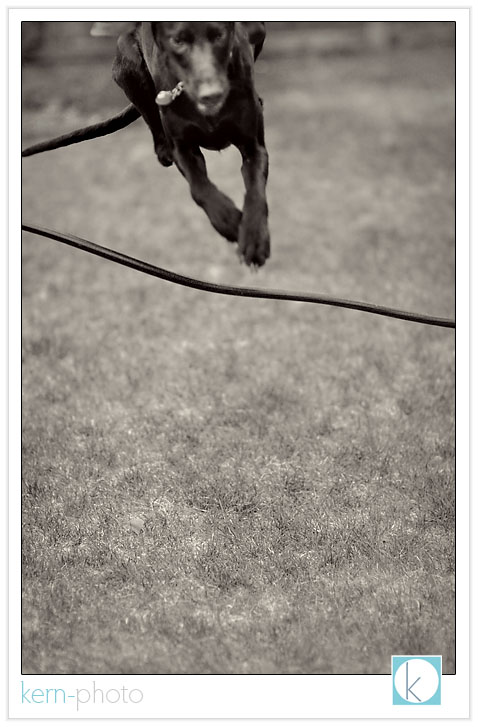
he can jump!
view their slideshow here.
a favorite candid moment:
'there's something down there!" in 1 y.o. speak.
some real moments:
after we finished all the group family portraits, truman & nisa had shared some romantic time in a nearby open space park in louisville, colorado.
of course when i met indy, i decided we had to include him in our portrait session :) he's is a gregarious english pointer with handsome taste in dog collars :)
he can jump!
radiopopper p1 review
05.11.08 | photo-resources

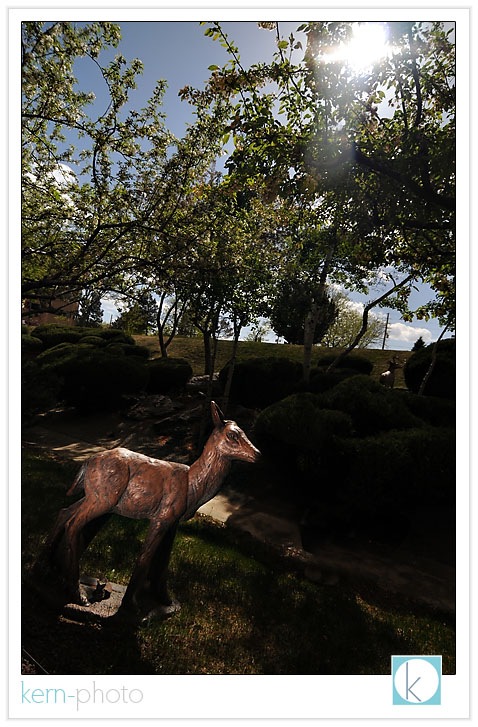
*PHOTO GEEK-ALERT*
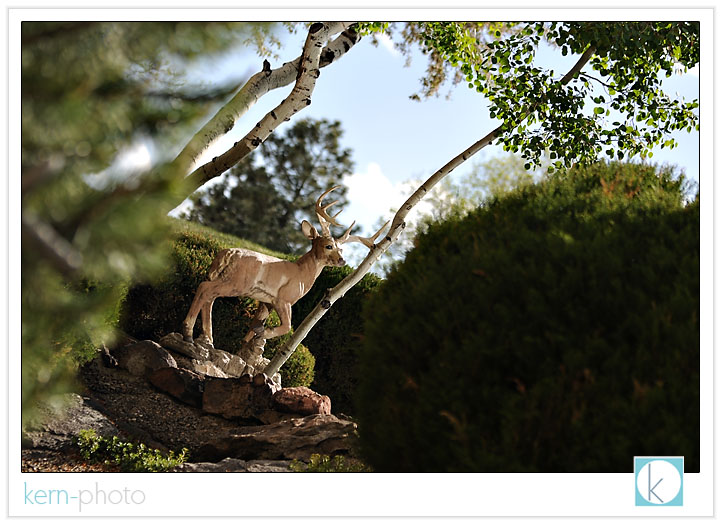
while the deer pictured above is totally fake, the 1/3000 of a second flash-sync used in this shot is totally real. this is among the first shots taken with the new radiopoppers p1, which now greatly extends wireless "through the lens" (ttl) metering (i-ttl for nikon or e-ttl for canon) capability to wireless triggering using radio signals.
radiopoppers take the road more traveled by using radio signals to transmit a wireless "fire now" signal as opposed to infrared technology. infrared triggering for flashes can be unreliable because the line-of-sight signal can be blocked by a tree, person, or a hopping grasshopper.
the basic idea behind ttl is that the flash on the camera talkings to the off-camera flash and tells it how much power to output. tiny pulses of light emitted nano-seconds before the photo is used to survey the scene to determine "proper" exposure. this functionality is able to work regardless if the camera-strobe is told to "not fire," which has no effect on exposure.
check out more radiopopper reviews here. and if you want to read more specifics about the p1 system and installation guidelines, head over to radiopopper and sleuth out the published owner's manual and Installation video (Quicktime, 6 min, 14Mb). btw, i am not endorsed by radiopoppers and this review simply serves as my first impression of these new creative lighting tools.
as always, read your owner's manual. i actually enjoyed the warmth and humanity of the writing tone in the owner's manual, far better than most manuals written for direct translation into three dozen languages.
this review also highlights the usefulness of high-speed shutter sync when used in wireless off-camera flash situations. before the dawn of the poppers, this functionality was available only with nikon i-ttl and canon's e-ttl wireless flashes that were either: 1) positioned on-camera, 2) tethered by a ttl cord, or 3) utilize infrared technology. the downfall about the infrared is the moment your line of sight is broken, the flash doesn't receive the trigger signal from the camera and the flash fails to fire. i have had countless exposures where this happens which is totally annoying. however, using radio technology, the communication lines have opened up far greater wireless i-ttl metering options now thanks to radiopoppers. party on.
here are a few initial observations:
PROS:
+ high-speed, reliable wireless flash sync up to 1/8000 sec. not just, wow. but, WOW!
+ no misfires, yet. they fired around corners, behind vegetation reliably, shot after shot after shot. they even fired through concrete walls with no windows at a distance of about 200 feet. there is absoutely no way the current line-up of wireless ttl flashes on the market can do that out of the box.
+ simple setup and ease of use.
+ slightly shorter set-up times will help in complicated lighting conditions.
+ we pay so much for the lenses with good bokeh to use wide open at apertures such as f/2/.8 or f/1.4, why should we have to stop down to f/5.6 and loose the "pretty" foreground/background bokeh? one reason of the whole shebang about using shallow-depth of field lenses is it is easier to isolate the subject by causing the background to have a soft focus appeal. now we can.
+ i intend to use the radiopoppers like pocketwizards (or any other brand of radio slaves) for triggering small speedlight flashes, but with the added benefit of not having to walk over to each slave to change the power output. this is HUGE. this means i can change power either from in-camera or a camera-mounted flash with its own output turned off. this is especially useful if my small flash is on top of a wedding dj's speaker at the reception and i don't want to make an appearance through the dance floor en route to change settings :)
+ if you want to use ttl functionality with ratios and different lighting groups, you can do so from the camera or on-camera flash.
+ the simple design is refreshing to see in a tech world (sorry, equipment measurbators). it has two buttons.
+ "cross-platform" adaptable. this means they play well with both canon and nikon equipment.
+ takes AA batteries.
+ good customer service and support (online, email, and phone). i got a call from kevin king himself ensuring order accuracy. thanks, kev.
+ it is cool to be different.
CONS:
- $360 for one transmitter and one receiver. gulp. evolution has a price, you could say.
- ttl is not that smart, especially when you're lighting only a small portion of your photo. ttl flashes evaluate the entire scene, sometimes dark or light backgrounds will make them guess wrong. you can dial up or down the flash exposure compensation to your taste (be the boss over your metering, not your camera!!). that is where the spin-the-dial-with-an-edumacated-guess-and-see-what-works method of trial/error via chimping is useful. i prefer to set the output of each of the slaves manually. the new perk is now i can make changes using the camera in my hand instead of walking over to each flash unit.
- a screwdriver is required to change the batteries.
- some disassembly required to store properly store flash and radiopoppers in camera bag securely. (i.e. unscrewing the antennas). similar prep-time with pocketwizards and their cords.
- limited supplies as of now. they are taking pre-order shipments only and the rest i waited 6 weeks after ordering it to get it in the mail).
- no pc-sync cord to trigger powerful studio strobes (keep your pocketwizards). however, the radiopopper jr. seems enticing for only $25, coming late summer.
SET-UP:
less is more, especially when it comes to lugging around camera gear. that's why i wasn't super excited about using my radiopoppers mounted on a speedlight mounted on a camera. too heavy. a well-balanced camera is very important to me, as i shoot without a camera strap. the vertical grip used with a 70-200 f/2.8 lens balances the camera nicely front to back. however, mount an sb-800 AND a radiopopper and you've added more weight in a different direction, making the camera harder to hold.
that's another reason i dig the pop-up flashes is because they can serve as a commander to other off-camera speedlights. if you got it, why not use it?
and that is exactly what i did with during my initial testing. no problems encountered :)
why else would someone want a big speedlight flash (turned-off) on the camera just to trigger another flash? doesn't that defeat the purpose of an "off-camera" flash?
the preferred option is using some sort of hot-shoe mounted bracket to adhere the radiopopper to such as gary fong's puffer pop-up flash diffuser, which has a hotshoe mount with a nice spot for velcro to adhere the transmitter. this should provide a nice solution when i quickly and easily remove the transmitter (like mid-ceremony in stealth mode... i don't want to hear the velcro rip). plus, who wants velcro or tape on their camera?
here's the skinny on instructions on how to "macgyver" your own mount using the puffer.
the radiopopper p1 transmitter actually fits into the pop-up flash nicely in between the nikon d-300 and the in-camera flash. in testing, the radiopoppers worked fine using the nikon d-300, d-200, d-80, and d-70 in-camera flash. i opt to turn the camera flash "off"
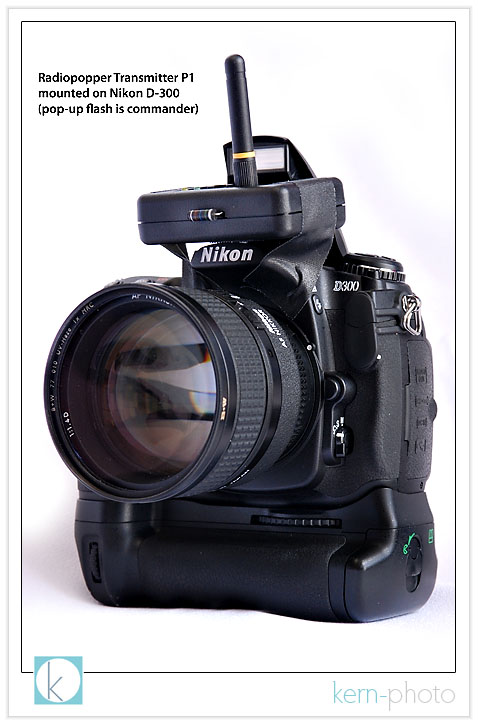
ok, i agree. a cheap piece of tape on a $3,000 camera outfit might seem foolish... but realize this was simply a temporary solution and experiment for the purpose of this review.
this is a far better alternative... to learn more about this, be sure to check out instructions here on how to "macgyver" your own mount using the puffer as featured below.
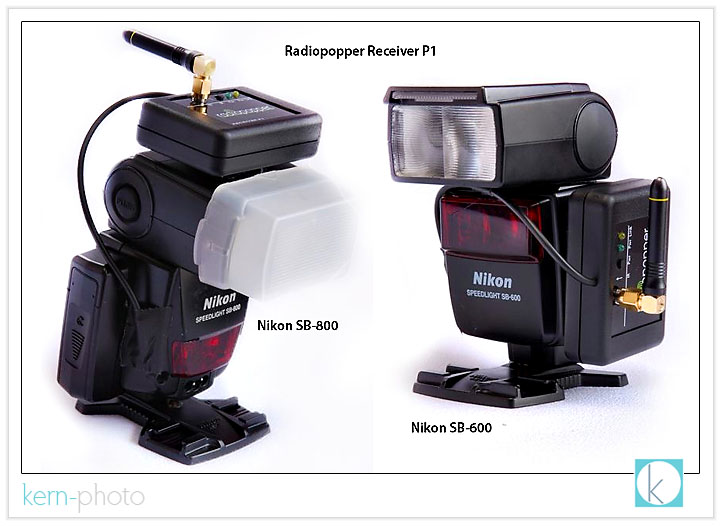
featured below are the radiopopper p1 receivers mounted with the supplied industrial-strength velcro. due to limited real estate on the flash body, i chose to mount the receiver on top of the nikon sb-800 and on the side of the sb-600 flash. you can shorten the optical cable using a sharp blade, but i chose to keep the original length, at least for now. notice the direction where the antennae point for optimal reception.
introducing the full 'C3-PO' setup, allowing the speedlight to be safely positioned from just about anywhere, including hanging upside down from a tree branch:
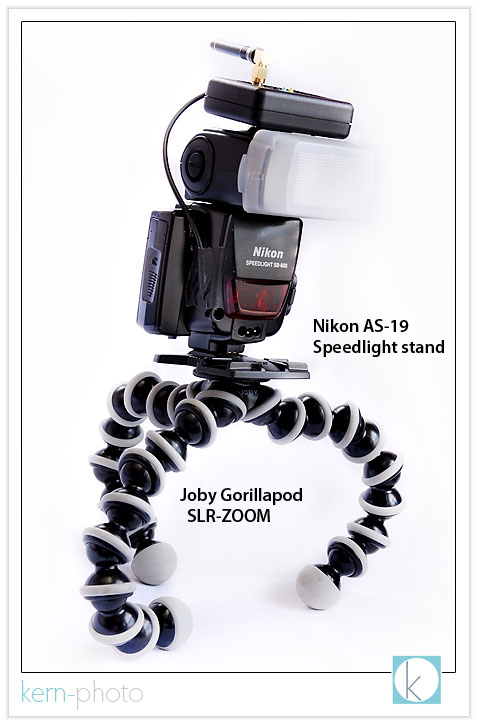
while the joby gorillapod serves as a great lightweight and portable lightstand that can be wrapped around my camera bag when not in use. they are nearly indestructible to dirt, sand, water. wish i could say the same about more photo equipment :)
the nikon as-19 speedlight stand comes with the sb-600 and sb-800 flashes. on the underside, the stand features the standard 1/4" thread that fits most lightstands and tripod mounts. this is a nice little golden nugget for securely locking in the nikon flash.
TEST PHOTOS:
in all flash examples i used a nikon d-300 with a 70-200 f/2.8 lens and a nikon sb-800 speedlight set at full power. the flash is positioned on the ground behind the dark bush just to the right of mr. deer and is using the 'C3-PO' setup pictured above. i was able to obtain 100% triggering reliability, which was an absolute first when triggering wireless speedlights off-camera. that was so freeing!
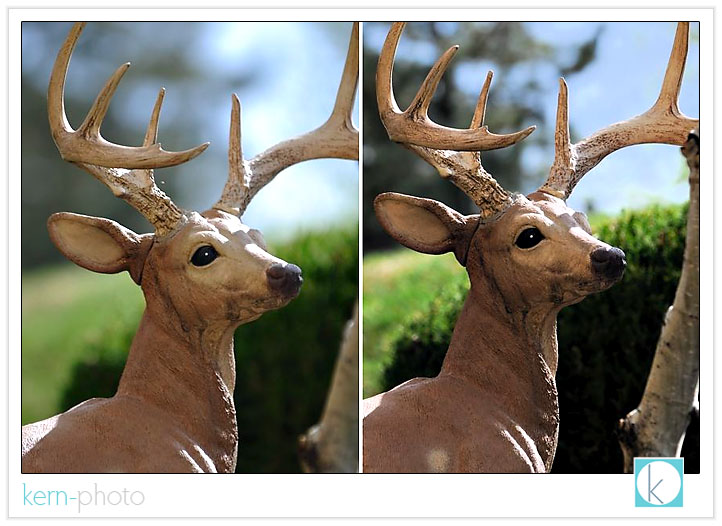
below: f/2.8 at 1/1500 sec with a focal length of 75mm (notice the "pretty" foreground & background bokeh)
below: f/8 at 1/250 sec, with a focal length of 75mm (greater foreground & background detail makes it more difficult to isolate subject)
here's a closer detail shot zoomed in to 200m (300mm effective focal length on the d-300).
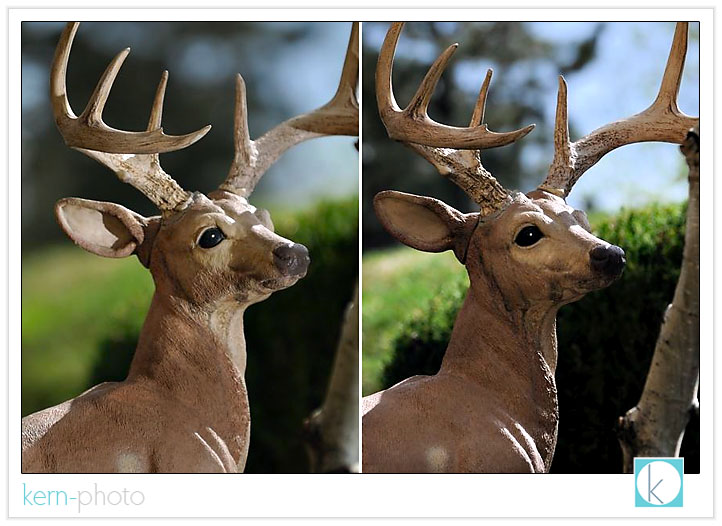
LEFT: f/2.8 at 1/1500 sec (NO FLASH)
RIGHT: f/8 at 1/250 sec (NO FLASH)
to my taste, the image on the left without flash would be preferred. notice what the image on the right brings to the table... more (unwanted) detail.
now it is time to compare apples to apples using a flash... this is where it would be impossible to create an image above 1/250 or 1/500 with standard pocketwizards (cameras max shutter sync varies.... the d-70 has 1/500 sec flash-sync while the d-3 and d-300 have only 1/250 sec). check this: compare the background on the u
LEFT: f/2.8 at 1/1500 sec with FLASH at FULL POWER (1/1) which creates less out of focus detail than if we use...
RIGHT: f/8 at 1/250 sec with FLASH at FULL POWER (1/1) and gets greater background detail :(
now here comes a mini-lightbulb experience: notice the two shots below the backgrounds are similar, except one is slightly darker than the other. why? even though they are both shot at f/2.8, the image on the left was shot at a shutter speed of 1/750 (with no flash) and the one on the right was shot at a shutter speed of 1/1500, one stop faster. because they both were shot at f/2.8, the quality of the background highlights out of focus (remember bokeh?) remains the same, especially in the green areas. because these were shot handheld (not on a tripod), slight differences in the blue and black colors in the background result from a slight shift in shooting position. the only difference is one appears slightly darker than the other because of the shutter speed change.

pictured below, bambi serves as a decent lighting model despite harsh overhead sun conditions. however, we can isolate bambi from the background a little easier by overpowering the ambient light triggering our speedlights with radiopoppers shooting at f/4 and 1/8000 sec with ISO set 400 to boost the flash power a tad (flash still set at full-power). notice that the sun is not completely overpowering, as we can still see rim light on bambi and abundant ambient light in the background:
a few more things to think about:
1 - mr. deer & bambi didn't move the whole time, which made it nice for comparison photography for the purpose of this review. however, if we were trying to stop action, the faster shutter speeds would really come in handy, like freezing water drops mid-air or photographing in super windy conditions.
2 - flash isn't always a good thing, especially in real wildlife photography. i'm not sure if i would want to use a flash on a real deer. i might not make it home in one piece. to paraphrase yoda, "know when to use the force, you should."
FINAL THOUGHTS:
if you do not already own a pair of pocketwizards and use speedlights off-camera, then i would 100% recommend radiopoppers for triggering reliability, ease of use, and ttl-metering.
if you fall into the same aforementioned camp and are a strobist, then i would 199% recommend radiopoppers.
if you already own a pair of reliable radio slaves or pocketwizards and consider using speedlights in your off-camera lighting, i would 50% recommend the radiopoppers for the added ease of use in changing power output from holding your camera.
if you do not want use speedlights off-camera (canon or nikon), then save your money.
__________
ps- for those strobists who just wanna know, here's the lighthing setup for photographing the speedlights: shot sans flash using a single 40" reflector positioned about a foot away with a white sheet underneath. the setup was about 2 feet from western facing window with blinds closed slightly and outside with sun set at full-colorado-power. 1/8 second exposure at f/8 for depth of field using iso 400 on a nikon d-80 with a focal length of 70mm and iso set to cloudy. whew.

coffee-shop class #5: radiopoppers 101
05.08.08 | coffee-shop
class
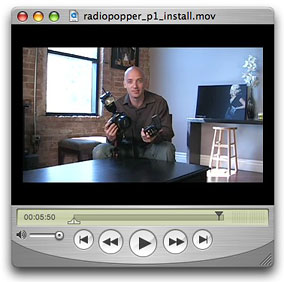
Download HERE the awesome quicktime video by jared platt (14MB, 6 Minutes)
this month's coffee shop class is more of an exploratory learning about radiopoppers. if you check out the above video, this gets you pumped up, then attend this mini-class to begin learning how to use it. do not worry, you do not need purchase a set of radiopoppers.
this month's coffee-shop class covers why shooting with a flash sync of 1/6,000 of a second is cool and how using the radiopoppers can help you obtain a distinct look in your photography. cool in the sense like overpower the gajillion-watt sun with a tiny strobe cool. we'll cover why the are the next big thing in the arsenal of wedding / portrait photographers interested in using off-camera flash. but are they as good as the gold standard, pocketwizards? we'll being to explore firsthand.
who: those wanting to learn more about radiopoppers and a tad about off-camera flash.
what: a hands-on mini-workshop about triggering your ittl flash from something other than wireless (we're talking radio frequencies, here :) nikonians will be treated to some radiopopper fun, but canonians are welcome, too.
when: wednesday, may 14, 2008 from 4:30 - 6:00 pm (we'll do 45 minutes inside, 45 minutes outside)
where: maggiano's PARK MEADOWS (NOT the one in Denver... parking is too much of a pain. and, yes, they have the best italian hot coffee :). come early to grab some coffee/wine and a good seat. directions: 7401 S Clinton St, Englewood, CO 80112.
why: to teach and learn and have fun, plus an opportunity to network with other fellow photographers
cost: *free*
what to bring: camera and an assortment of lenses (nikon users are welcome to borrow my poppers :)
RSVP: in the comments section of the blog below.
homework: check out this and this and this and of course the radiopopper blog here. seriously, people, do your homework for this one. you'll be glad you did.
here is a direct link to the radiopopper p1 owner's manual HERE (good bathroom reading material for hard-core strobists :)
and if you are interested in ready my initial review of the poppers, check it out here.
_____
to learn more about the kern-photo 'coffee-shop class,' click HERE.
if you are lost, call r. j. kern of kern-photo at 303.474.0983.
_____
lady & chopper
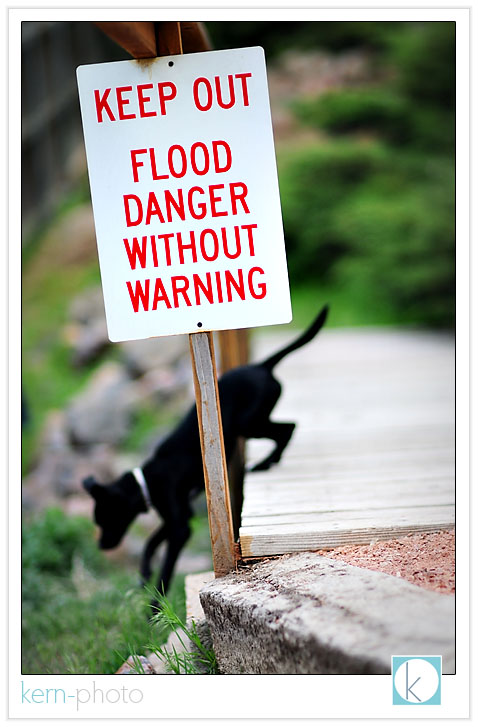
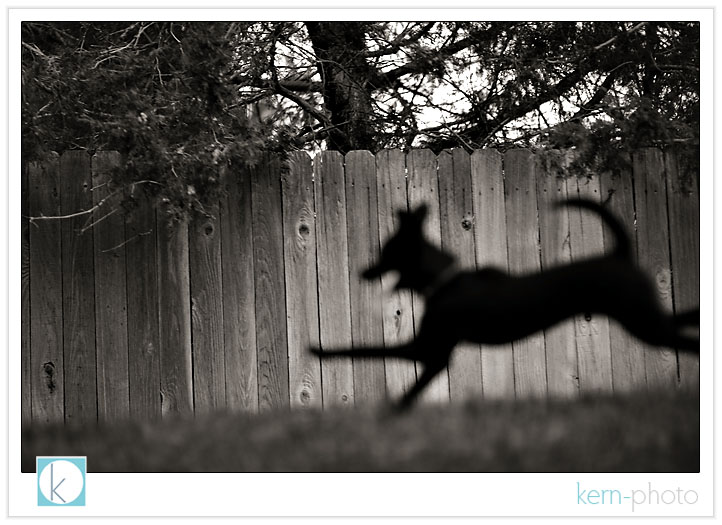
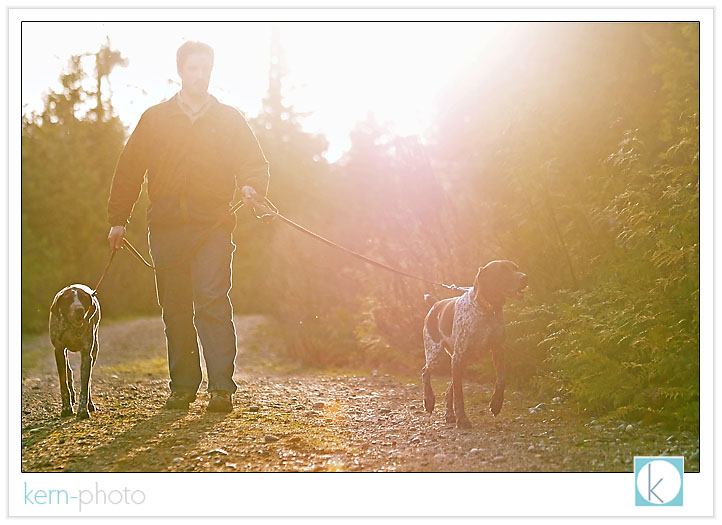
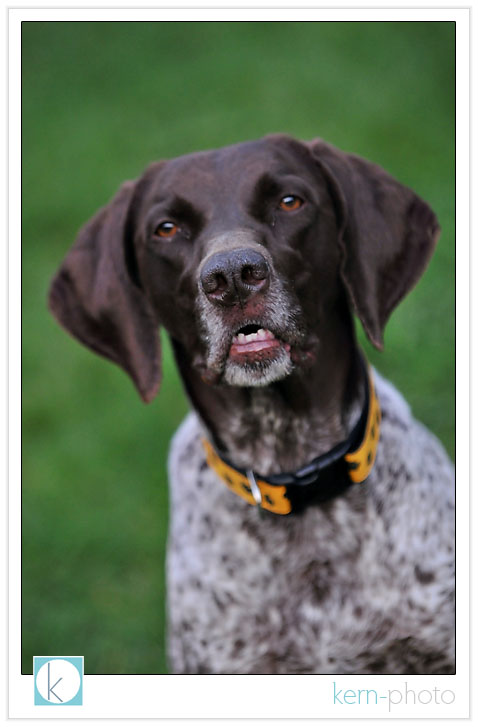
05.08.08 | pooches
lady & chopper, a pair of dash's
distant pointer cousin friends, offer the
reinstra
family some sporting excitement in
kingston, washington featuring their new,
handmade pattern &
paw collars.
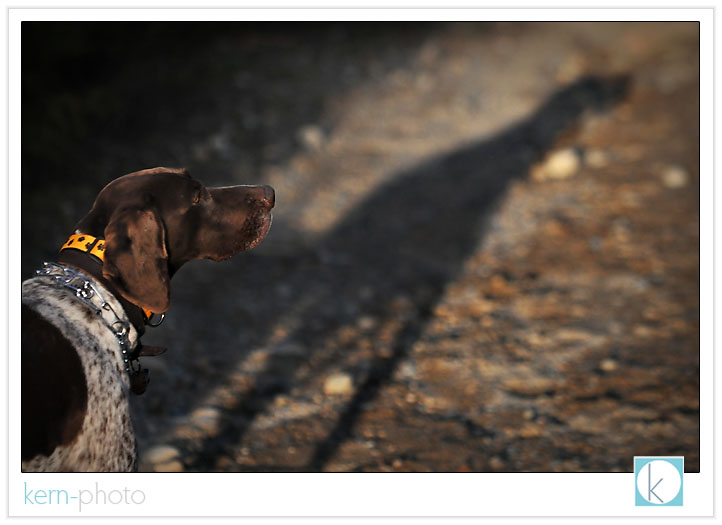
chopper captures a rare glimpse of the sun during the pacific northwest spring:
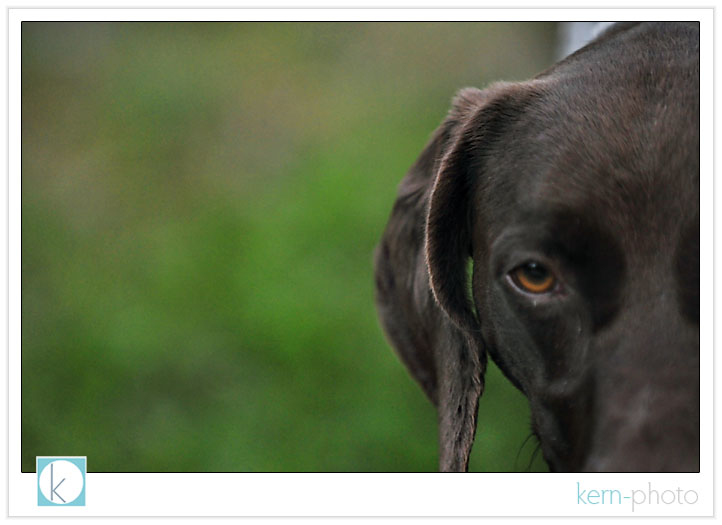
lady's eye on the prize (a stick):

if dogs could talk, lady would speak pearls of wisdom :)
chopper captures a rare glimpse of the sun during the pacific northwest spring:
lady's eye on the prize (a stick):
if dogs could talk, lady would speak pearls of wisdom :)
nicole & mark
05.07.08 | trash the
dress
nicole & mark loved their
wedding images so much (and had so much fun
making them in the first place) they did not
hesitate to join in when i recommended to do an
urban photo session. they were super trouper
models and had tons of fun alongside more than
two dozen other mile high
photographers that participated in a
trash-the-dress meet-up at the denver art
museum including paige
elizabeth, erin
cady, zack ware, gena mcmillan,
among many others. andrew
schaefer helped to spearhead the effort.
there were numerous other brides and models
that also participated in the event (sorry,
i didn't make it around to work with
everyone).
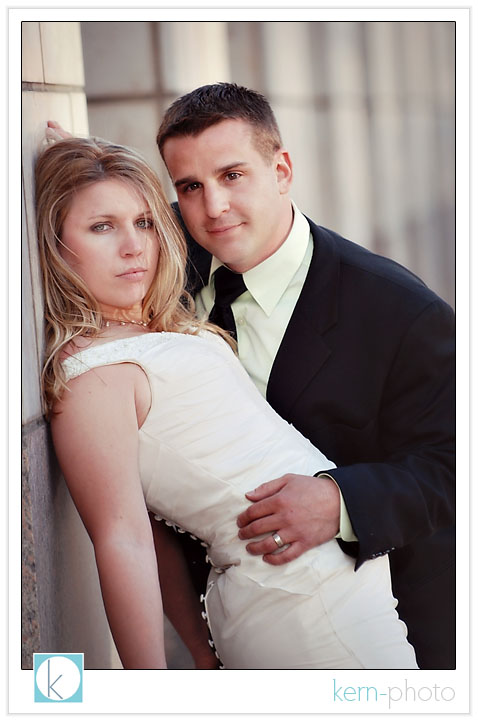
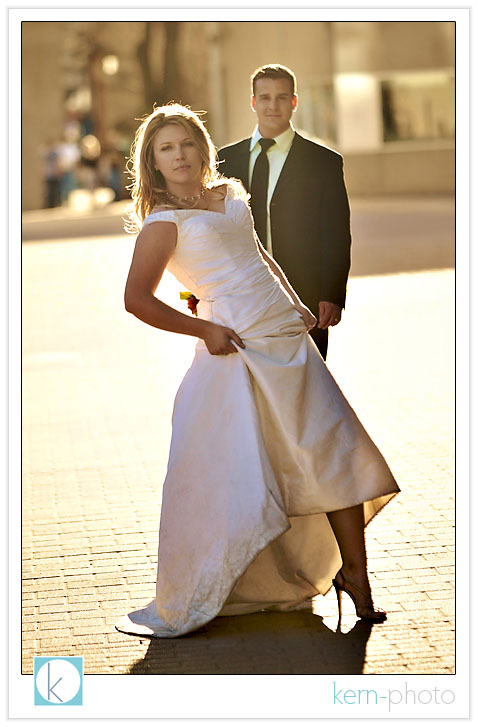
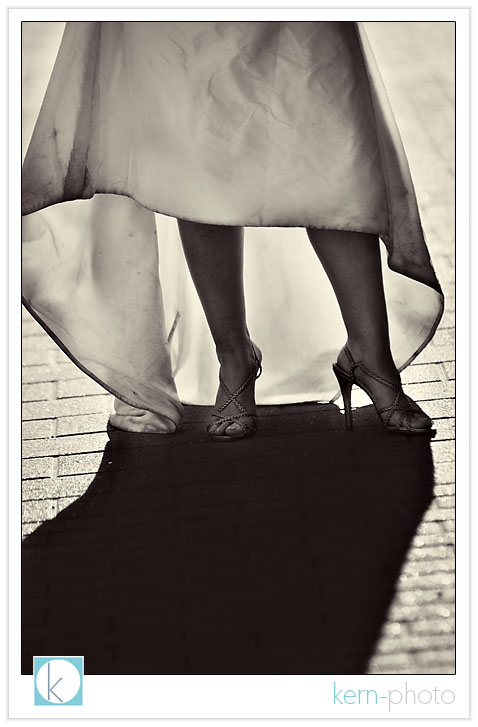
if you want to learn why a bride would want to trash her dress in style, you might want to read this. we love to venture beyond our comfort zone and explore new ideas, lighting, and locations with our clients. extended portrait session like a trash the dress session allow just that. and clients in return get fun images that will be super special to share with their grandchildren in 50 years (and that's what really matters :)
click HERE to watch their slideshow and here are a few favs:
i totally don't remember what was so funny, but the photo made the final cut :)
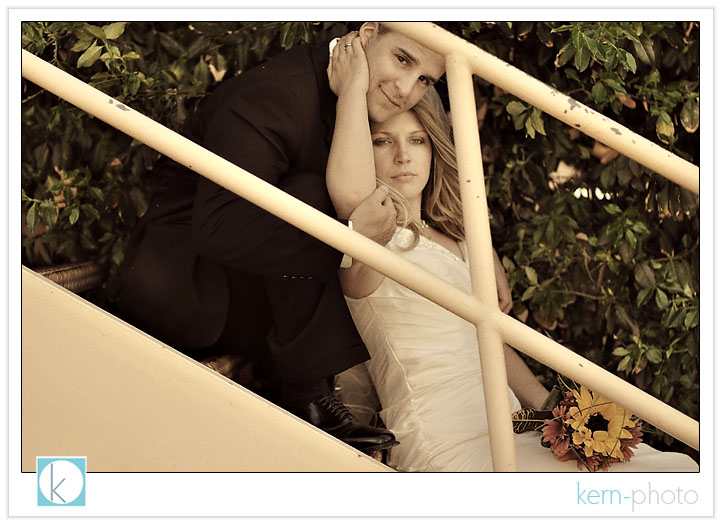
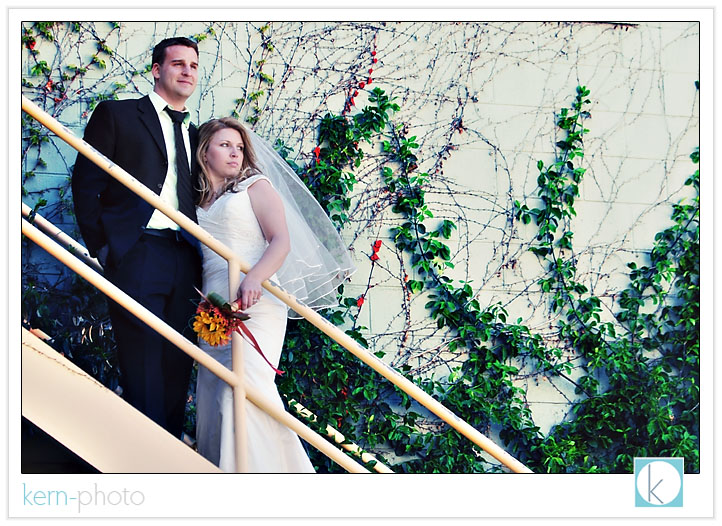
staircases and ivy are not typical wedding backdrops... but we love them for that same reason!
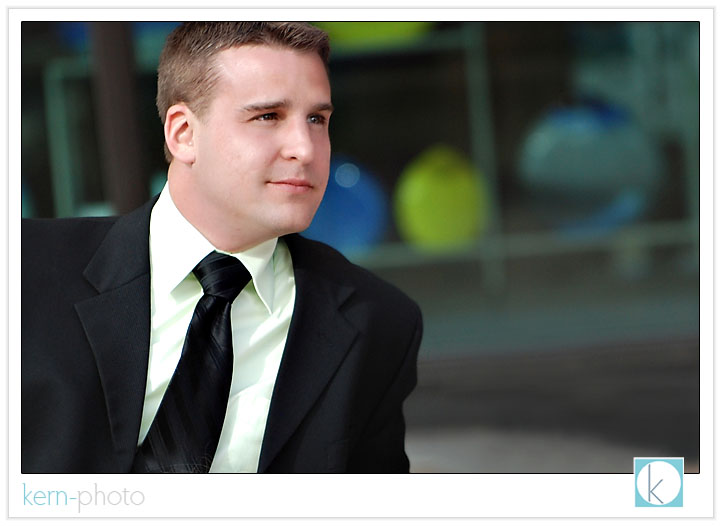
here's mark:
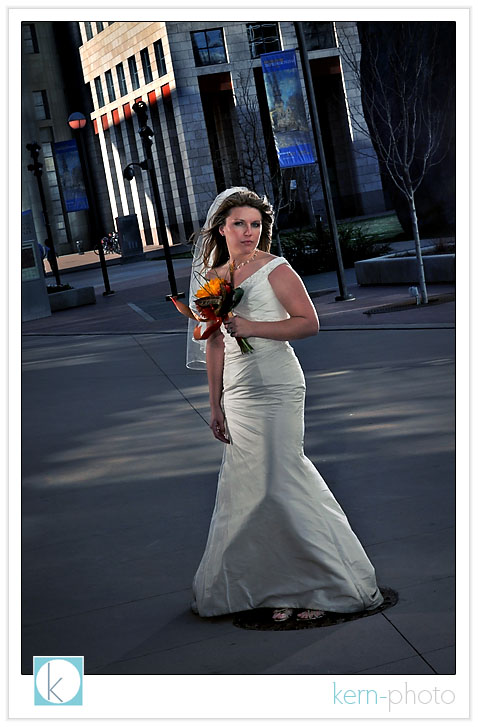
and nicole:
the idea from the shot below came from an old sopranos ad mixed in with this strobist article.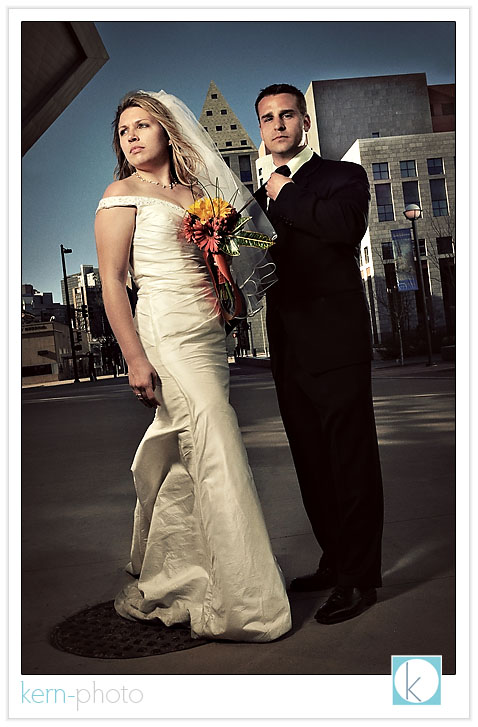
photographers photo geek note: the above
image was shot f/19 at 1/250 sec at ISO 280 with
two 400 w/s strobes homemade snoot at full power
positioned off camera at 30 degrees from nicole
and a overhead sb-800 in a softbox mounted on a
voice-activated boom lightstick using a nikon
d-300 with a nikkor 28-70 f/2.8 lens. whew. i
can't wait to use our new set of radiopoppers to
pull off more shots like these with a bit
more ease in gauging subject exposure :)

straight out of camera with a tad of warmth added (including the halo around mark :)

if you want to learn why a bride would want to trash her dress in style, you might want to read this. we love to venture beyond our comfort zone and explore new ideas, lighting, and locations with our clients. extended portrait session like a trash the dress session allow just that. and clients in return get fun images that will be super special to share with their grandchildren in 50 years (and that's what really matters :)
click HERE to watch their slideshow and here are a few favs:
i totally don't remember what was so funny, but the photo made the final cut :)
staircases and ivy are not typical wedding backdrops... but we love them for that same reason!
here's mark:
and nicole:
the idea from the shot below came from an old sopranos ad mixed in with this strobist article.
straight out of camera with a tad of warmth added (including the halo around mark :)