
how to (re) photograph cars
09.17.08 | photo-resources
“come for the cars, stay for the people” was
mentioned more than a few times at the chrysler
300 club international fall 2008 meet held last
weekend in boothbay harbor, maine. so true, i
found.
“itching and scratching in the parking lot ‘til 2 a.m,” nicole and my mom jest.
regardless how one may look at it, last weekend was spent creating great memories with my dad, aunt, and uncle in land of the lobster rolls.
this experience inspired me to write this article and share photograhic insight with new friends and car lovers alike.
__________________
if you every try to photograph cars, the approach can be difficult in comparison to the work we see in the big leagues. motor companies pay top dollar to have their vehicles looking their best so they can sell them. to the antique car collector, car photography is just a slight margin below a family portrait.
“good” car photos go along way: they can help to boost a car sale or can serve as an invaluable document for insurance purposes. but reasons to photograph cars go much farther than that. as a photographer and a son of a car lover, there something exciting about sharing images of a car, restored completely to show-room shine after years of patience.
i offered a pseudo coffee-shop class to members to offer them tips on how to photograph their classic cars. many of them have a digital cameras and asked me how they can take "better photos” because they couldn’t get the results they were hoping for.
since not everyone was able to make the mini-class, so i’ve jotted down a little bit of what was discussed. the golden nugget:
*** there are rules. and there are rules to be broken. if you choose the latter, do so with creative intent and purpose.***
after considering this, here are 21 tips on how to photograph your car (in no particular order)
1. shoot in the "golden hour." this can be either at dusk or dawn. generally, these are good times to photograph, and occur 30 minutes before and after either sunrise or sunset.
2. shoot long. a longer focal length lens minimizes distortion and helps to increase background focus blur, drawing your eye towards the subject, rather than a distracting background.
3. shoot with perspective. a telephoto lens helps to compress the car, adding a dramatic perspective.
4. about face. turn the front wheels so you can see the wheel face.
5. chimp and look at the screen on the back of your camera. use your tools to their fullest. if the picture looks too dark or light, change your exposure. white-balance off? adjust it. nailing your shot in camera will save hours of time in front of the computer later.
6. keep your background interesting, yet not distracting. trees, a clear sky, or a field works well. a white car against a gray sky can appear boring. contrasting backgrounds can create more interesting images.
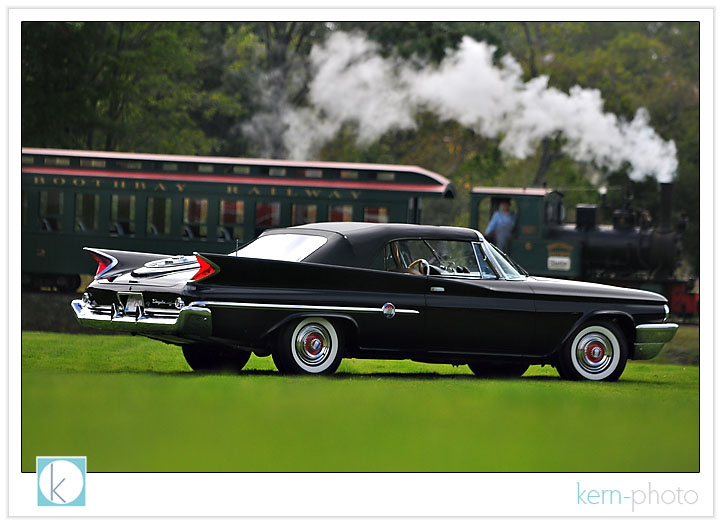
7. change up the angle. slant uphill or downhill simply by tilting the camera angle. tilt the camera to make the car look like it is going up or down a hill, offering more drama. for added drama during twilight, turn the headlights on.
8. clear background clutter. a slight adjustment to camera position can make a big difference. unless, of course, you want powerpoles growing out of the roof (which can be cool if that is your thing :)
9. shoot 4 wheels. lower your camera angle to view all four wheels of the car. cars look bold & aggressive when shot at this low angle, which helps to "ground" the car and make it appear more "solid."
10. know when to use filters. a polarizing filter on an SLR lens can reduce reflections on paint, windows, and chrome. learn how to use it. in addition, a neutral density graduated filter can help to keep skies rich in color and minimize loss of shadow detail of the subject. again, learn how to use it. the goal is getting it right first in camera and then no having to do heaps of post-production in photoshop later.
11. look for good light. photograph the car with the shadow on the other side of the car for the 'best' light. however, rules can be broken. this is a good one to break if you are creative :)
12. megapixels has nothing to do with making a good photo -- YOU do. don't believe the megapixel myth.
13. shoot when the sun is low. overhead sun casts heavy shadows leaving the sides of the car in the dark.
14. size matters. when you are ready to print, remember the aspect ratio of most cameras is 2 x 3. that means you'll get a "full-frame" 4 x 6 image with no worries, but cropping will occur if you intend to fill an 8 x 10 print. plan ahead with your composition if you know you are planning to crop a photo to a different ratio.
15. use good glass. professional-grade SLR lenses may offer improved contrast, sharpness, and minimal distortions over older point-and-shoot cameras. my favorite car lens: the nikon 70-200mm f/2.8 af-s vibration reduction. we invest in good lenses before we invest in cameras. a digital camera is obsolete after a few years, while good lenses can last for decades and not become obsolete. learn how to manage obsolescence.
16. light, composition, and a strong idea are the three ingredients for a *great* photo. a *good* photo has at least two of the three.
17. if you don't have good light, create it. lightpainting can yield some creative results talked about on the kern-photo blog here.
18. for low-light shots, use a good tripod with a timer or boost up the iso. this will greatly extend your working time past sunset. good cameras can shoot in almost no light and still pull off great results. practice and creativity is key here. a street light can be an effective lightsource. don’t forget about subtle ambient light as well.
19. zoom in and fill the frame. 10% car and 90% landscape isn't necessarily "good." again, another rule to break if you have that extra dose of creativity.
20. bring extra batteries & memory cards on location. flip used cards face-down in the case to remind you they've been used. nothing like getting all setup with perfect lighting and a clean car and something minor technical glich rams its face your way.
21. back-up. back-up. back-up. after every shoot & before i lay my head on the pillow, i try to have everything backed up in at least three locations (external harddrive, computer, and memory cards). keep the most important shots backed up to DVD off-site if possible.
in sum, we kept it simple and to the point, then followed it up with a light painting demo which was a "light-bulb" experience for many :)
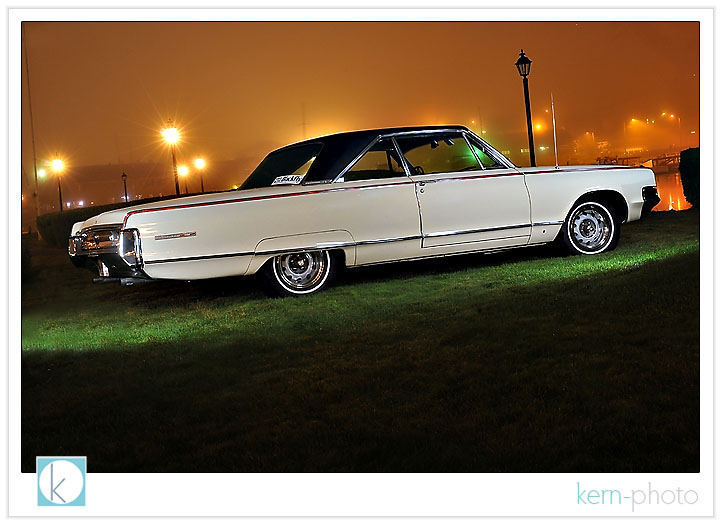
below is the final shot we did with the group watching with the before lighting painting and after (post questions on the comments section below and i will try my best to answer them):
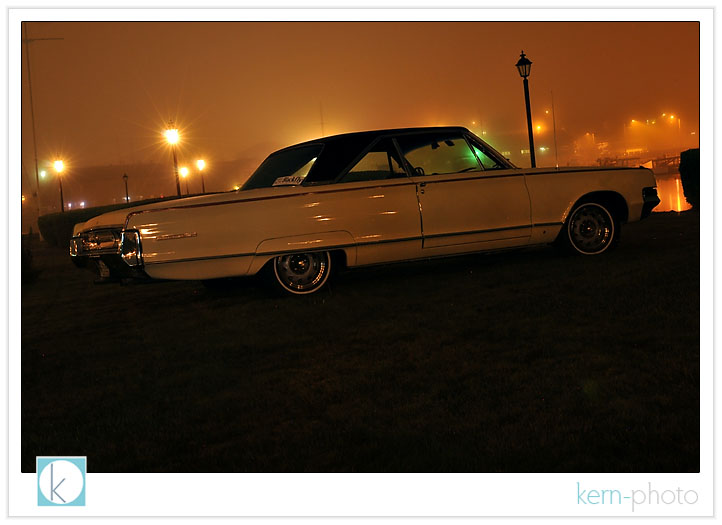
and after a 20 second exposure, lighpainted with about 5 pops of a lumedyne battery pack at half-power diffused via a small softbox. notice the subject changes while the background remains the same due to the lightpainting effect.
chrysler 300 D with the atlantic ocean in the distance:

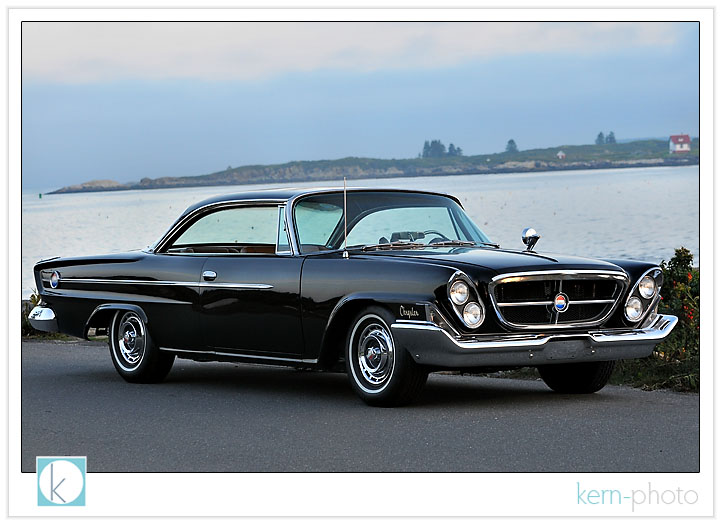
chrysler 300 G:
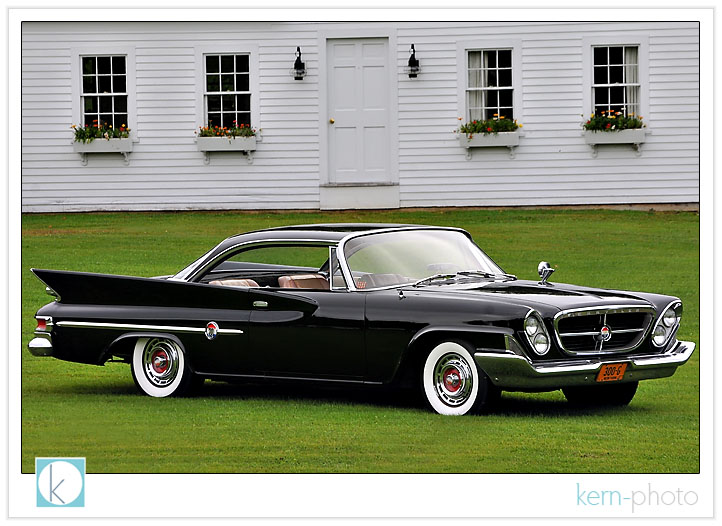
the nostalgic “forward look.”

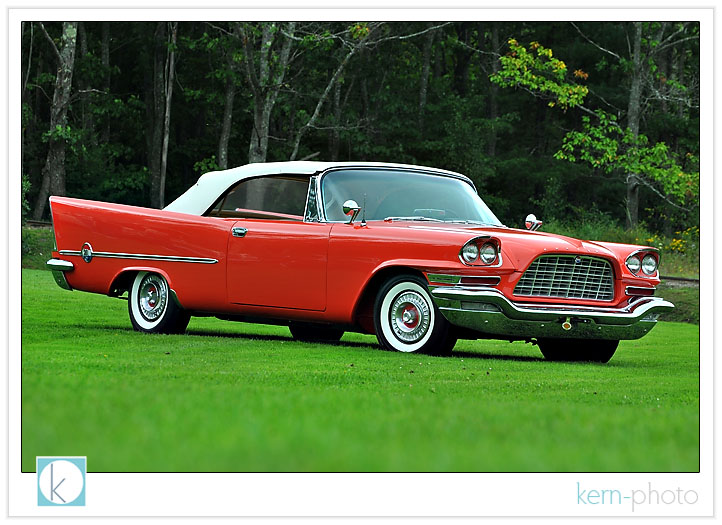
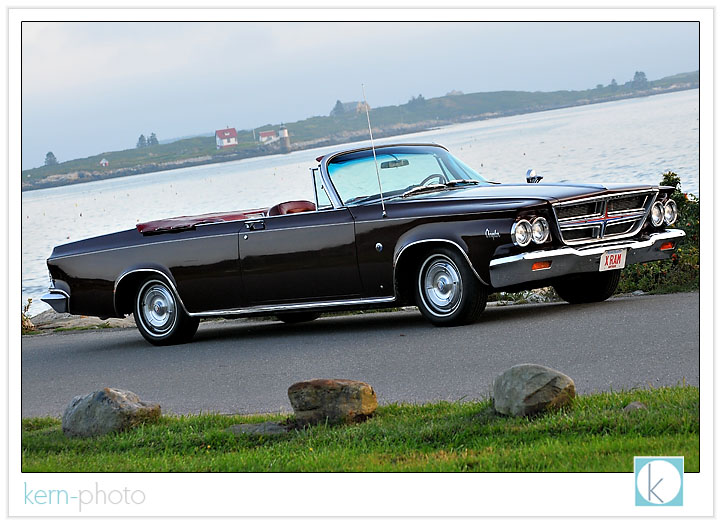
personally, one of my favorite models, the chrysler 300 C convertible:
we waited for a few minutes for this shot of this chrysler 300 F to be just right.
clean light with a scenic backdrop:
to view more images on the event website, click HERE.
and to view a few images from the fall 2007 meet, click here, here, or here. and here’s a bunch of favorites from the 2006 fall meet in lawton, oklahoma.
“itching and scratching in the parking lot ‘til 2 a.m,” nicole and my mom jest.
regardless how one may look at it, last weekend was spent creating great memories with my dad, aunt, and uncle in land of the lobster rolls.
this experience inspired me to write this article and share photograhic insight with new friends and car lovers alike.
__________________
if you every try to photograph cars, the approach can be difficult in comparison to the work we see in the big leagues. motor companies pay top dollar to have their vehicles looking their best so they can sell them. to the antique car collector, car photography is just a slight margin below a family portrait.
“good” car photos go along way: they can help to boost a car sale or can serve as an invaluable document for insurance purposes. but reasons to photograph cars go much farther than that. as a photographer and a son of a car lover, there something exciting about sharing images of a car, restored completely to show-room shine after years of patience.
i offered a pseudo coffee-shop class to members to offer them tips on how to photograph their classic cars. many of them have a digital cameras and asked me how they can take "better photos” because they couldn’t get the results they were hoping for.
since not everyone was able to make the mini-class, so i’ve jotted down a little bit of what was discussed. the golden nugget:
*** there are rules. and there are rules to be broken. if you choose the latter, do so with creative intent and purpose.***
after considering this, here are 21 tips on how to photograph your car (in no particular order)
1. shoot in the "golden hour." this can be either at dusk or dawn. generally, these are good times to photograph, and occur 30 minutes before and after either sunrise or sunset.
2. shoot long. a longer focal length lens minimizes distortion and helps to increase background focus blur, drawing your eye towards the subject, rather than a distracting background.
3. shoot with perspective. a telephoto lens helps to compress the car, adding a dramatic perspective.
4. about face. turn the front wheels so you can see the wheel face.
5. chimp and look at the screen on the back of your camera. use your tools to their fullest. if the picture looks too dark or light, change your exposure. white-balance off? adjust it. nailing your shot in camera will save hours of time in front of the computer later.
6. keep your background interesting, yet not distracting. trees, a clear sky, or a field works well. a white car against a gray sky can appear boring. contrasting backgrounds can create more interesting images.
7. change up the angle. slant uphill or downhill simply by tilting the camera angle. tilt the camera to make the car look like it is going up or down a hill, offering more drama. for added drama during twilight, turn the headlights on.
8. clear background clutter. a slight adjustment to camera position can make a big difference. unless, of course, you want powerpoles growing out of the roof (which can be cool if that is your thing :)
9. shoot 4 wheels. lower your camera angle to view all four wheels of the car. cars look bold & aggressive when shot at this low angle, which helps to "ground" the car and make it appear more "solid."
10. know when to use filters. a polarizing filter on an SLR lens can reduce reflections on paint, windows, and chrome. learn how to use it. in addition, a neutral density graduated filter can help to keep skies rich in color and minimize loss of shadow detail of the subject. again, learn how to use it. the goal is getting it right first in camera and then no having to do heaps of post-production in photoshop later.
11. look for good light. photograph the car with the shadow on the other side of the car for the 'best' light. however, rules can be broken. this is a good one to break if you are creative :)
12. megapixels has nothing to do with making a good photo -- YOU do. don't believe the megapixel myth.
13. shoot when the sun is low. overhead sun casts heavy shadows leaving the sides of the car in the dark.
14. size matters. when you are ready to print, remember the aspect ratio of most cameras is 2 x 3. that means you'll get a "full-frame" 4 x 6 image with no worries, but cropping will occur if you intend to fill an 8 x 10 print. plan ahead with your composition if you know you are planning to crop a photo to a different ratio.
15. use good glass. professional-grade SLR lenses may offer improved contrast, sharpness, and minimal distortions over older point-and-shoot cameras. my favorite car lens: the nikon 70-200mm f/2.8 af-s vibration reduction. we invest in good lenses before we invest in cameras. a digital camera is obsolete after a few years, while good lenses can last for decades and not become obsolete. learn how to manage obsolescence.
16. light, composition, and a strong idea are the three ingredients for a *great* photo. a *good* photo has at least two of the three.
17. if you don't have good light, create it. lightpainting can yield some creative results talked about on the kern-photo blog here.
18. for low-light shots, use a good tripod with a timer or boost up the iso. this will greatly extend your working time past sunset. good cameras can shoot in almost no light and still pull off great results. practice and creativity is key here. a street light can be an effective lightsource. don’t forget about subtle ambient light as well.
19. zoom in and fill the frame. 10% car and 90% landscape isn't necessarily "good." again, another rule to break if you have that extra dose of creativity.
20. bring extra batteries & memory cards on location. flip used cards face-down in the case to remind you they've been used. nothing like getting all setup with perfect lighting and a clean car and something minor technical glich rams its face your way.
21. back-up. back-up. back-up. after every shoot & before i lay my head on the pillow, i try to have everything backed up in at least three locations (external harddrive, computer, and memory cards). keep the most important shots backed up to DVD off-site if possible.
in sum, we kept it simple and to the point, then followed it up with a light painting demo which was a "light-bulb" experience for many :)
below is the final shot we did with the group watching with the before lighting painting and after (post questions on the comments section below and i will try my best to answer them):
and after a 20 second exposure, lighpainted with about 5 pops of a lumedyne battery pack at half-power diffused via a small softbox. notice the subject changes while the background remains the same due to the lightpainting effect.
chrysler 300 D with the atlantic ocean in the distance:
chrysler 300 G:
the nostalgic “forward look.”
personally, one of my favorite models, the chrysler 300 C convertible:
we waited for a few minutes for this shot of this chrysler 300 F to be just right.
clean light with a scenic backdrop:
to view more images on the event website, click HERE.
and to view a few images from the fall 2007 meet, click here, here, or here. and here’s a bunch of favorites from the 2006 fall meet in lawton, oklahoma.