Staging Foregrounds {creative tutorial}
Tis the season for family portraits! While shooting this awesome family this weekend in Moorhead, MN, It occurred to me how easy it is create something totally different by simply moving a perspective and shooting through things… trees, grasses, windows. Pretty much anything. And I love the effect. I like using this technique to add another element of creativity to my portrait work. Here’s what to do:
Step 1. Get your ‘safe shot’ out of the way. Choose a suitable location, put them in the ‘good light,’ keep in mind my posing tips for couples, and encourage some genuine interaction. Done.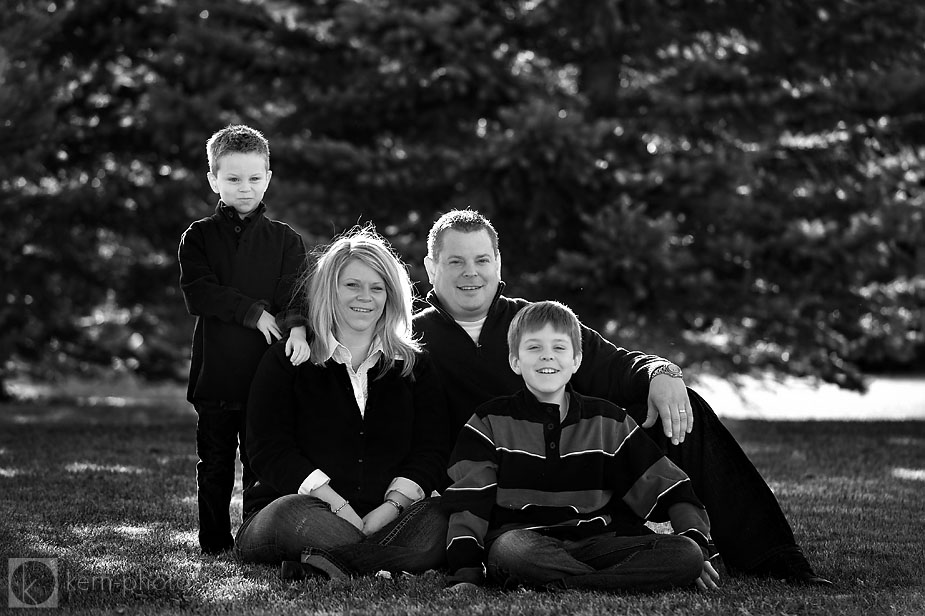
Step 2. Keep encouraging the interaction and fun conversation while moving around and exploring. I like sandwiching clients with a simple layer of contrasting colors that add some nice pop to a photo, making it almost like a painting. Keep in mind this isn’t the same Sandwhich Method I love for available light shooting.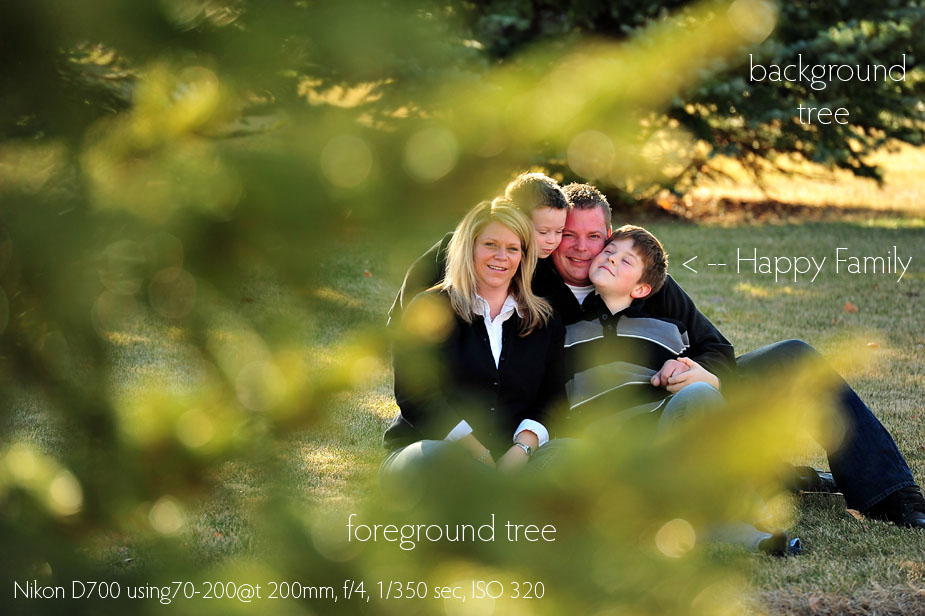 Step 3. Critically think about the foreground as painter would choose a paintbrush. I love the final image!
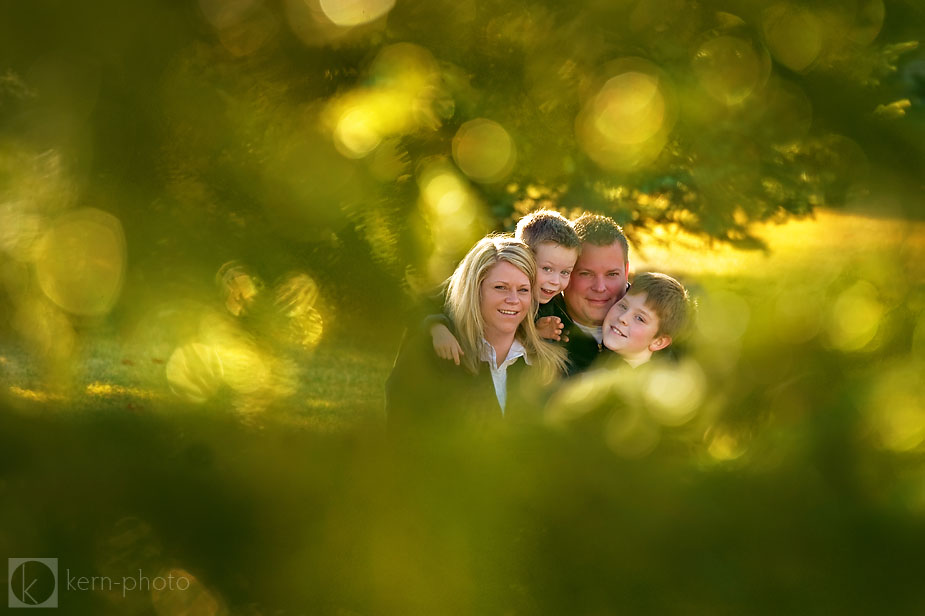
A few tips to get you started:
- Longer focal lenses like a 70-200 f/2.8 help to compress a scene, sandwiching foreground and background. Shallower depth field also helps to blur distracting details, however I usually like to stop down at least 2 stops for maximum bokeh effect.
- Choose darker backgrounds if you’re are backlighting, which helps to create that nice rim light to distinguish subjects from background.. otherwise they might get lost in the scene. That additional contrast helps to draw your eye to the subject.
- Once you get focus, lock it so it doesn’t shift around, which is why I like those little buttons on my 70-200. Sometimes those lenses get confused and you’ll miss the shot. Then take a blast of photos keep your eye on the subject, but peripheral towards the out of focus and try to create an interesting composition. The possibilities are limitless!
- In post-processing, experiment by raising the black point curve to add subtle color gradients into shadows or use the split-tone tool in Lightroom to add color in either shadows or highlights.
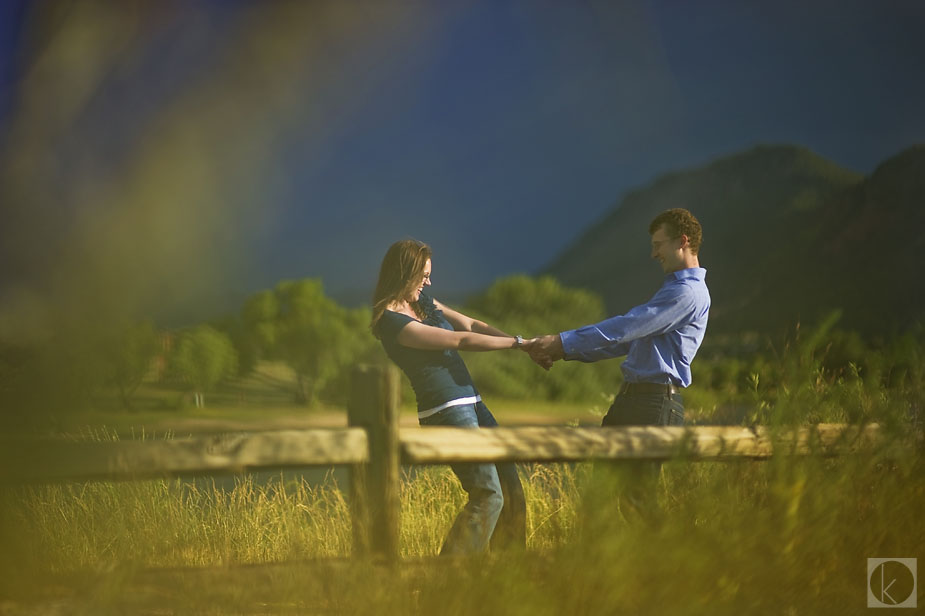
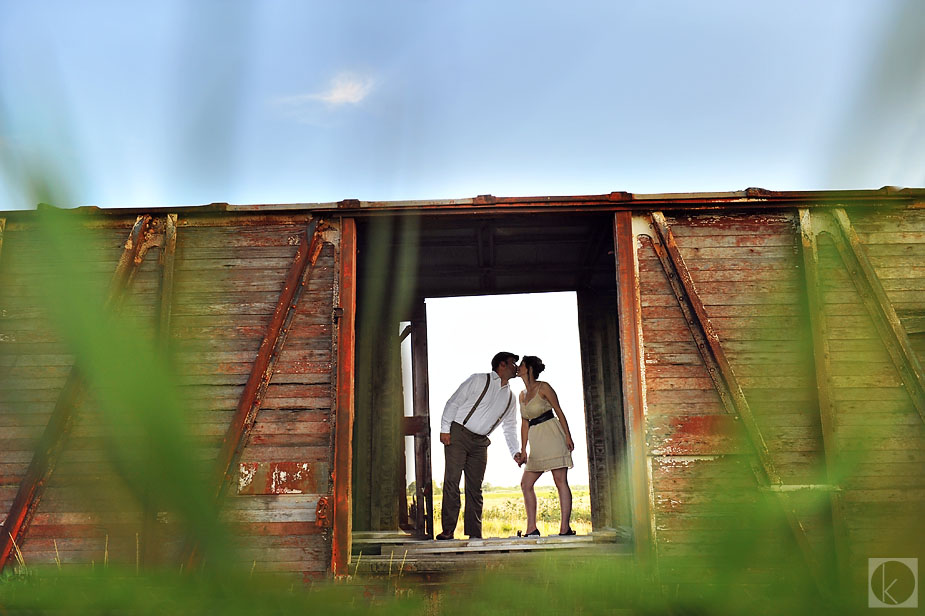
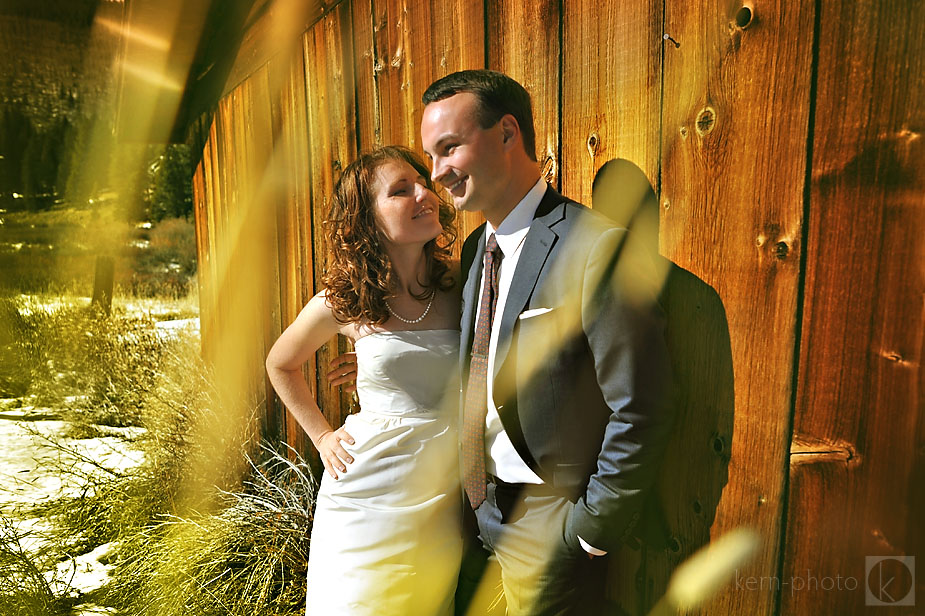
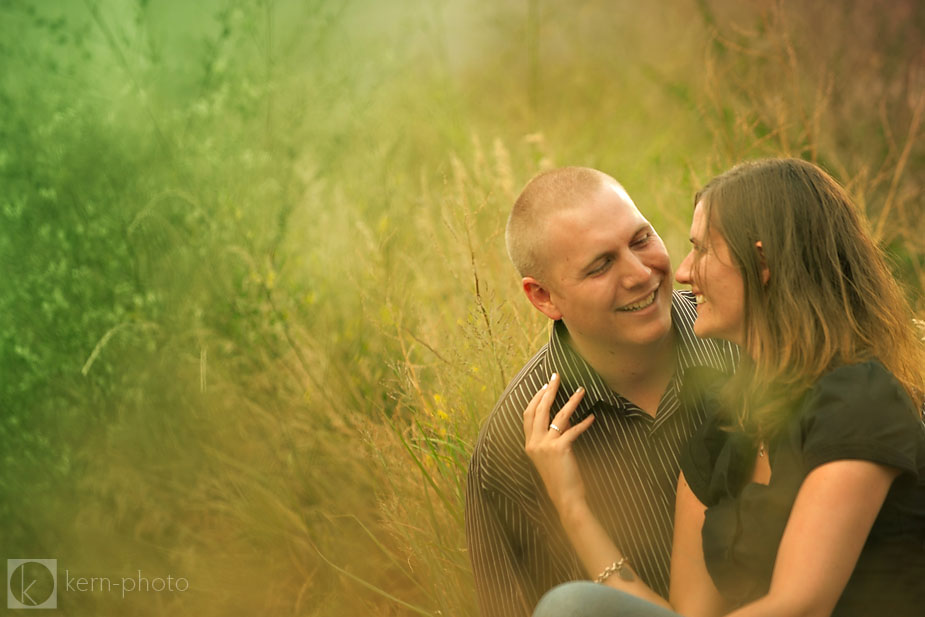
Keep in mind, to create a great photo you still need a good eye, patience, mastery of your equipment, and willing clients to pull it all off. The great news: you can use this technique on family portraits, engagement sessions, and creative portrait time with a bride and groom. Here are some more visuals to illustrate… all of which use some sort of foreground blur that is a natural color to promote visual interest:
 Of course with different seasons, you’ll get different effects as the environment and vegetation change!
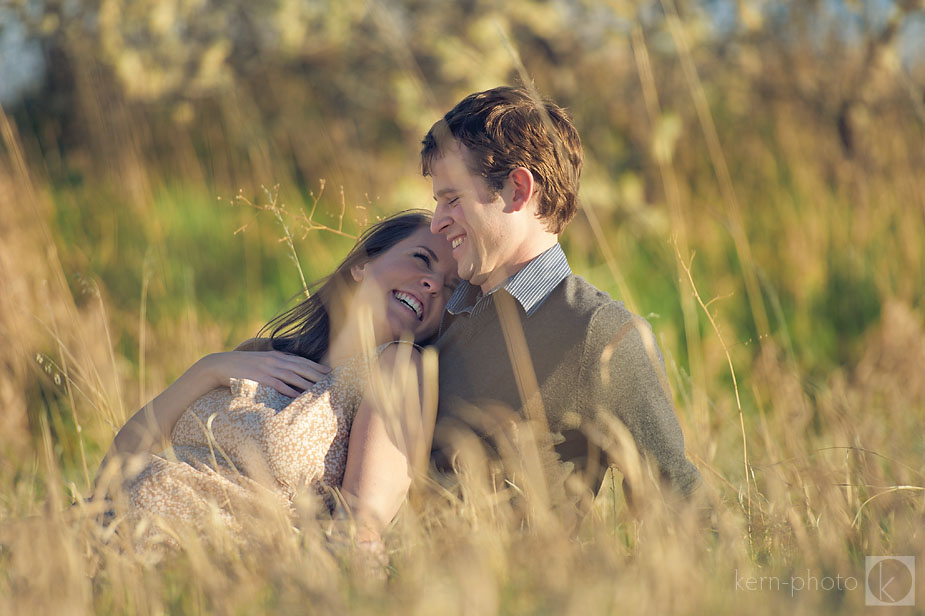

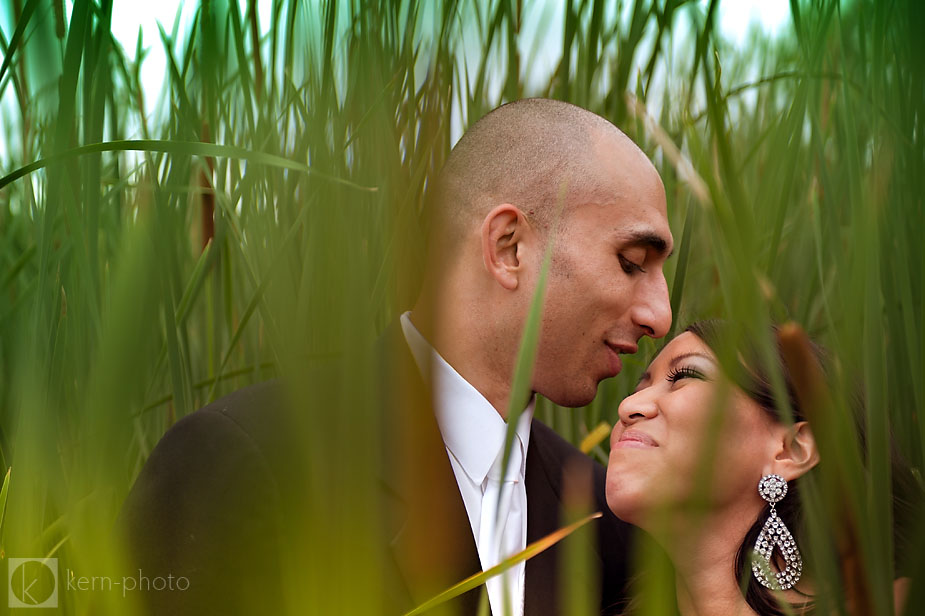
 Get lower than the grasses usually requires removal of the vertical grip to get an extra few inches lower:
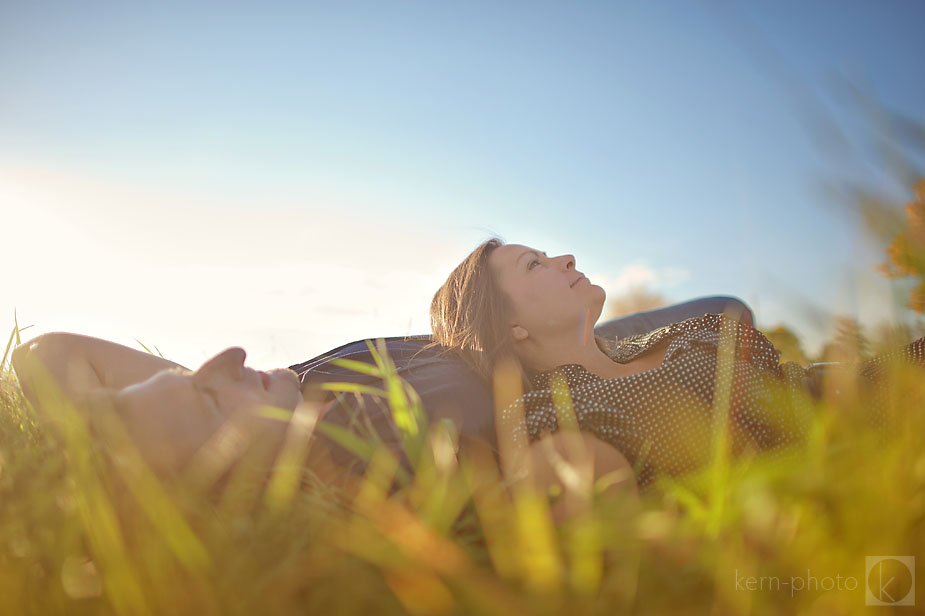 Shoot through a window:
 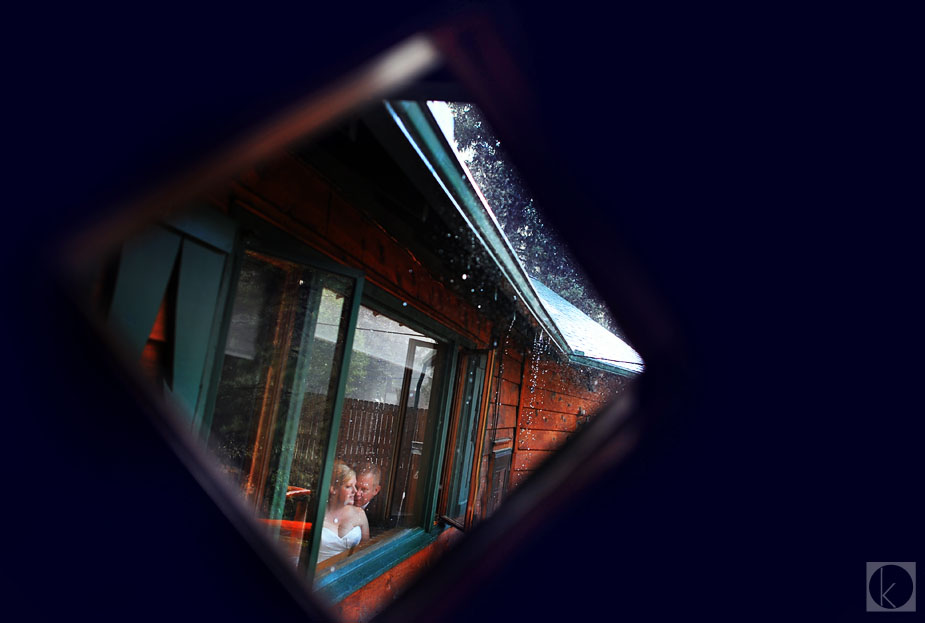 I love the blend of the grasses and grain of the film.
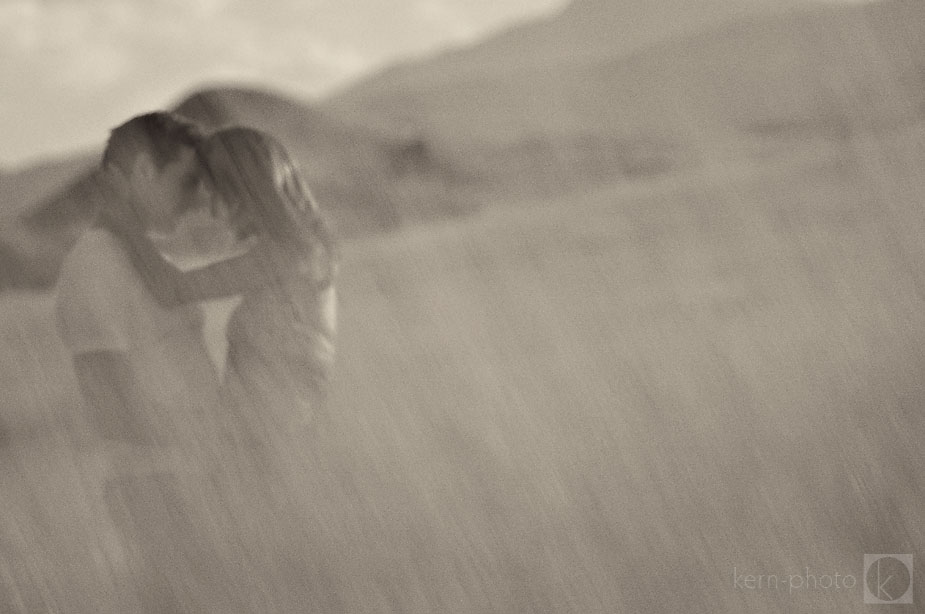 You can even use feet!
That’s it! Try this new shooting technique next time you are out on location and want to push some creativity! Happy shooting!
Tags: cool bokeh images, create beautiful effects with bokeh, family portrait ideas, minneapolis family photographers, moorhead wedding photographer


Pingback: The Hit List: 33 Photo Tips & Tutorials from 2011 | Kern-Photo
Pingback: Wonderful Wednesday … An inspiring video says, “We’re here to do what makes our heart sing” | Alex Beadon Photography