how we process digital negatives
03.01.08 | bridal-resources
- photo-resources
back
in the days of film photography, the negative was
the starting point for a good photograph. a good
negative was important for a good print, but the
photographer had to work 'darkroom magic' to
ensure the final print was worth hanging. these
skills often took years of practice to perfect. a
good print often relied upon 'behind-the-scene'
techniques like re-touching dust specs, selective
lighting (dodging) or darkening (burning),
contrast adjustment, sharpening, and cropping.
these techniques allowed the photographer to
create an image reflecting his/her creative
intention just before the shutter was clicked.
with digital photography, while the technical processes of picture-taking hasn't changed much, but the workflow has. just because a photo is taken, doesn't mean it is ready for printing. our creative post-processing techniques are an important component of our 'fresh. modern. fun.' style. any final print undergoes scrutiny before headed to the printer. that means stray hair removal, minor blemish retouching, contrast-adjustment, color-correction, sharpening, etc are all completed before a final print is made.
each image is different and requires a different artistic touch to refine. similar to food, if you put the same amount of salt on every dish, sometimes it might taste better, while other times it might taste awful. same goes with photography. we take care in every print to ensure it represents our best work. not everyone 'gets' digital photography, so we wanted to share a little bit of the behind-the-scenes magic of what makes your kern-photo print special.
vivid, sharp, bright images is what we love... and there is potential in every photo to bring out the best. however, we have a few tricks to really make the images pop. apart of our digital workflow helps streamline the process. we start with a digital 'raw' negative (step 1.) which becomes a corrected proof (step 2.) before a print-ready image (step 3). when you receive your digital negatives, they will be in the corrected proof stage (step 2). if you order prints from us, rest assured you'll get images that meets (step 3) the kern-photo highest standards.
stay tuned for a more in depth look at how we use the latest photoshop technology (adobe cs3) and custom built processing techniques (actions) to obtain our signature look.
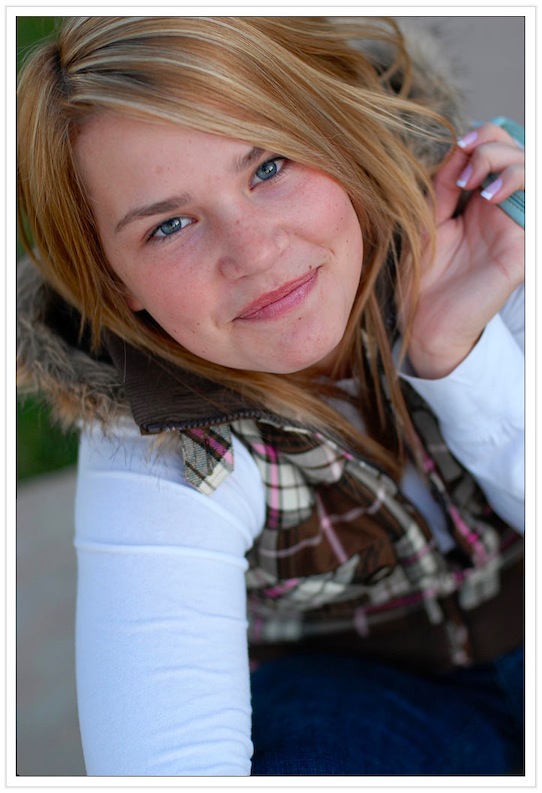
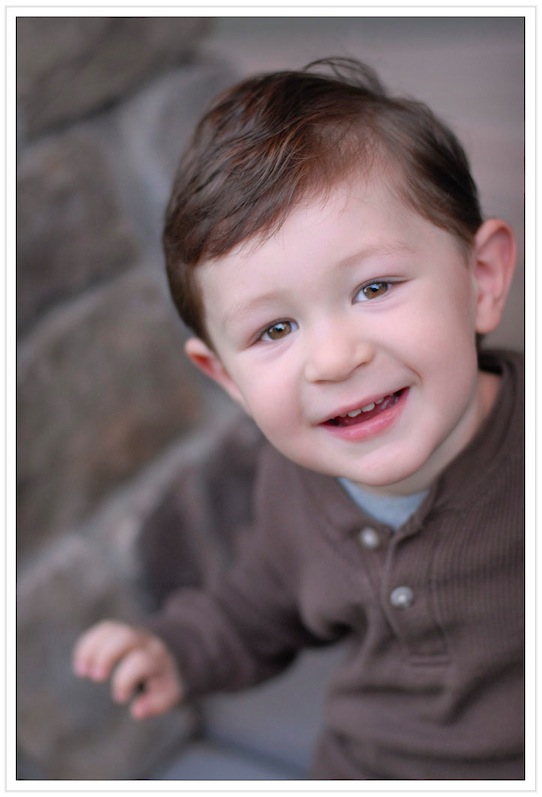
but for now, here are a few examples of the general steps taken to process an image:
step 1. the digital 'raw' negative (straight out of the camera)

step 2. the corrected proof (color-corrected, exposure increased, contrast added)

step 3. the final print-ready image (skin re-touched, a bit of warming, eye-pop, and magic sharpening)

step 1. the digital 'raw' negative (straight out of the camera)

step 2. the corrected proof (color-corrected, slight contrast added)

step 3. the final print-ready image (skin re-touched, eye-pop, a bit of warmth, and magic sharpening)

step 1. the digital 'raw' negative (straight out of the camera)

step 2. the corrected proof (color-corrected, slight contrast added)

step 3. the final print-ready image (skin re-touched, eye-pop, and magic sharpening)

with digital photography, while the technical processes of picture-taking hasn't changed much, but the workflow has. just because a photo is taken, doesn't mean it is ready for printing. our creative post-processing techniques are an important component of our 'fresh. modern. fun.' style. any final print undergoes scrutiny before headed to the printer. that means stray hair removal, minor blemish retouching, contrast-adjustment, color-correction, sharpening, etc are all completed before a final print is made.
each image is different and requires a different artistic touch to refine. similar to food, if you put the same amount of salt on every dish, sometimes it might taste better, while other times it might taste awful. same goes with photography. we take care in every print to ensure it represents our best work. not everyone 'gets' digital photography, so we wanted to share a little bit of the behind-the-scenes magic of what makes your kern-photo print special.
vivid, sharp, bright images is what we love... and there is potential in every photo to bring out the best. however, we have a few tricks to really make the images pop. apart of our digital workflow helps streamline the process. we start with a digital 'raw' negative (step 1.) which becomes a corrected proof (step 2.) before a print-ready image (step 3). when you receive your digital negatives, they will be in the corrected proof stage (step 2). if you order prints from us, rest assured you'll get images that meets (step 3) the kern-photo highest standards.
stay tuned for a more in depth look at how we use the latest photoshop technology (adobe cs3) and custom built processing techniques (actions) to obtain our signature look.
but for now, here are a few examples of the general steps taken to process an image:
step 1. the digital 'raw' negative (straight out of the camera)
step 2. the corrected proof (color-corrected, exposure increased, contrast added)
step 3. the final print-ready image (skin re-touched, a bit of warming, eye-pop, and magic sharpening)
step 1. the digital 'raw' negative (straight out of the camera)

step 2. the corrected proof (color-corrected, slight contrast added)

step 3. the final print-ready image (skin re-touched, eye-pop, a bit of warmth, and magic sharpening)

step 1. the digital 'raw' negative (straight out of the camera)

step 2. the corrected proof (color-corrected, slight contrast added)

step 3. the final print-ready image (skin re-touched, eye-pop, and magic sharpening)

