
geeking out with the 105 macro
which is why i recently turned to craigslist.com to purchase our newest lens, the 2-year old nikon 105 mm f/2.8 af-s macro lens. i placed an ad and a few days later i had a seller willing sell it at a good price ($550) AND to toss in a UV filter, along with a circular polarizing filter, and a warming filter (remember those?) for free. done deal.
i forgot how fun macro lenses can be. the super shallow depth of field is something no other lens can achieve, especially when used with a nikon d-300 with a "dx" sized sensor with a 1.5x crop factor. the reason we sold our old one was it proved a bit challenging to use in low-light situations. however, with the newer vibration reduction (vr) technology, tripods become a thing of the past, unless you want to stop down to f/22.
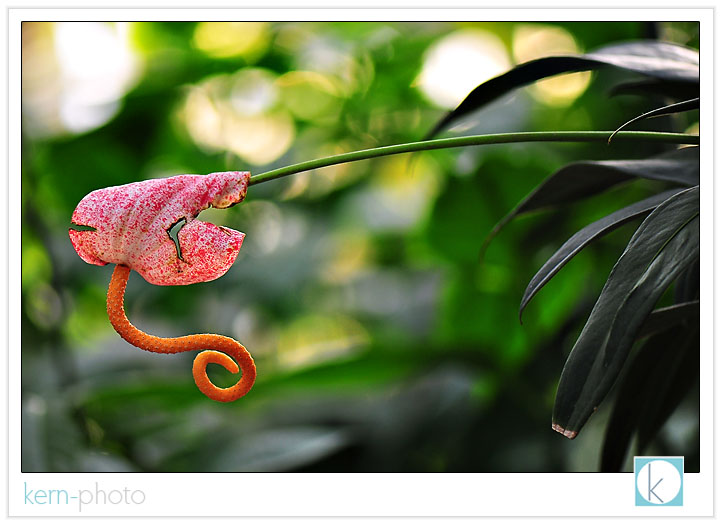
while geeking out in the botanical gardens in washingon d.c., i brought along the new lens and enjoyed the sights and serenity. for added inspiration, i listening to u2's newest album, "no line on the horizon" which gets the 5-stars in my book). focussing down to mere inches to the subject allows for a super shallow depth of field making it easy to isolate the subject.
this little guy was hungry, but didn't get a nut from me.
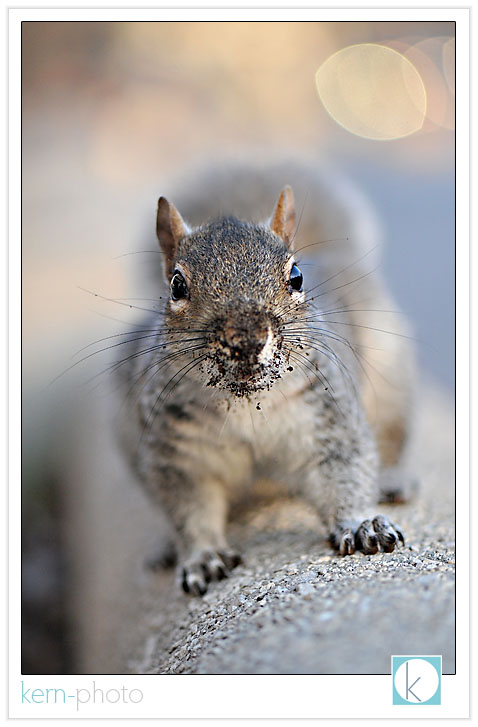

yikes!
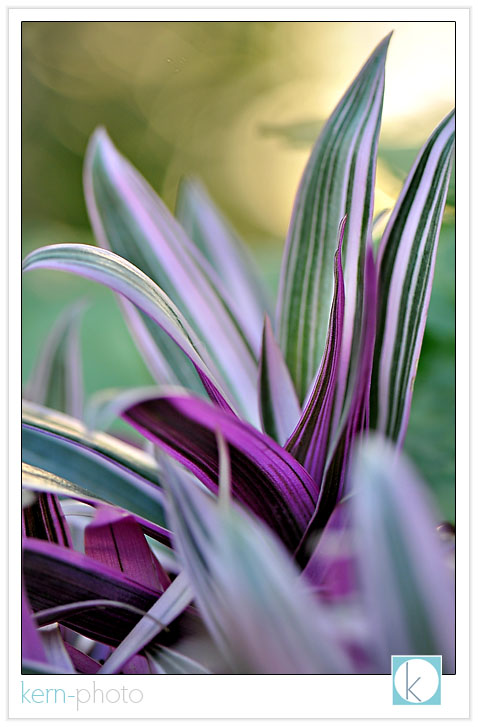
there is a whole world of small things of interest if you slow down and look close.
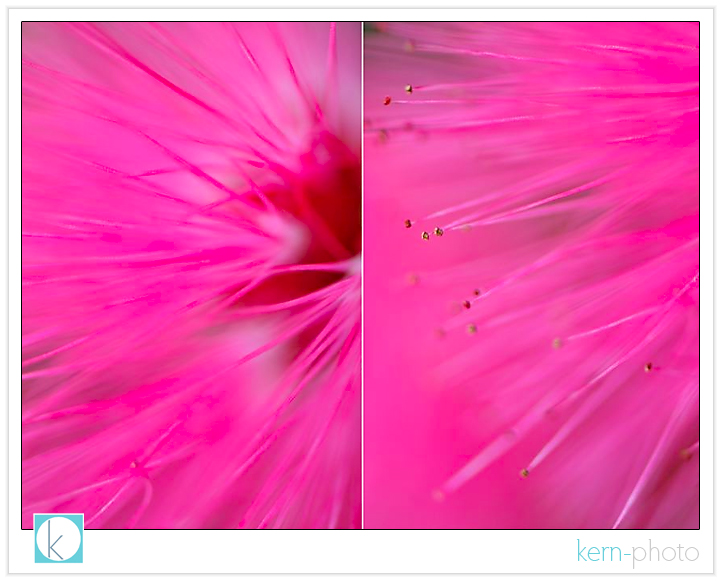
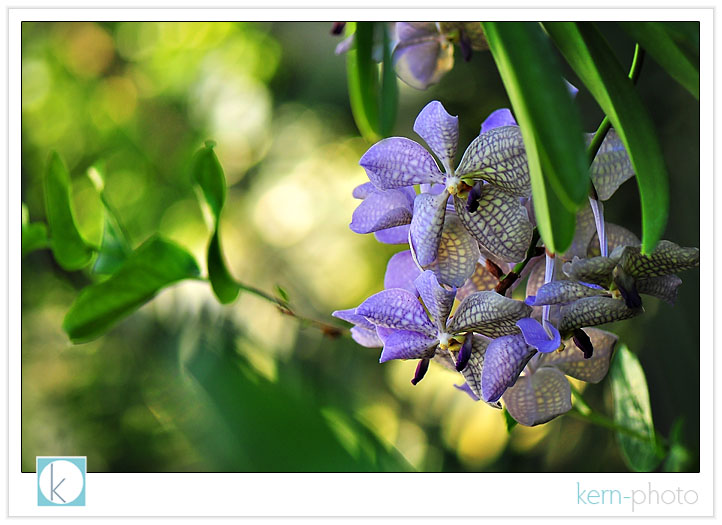
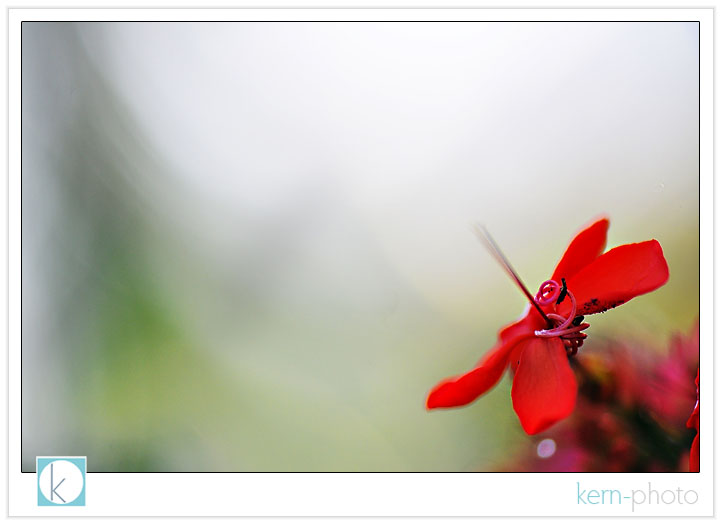
i was impressed by the bokeh of nikon's latest 105 f/2.8 macro vr lens. the creamy blobs in the background compliment the foreground subject... adding a certain elusive quality. there is a difference between bokeh and areas of out of focus. notice the elusive quality to the background in the above image and the image below.
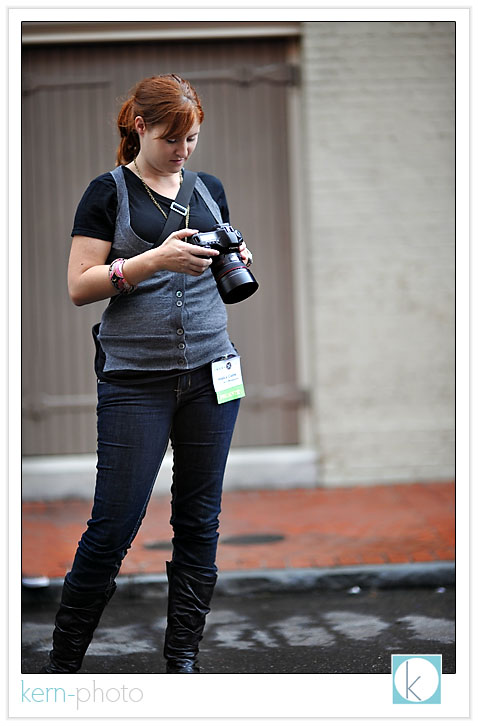
in preparation for use in portrait session, i walked around the streets of DC learning my capabilities with my new tool. the lens isn't necessarily ideal for street photography, but it can shine if used in low light in certain scenarios. i was impressed to see this, along with the colorful background. i doubt i'll use the lens in many portrait scenarios since i like f/1.4 apertures, thank you very much.
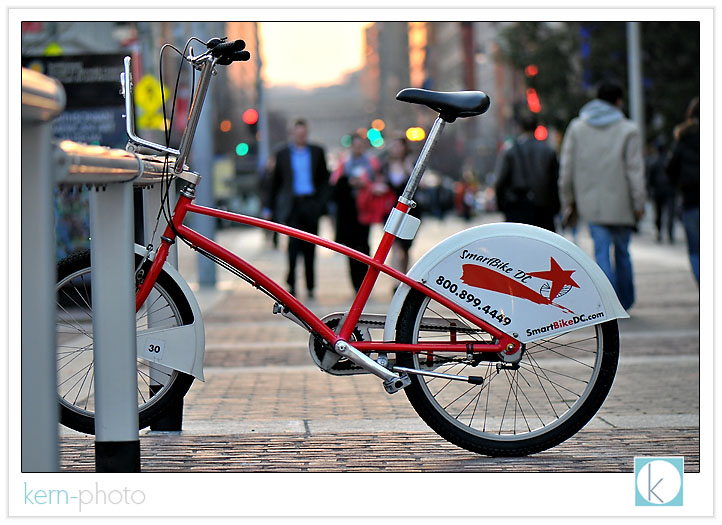
mmmm.... of all the portraits of lamp posts i've ever done in my whole life.... this one is the most recent:
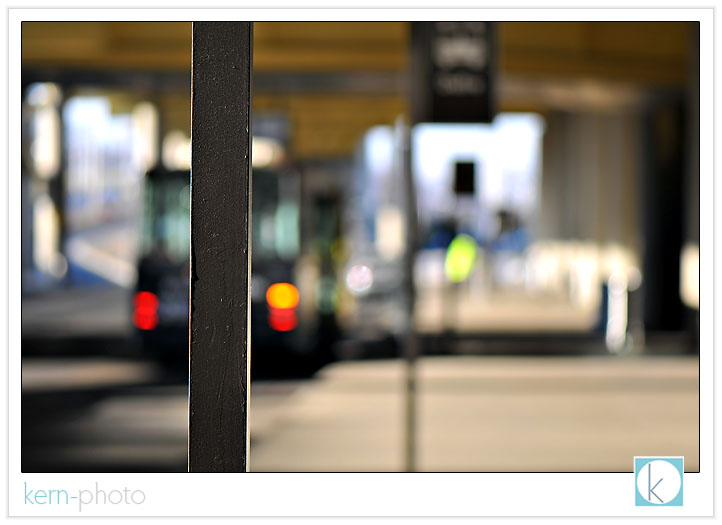
(and you were expecting something profound???).
party not-so like a rock star portraits
i’ve been giving some thought of what exactly the “pursuit of personal work” means to me. it boils down to random photos shoots that make me and my friends/family happy. personal work allows for experimentation and exploration of new techniques and ideas, which is the nutritional equivalent of protein shake after a good workout, except without the pressure. personal work doesn't necessarily pay the bills or replace the need for steady income. it is just enjoyable.
while each assignment i shoot there is a component of "personal work" and most of the time after the "safe shot" we step out of the norm and try something to please the innter creative self. perhaps it’s lighting, mood, attitude, or just the courage to create.
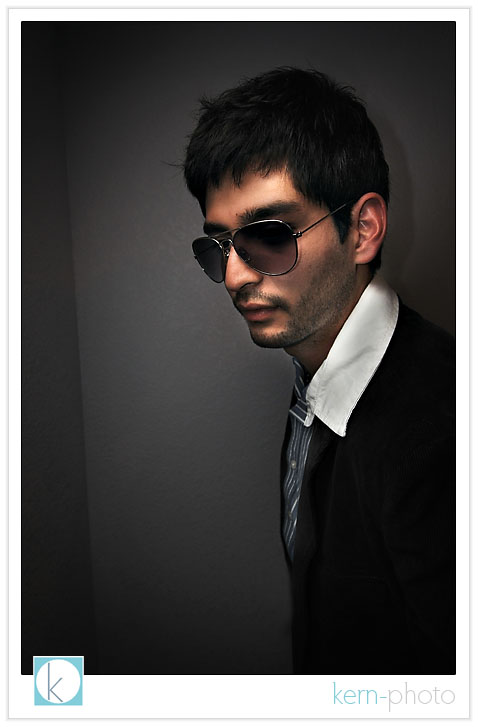
not long ago we were invited to a 60s, 70s, and 80s party by our friends. nicole pleaded me not to take the camera. i compromised and only took one flash and one lens (actual ingredients included a nikon d-300 with 12-24mm f/4 lens, a single sb-600, and an extra-small soft box). i dig the unconventional wide-angle lens for portraits and the inherent distortion :)
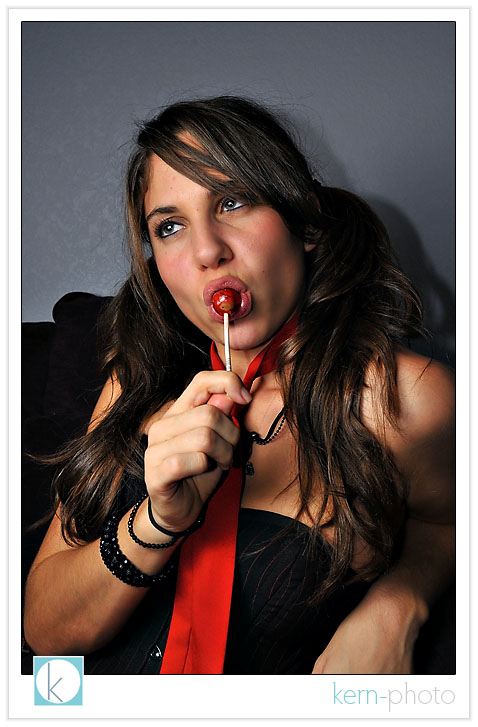
as the night progressed, it began to think more about on-axis fill using two small flashes. thanks to the strobist for planting the seed in my head. i used the pop-up flash on the d-300 at minus 2 stops ttl and the sb-600 at ttl (diffused via softbox). this created a strong main light and the pop-up flash provided just enough fill to see shadow detail. guys like dan winters and peter yang excel at the technique.
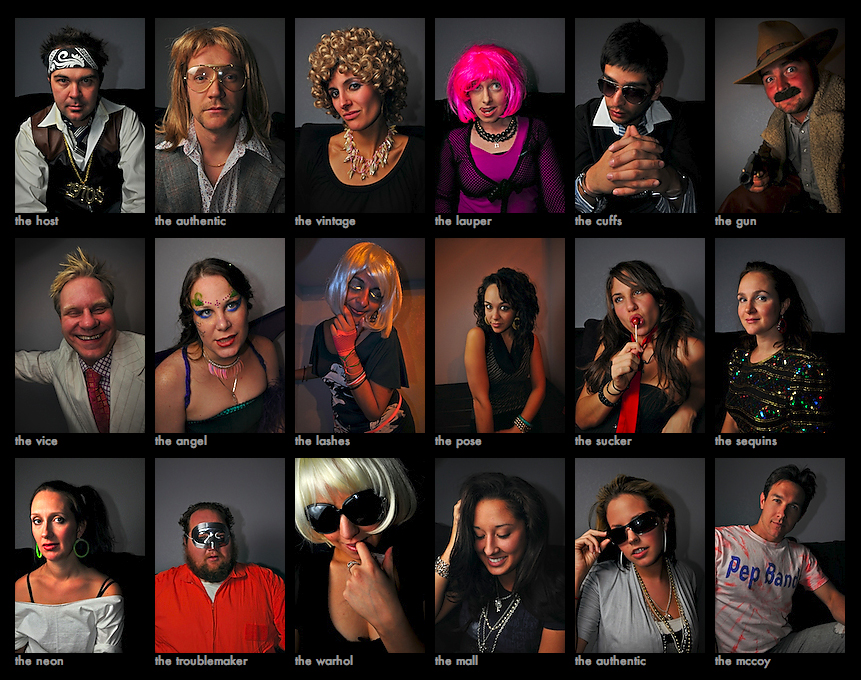
enough jibber jabba... one with the photos. here’s mike, the host.

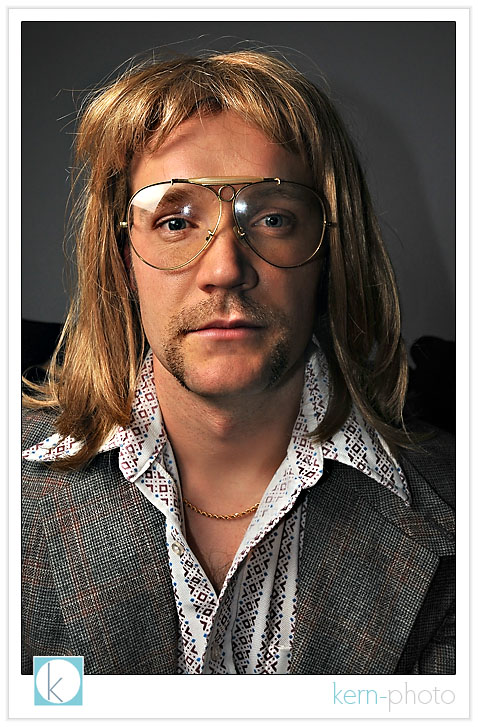
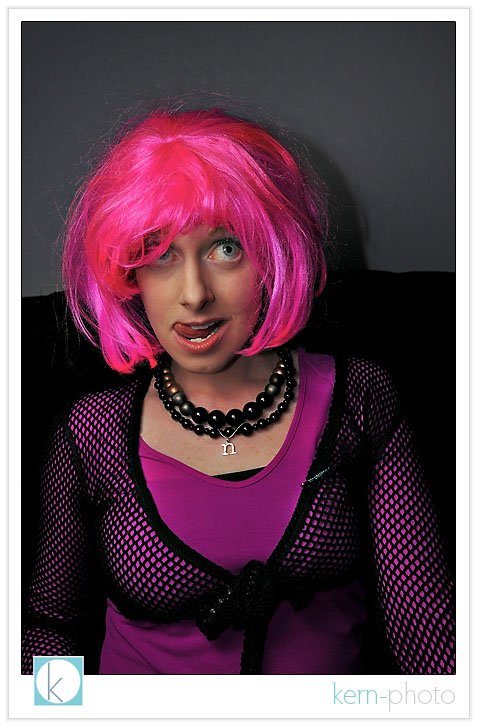
our uninvited guest that didn’t get the memo, but was a colorful character:

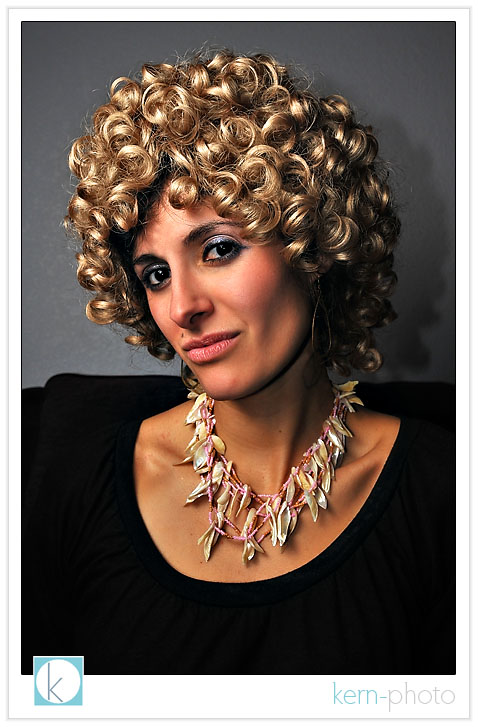
nicole grew pink hair just for the event (thanks to a spiffy wig).
see the full not-so rock star portrait gallery here. also, partial exposure metadata included in the gallery descriptions.
boycotting the d3x
why? while the 24.4 megapixel nikon d3X may be the greatest nikon, it is not worth $8,000. over-speculation and inflated market value just sounds waaaay too familiar given the current state our nation’s finances.
even if you shoot fashion / advertising / landscapes for a living and would normally use a medium-format digital back, chances are you probably have tons more life in your big guns and see no reason to sell it
nikon is leveraging efficiency, bulk purchasing, average fixed costs, and advantages due to expansion from 18 months of d3 production. i’d bet the new nikon d3x is cheaper to make than the d3 back in 2007.
here’s the big question: does twice the resolution mean twice the price AND twice the value?
to answer, let’s do some quick math.... figure wholesale for the larger sensor size might be $400 or perhaps $1,300 retail. that might justify a $5,500 price tag, not $8,000.
you can get a d3 for about $4,200. the d3x is about twice that, yet has only half the frame rate and 1/4 of the ISO performance as the d3. if image resolution is your bag, you could buy a decade’s worth of film for $8,000.
wait until it drops to about $6,000 next year, then consider it.
first published cover... kinda
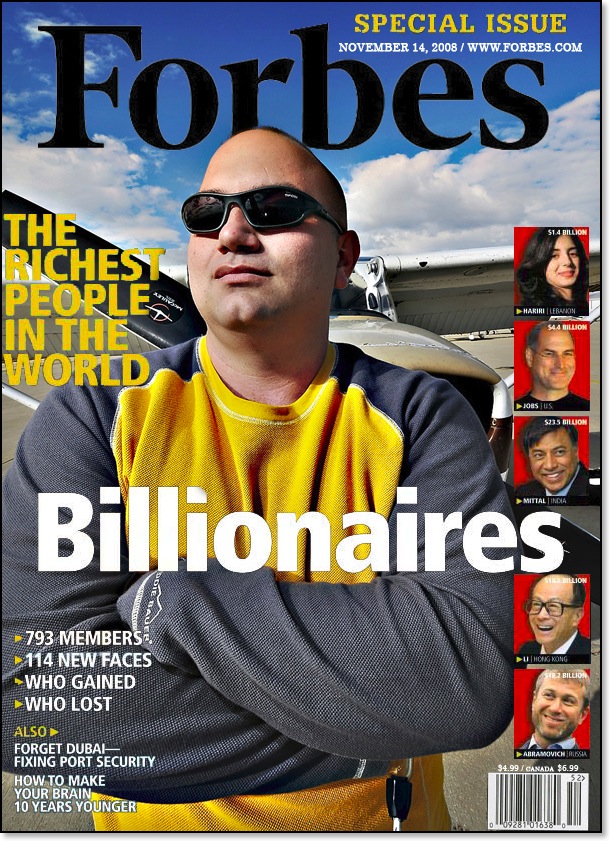
okay, okay. before i start getting calls from
forbes, the cover is pure fun.
no, it wasn’t really published. no, i don’t
work for forbes. but yes, those are real
airplane keys. and yes, that is my buddy,
gino siller holding the keys
about ready to pilot. not only is he a good
pilot, but he’s got some great photoshop
talent as demonstrated above!
on tuesday’s Veterans Day, we paid tribute
to America’s military veterans by joining the
friendly skies. the day before, i called up
gino. 60 seconds later, we had a guy’s day out
planned. spousal approval wasn’t easy... but
forgiveness was better than permission on this
one (thanks, hon :)
we headed for the airstrip around lunchtime.
after gino completed the pre-flight checks, i
grabbed my nikon d-300 with my favorite nikon
12-24mm f/4 anti-portrait lens, an sb-600 and
triggered this shot using my radiopoppers. metering the sky
was easy. f/11, 1/320 sec, iso 100. the pop-up
camera flash was dialed down minus 2.5 in the
i-ttl mode and the off-camera sb-600 was set
to i-ttl “0.” this allowed the my sb-600 to
blend in with the sun to serve as my main
light (sunglasses prevented blindness.... not
something to you want to bestow on your pilot
prior to take-off).
i chose the 1/320 second which made it easier to
bring down the ambient light and over-power the
sun just a tad. new concept? check out the
wrap-up from the coffee-shop class 8 about
metering with a flash,
kern-photo style.
the nikon d-300 pop-up flash served as on-axis
fill made famous by dan winters and explained by
the strobist’s on-axis fill
article. on-axis fill might be against
instinct for some pros. but it has an un-canny
ability to increase shadow detail, creating a
spiffy 3D pop i like.
funny enough, i nailed the exposure on the first
shot, thanks to nikon’s awesome flash metering! i
took a few more, but chimping on the back of the
screen made me underestimate and over-expose a
few shots. next time, i should trust my equipment
better.
i like simple lighting. with no time to set up
big strobes, i chose to decrease the distance to
my subject and use small flashes instead. by
taking a few steps closer, my small flash downed
a can of spinach and became that much stronger
(call it the “popeye effect”).

post-processing magic assisted by the totally rad actions.
here's the recipe: to desatuarate,
i ran "bullet tooth" with decreasing the
opacity of "gain" and "tone tweak" masks in
the advance settings down to about 20-30%,
then selectively added back a bit of blue
using "big blue" and yellow "green with envy"
(selectively painting them where i wanted).
next up, lightly used "pro retouch" on
the skin before painting with "can-o-woop-ass"
to bring out shirt shadow details and compress
highlights a bit. final touches
included: sensor spot removal, resizing, and
running kevin kubota's magic sharpen.
(total processing time: 5 minutes). btw: there
is some funky over-sharpening going on on the
right image, but it is getting late and my
pillow is calling my head.
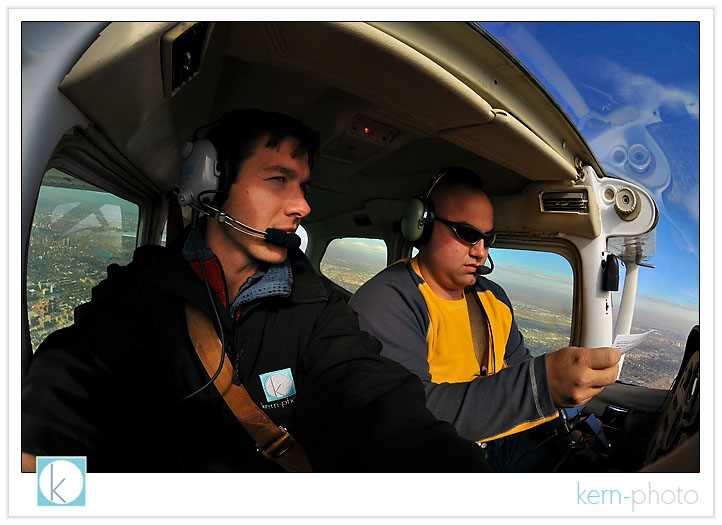
and now for the rest of the story...
checking the radio frequencies (we’re not lost,
we promise):
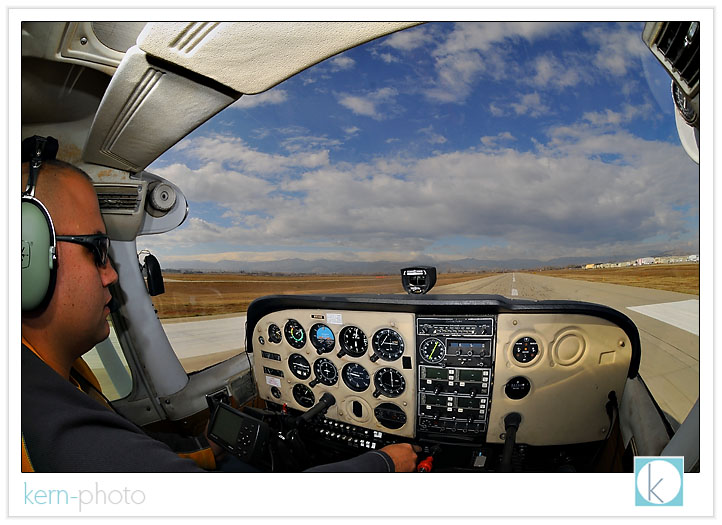
landing a centennial airport for lunch, one of
the smoothest landings of my life :)
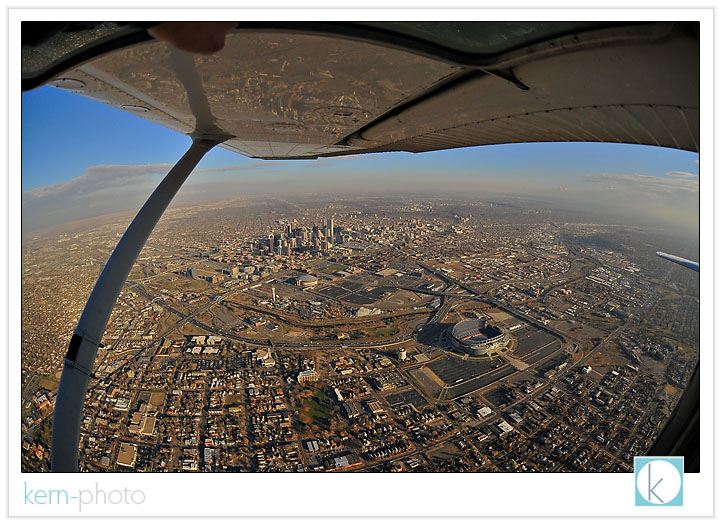
hanging out the window with my fish-eye lens to
capture the view 1500 feet above mile-high
denver. the wind was sooo strong. i have no idea
how pilots in those open-cockpit planes ever did
it.
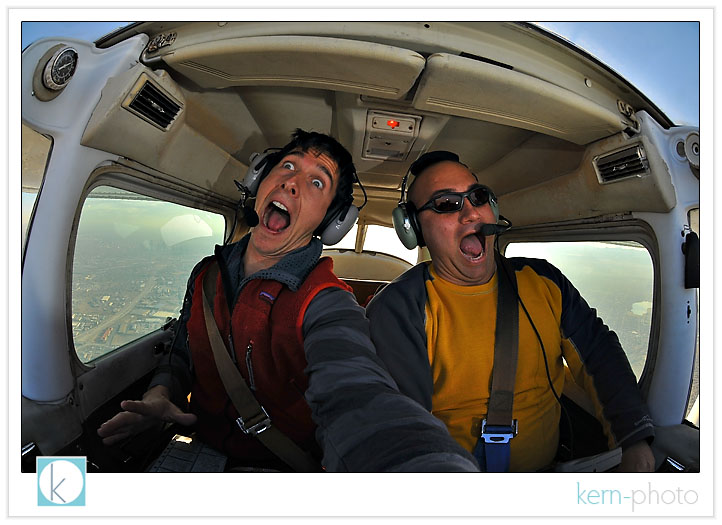
just kidding, honey :)
image-x '08 workshop wrap-up
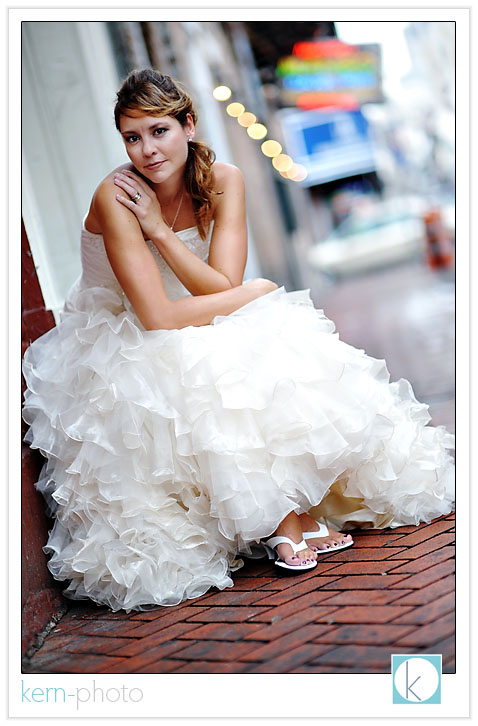
in the french quarter of new orleans, i spent an entire workshop day with john michael cooper and a second day with jessica claire. considered among the best in the wedding photography industry, john and jessica are polar opposites in shooting style and theory. but they have one thing in common: they know how to inspire.
my brain was a sponge of new information for 72 hours, thanks in part to 25 pages of notes, hundreds of photographs, and hours of recorded videos. i savored every bit of the two point five day experience. witnessing first-hand how the industry’s best shoot, do business, and are inspired... i walked away with a confident notion of what i like to shoot, and, more importantly, why.
i also found inspiration of the limitless possibilities afforded by the camera and the creative messages that can be created and the fun in creating images. i relished every opportunity to meet new photographers, which continued the learning into the wee hours of the morning and even the plane ride home (thanks, jeff).
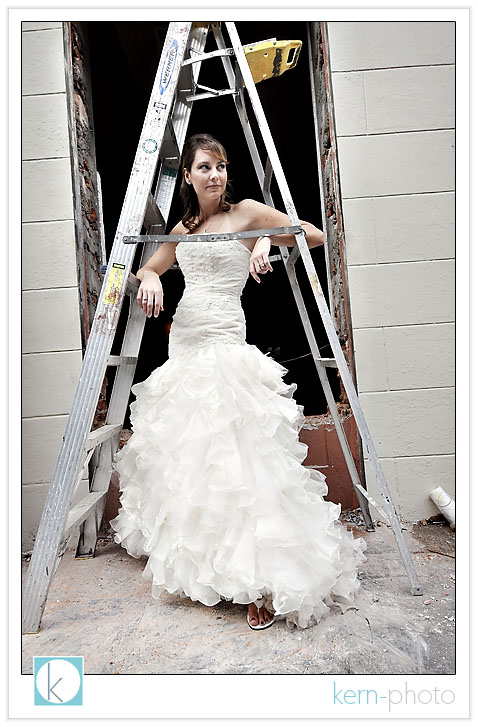
john encouraged us to try something different.... kristen did a wonderful job modeling without superstition.
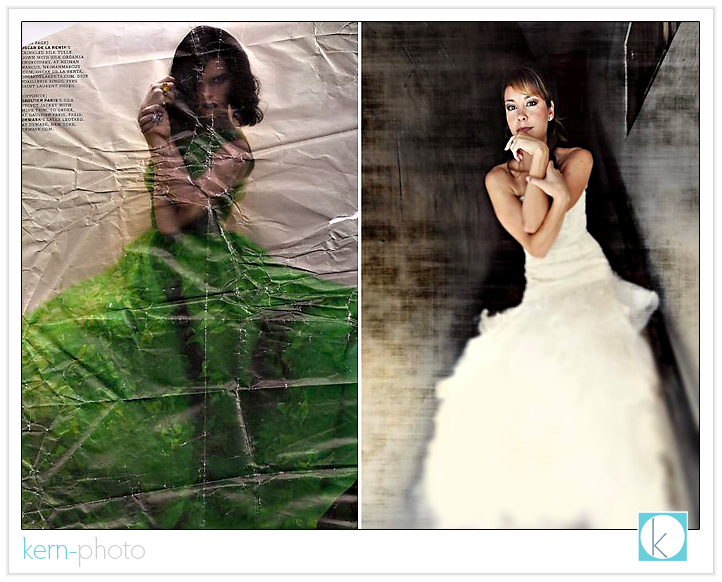
john gave us an assignment to go out of our comfort zone. he ripped out a page in a magazine and gave it to each student. our project: use the image for inspiration in our own unique style. featured left: a scan of the paper he gave me (it lived in my pocket for a few days), right: the inspiration in the final shot.
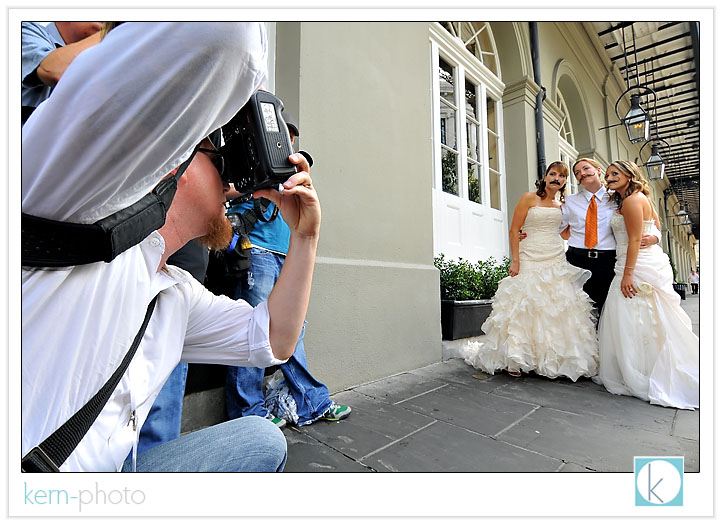
brides with mustaches was 100% john’s idea. why? because “know one else will have mustaches today.” be different, says john.
same goes for the obama and mccain masks:
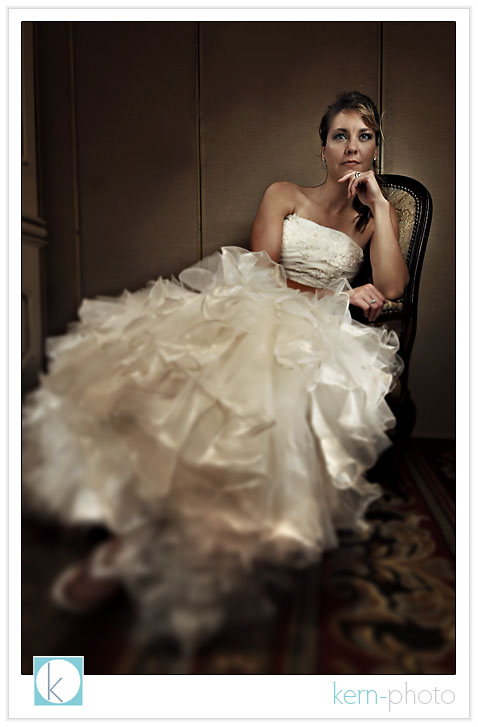
a typical bridal shot:
and a not-so-typical idea of the ‘queen of hearts,’ as modeled by kristen:

four-second exposure with light-painting via video light:
day 2: jessica claire (in foreground) with models, allison & ricky:
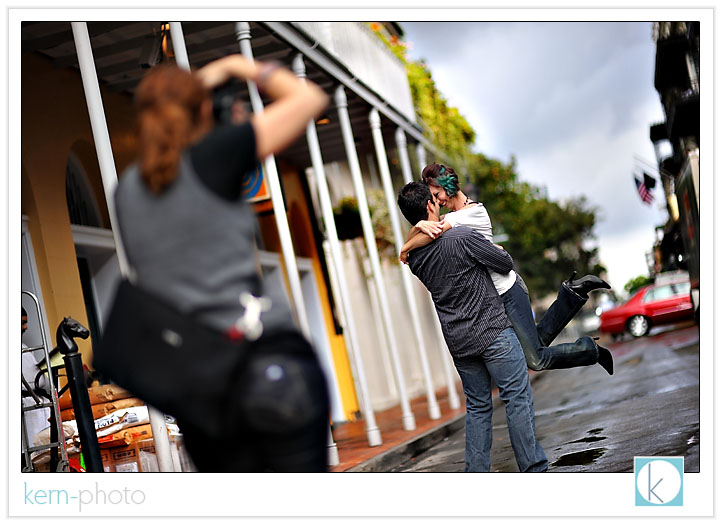
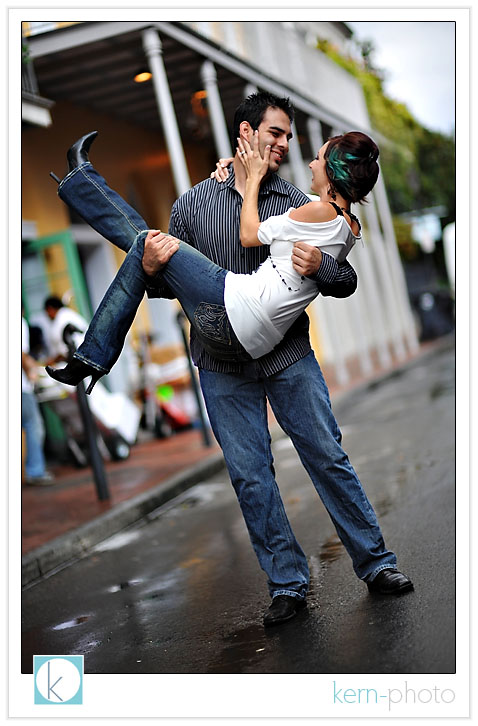
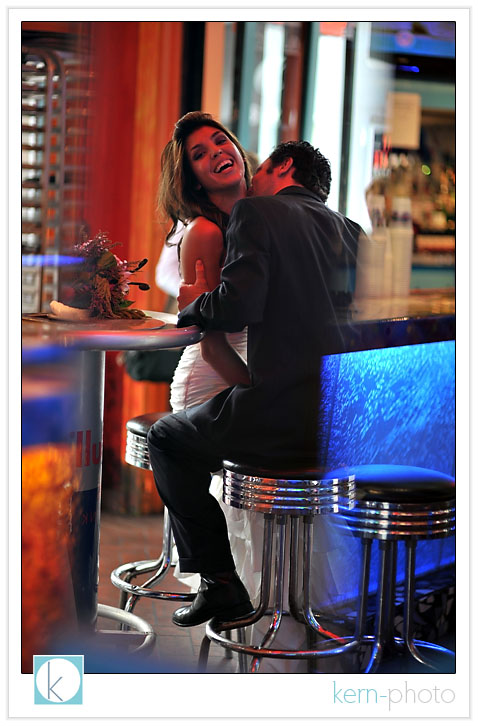
this is really 100% a jessica claire set-up shot... but she does a awesome job of helping clients boost confidence in front of the camera. allison & ricky met minutes before this shot was taken!
there’s nothing wrong with chimping, says one of the world’s top 10 wedding photographers:
split in groups of 10, we each had individual mini-assignments. for the next three shots of jen & ken, we were told to shoot in our “eclectic signature style”:
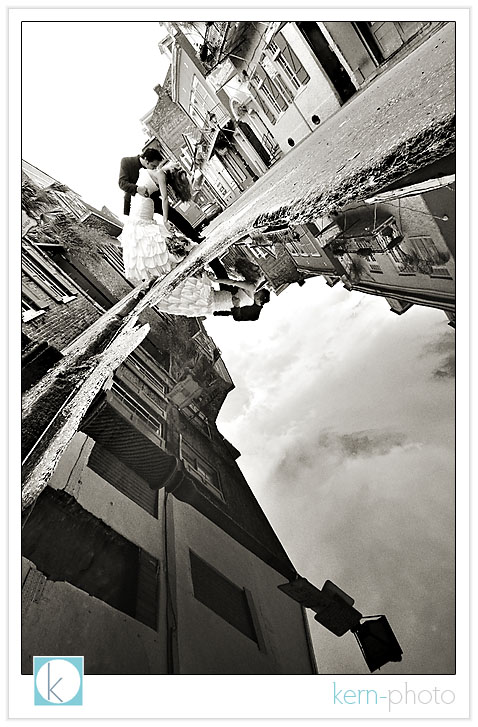
a bit of wide-angle drama with my favorite nikon 12-24 f/4 lens:
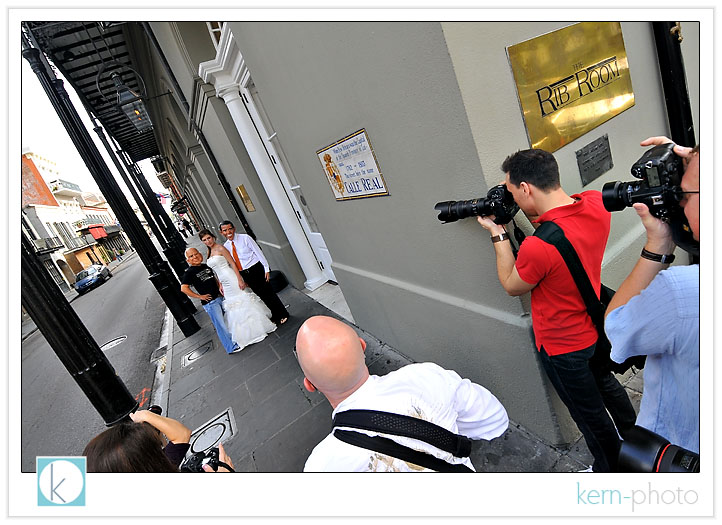
LOTS of photographers shooting the same couple can be challenging when attempting to create a new idea/pose/composition:
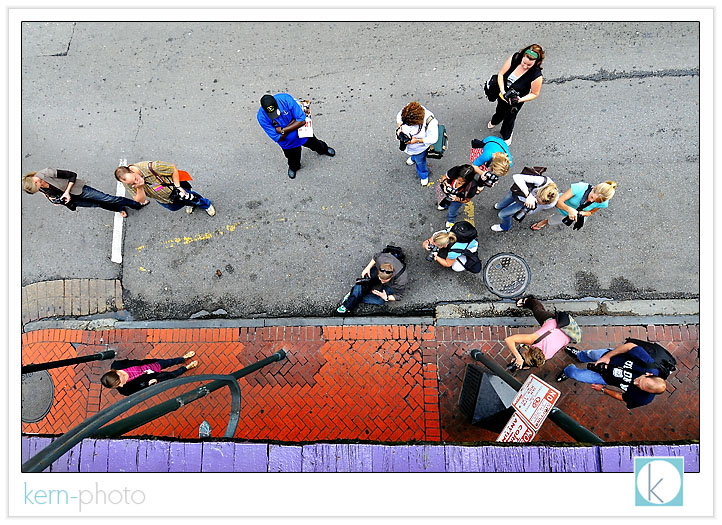
so i opted for a shift in angle and i ran upstairs to a balcony. i directed the talent to stand on top of the man-hole cover. i liked the simple yellow line and texture of the pavement.
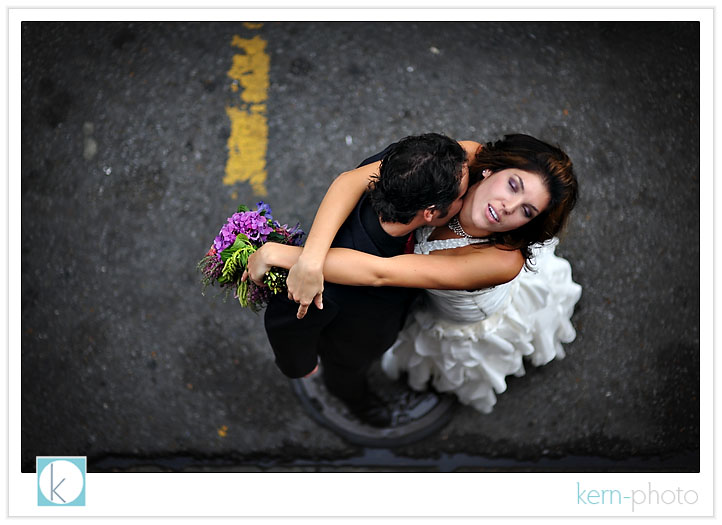
models jamie & rick, with focus on bokeh and simple details:
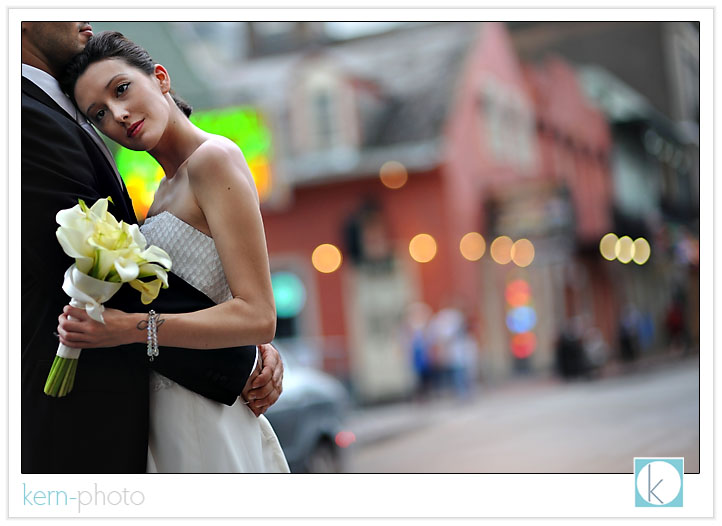
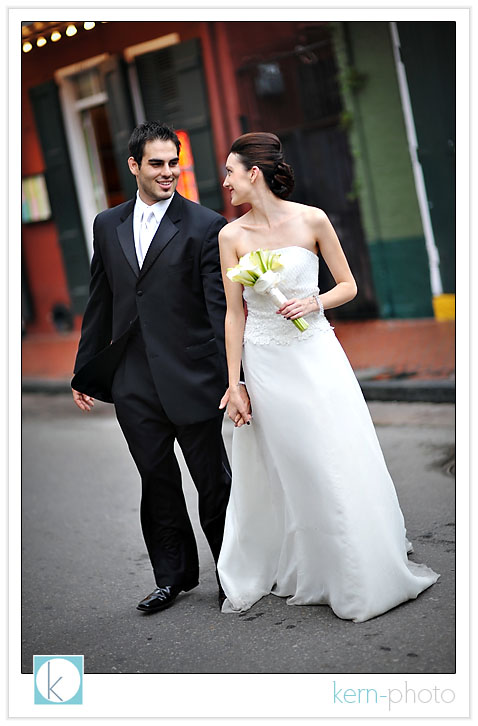
offering context to a place can serve as a creative ingredient for backgrounds. however, placelessness images can be just as fun, too!
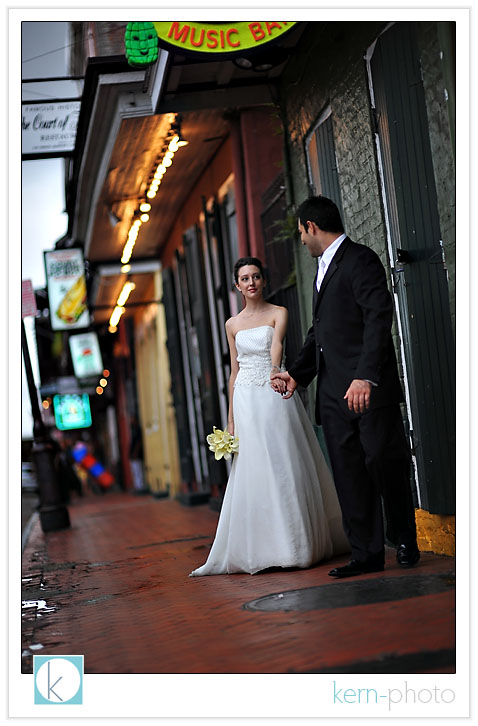
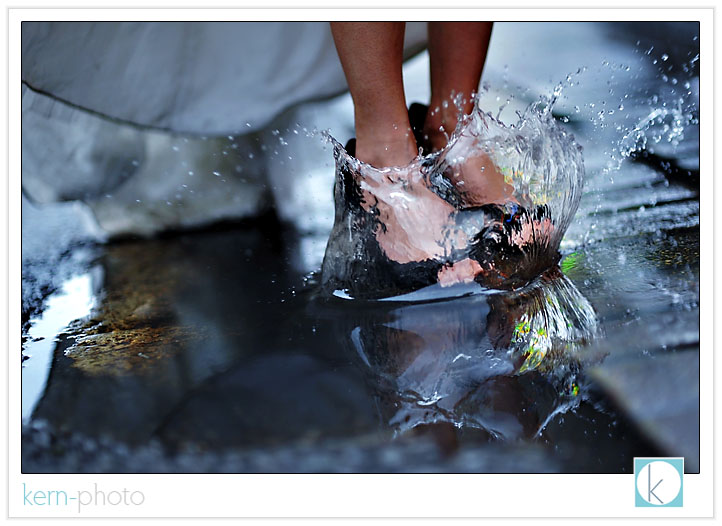
at the end of the shoot, while walking back to the hotel, i engaged in a conversation with jamie. she was interested in trying out an idea inspired by john michael cooper (father of the trash the dress phenomenon) inspired by that shot we all know by henri cartier-bresson (father of the modern photojournalism) of a man jumping over a puddle (“behind the gare saint-lazare”). here’s my set-up:
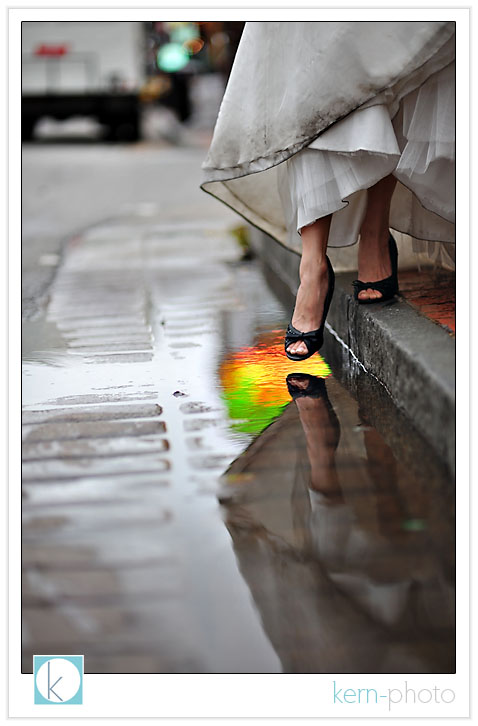
even in 1932, photographs of puddle jumpers were cliche. in 2008, this was no decision moment... just a lucky, fun, moment.
a portrait of jesh de rox:
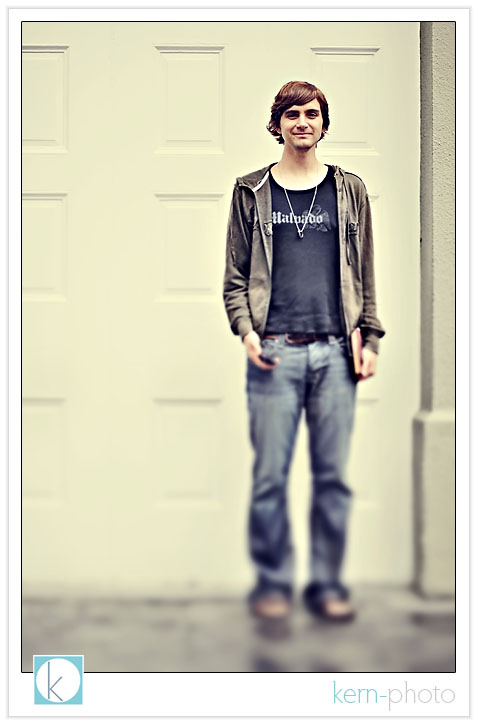
jesh’s words will stay with me for a long time. we spoke about the joy & elation of achieving a difficult goal and the process of intentionally creating the exact same feeling of elation to other aspects of life. my next workshop will be with spent him.
on the last night, we marched through the streets in a big easy tradition with a second line brass band parade:
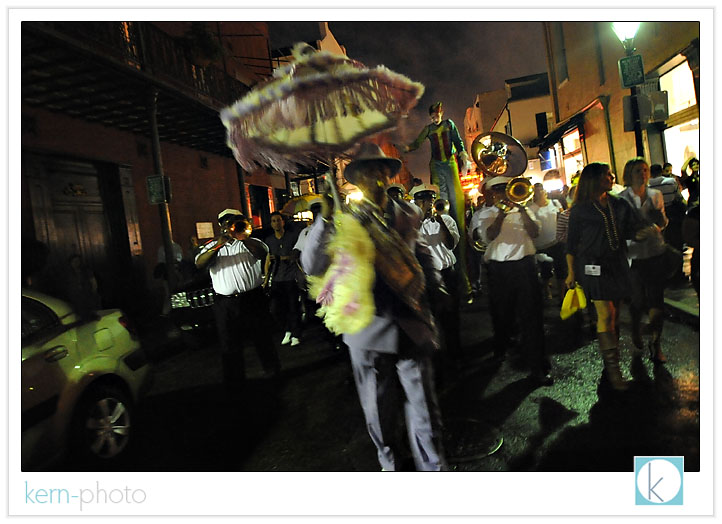
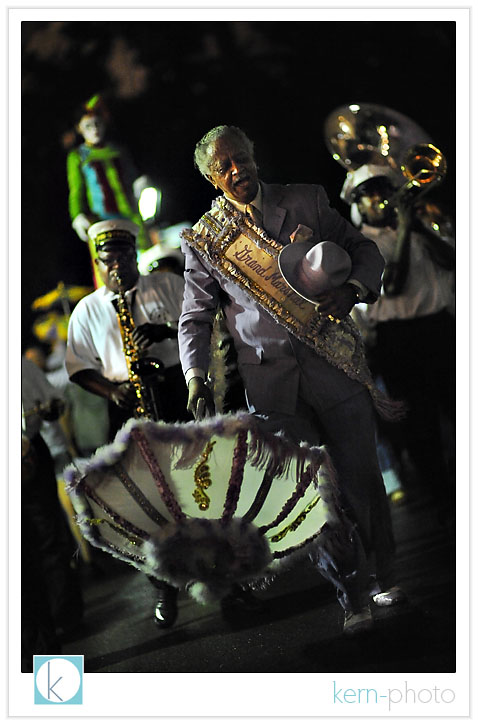
joe photo has as much energy & enthusiasm as a classroom of second-graders and he’s been shooting weddings for over a decade! talk about avoiding burn-out... on a night off, he still parties with a camera in hand!
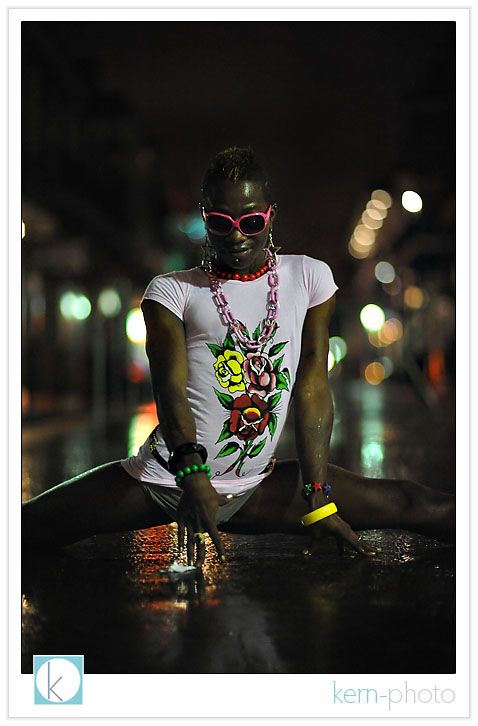
dixie trannie shot at 3:30am, iso 6400, f/ 1.4. hmmm... creative portrait?
the inaugural photographer hand-wrestling competition took place bourbon street. the rules are simple. winner takes all. who cares about winning... it is all about the fun!
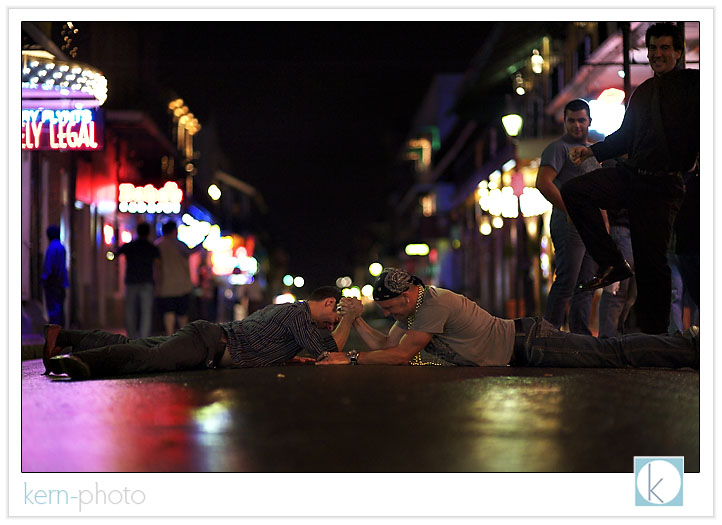
joe photo: 1. kern-photo: 0. and to think he’s got a decade up on me. now that’s inspiration! seriously, people, whatever happened to the testoserone-driven sport of arm wrestling? round II: wppi 2008?
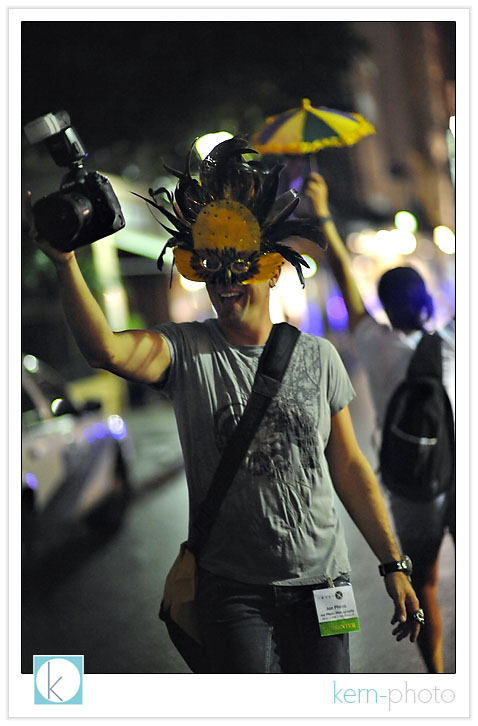
part of the wonderful experience included meeting some awesome people like photographer jan garcia, our cabbie extraordinaire, photographer jeffrey neal.
wedcomp '08
why wedcomp?
- judges are paid for jurying the competition (the way it should be!).
- the judges know their stuff. big names like zack arias, jennifer bebb, rachel lacour niesen, and cliff mautner will be judging. learn more about the judges.
- you don’t have to be accepted & buy into a money-making organization to participate.
- they are investing a portion of the proceeds into thirst relief. we like!
- the contest got great image categories: getting ready, ceremony, portrait, reception that are NOT bottlenecked into one style of photography called photojournalism.
- cool prizes
to learn more, check it:

alt-f inspiration
the “zero” wedding package offered john & dalissa 100% artistic freedom to produce this:
mark twain once said, “never let school interfere with your education.” the above illustrates real-world
how to (re) photograph cars
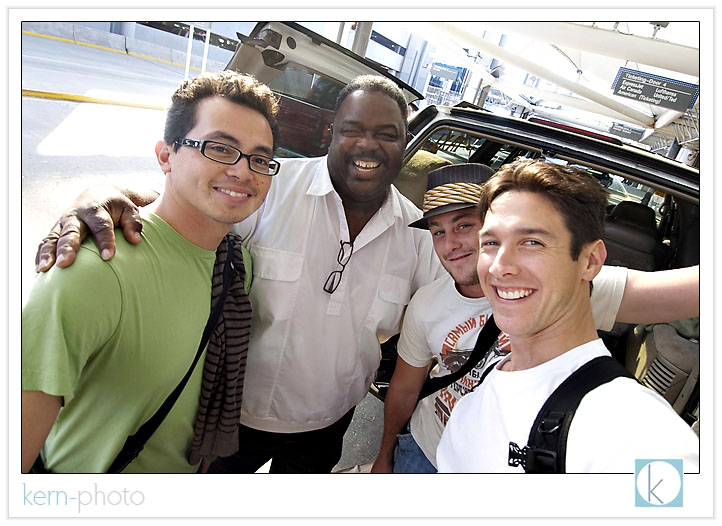
“itching and scratching in the parking lot ‘til 2 a.m,” nicole and my mom jest.
regardless how one may look at it, last weekend was spent creating great memories with my dad, aunt, and uncle in land of the lobster rolls.
this experience inspired me to write this article and share photograhic insight with new friends and car lovers alike.
__________________
if you every try to photograph cars, the approach can be difficult in comparison to the work we see in the big leagues. motor companies pay top dollar to have their vehicles looking their best so they can sell them. to the antique car collector, car photography is just a slight margin below a family portrait.
“good” car photos go along way: they can help to boost a car sale or can serve as an invaluable document for insurance purposes. but reasons to photograph cars go much farther than that. as a photographer and a son of a car lover, there something exciting about sharing images of a car, restored completely to show-room shine after years of patience.
i offered a pseudo coffee-shop class to members to offer them tips on how to photograph their classic cars. many of them have a digital cameras and asked me how they can take "better photos” because they couldn’t get the results they were hoping for.
since not everyone was able to make the mini-class, so i’ve jotted down a little bit of what was discussed. the golden nugget:
*** there are rules. and there are rules to be broken. if you choose the latter, do so with creative intent and purpose.***
after considering this, here are 21 tips on how to photograph your car (in no particular order)
1. shoot in the "golden hour." this can be either at dusk or dawn. generally, these are good times to photograph, and occur 30 minutes before and after either sunrise or sunset.
2. shoot long. a longer focal length lens minimizes distortion and helps to increase background focus blur, drawing your eye towards the subject, rather than a distracting background.
3. shoot with perspective. a telephoto lens helps to compress the car, adding a dramatic perspective.
4. about face. turn the front wheels so you can see the wheel face.
5. chimp and look at the screen on the back of your camera. use your tools to their fullest. if the picture looks too dark or light, change your exposure. white-balance off? adjust it. nailing your shot in camera will save hours of time in front of the computer later.
6. keep your background interesting, yet not distracting. trees, a clear sky, or a field works well. a white car against a gray sky can appear boring. contrasting backgrounds can create more interesting images.
7. change up the angle. slant uphill or downhill simply by tilting the camera angle. tilt the camera to make the car look like it is going up or down a hill, offering more drama. for added drama during twilight, turn the headlights on.
8. clear background clutter. a slight adjustment to camera position can make a big difference. unless, of course, you want powerpoles growing out of the roof (which can be cool if that is your thing :)
9. shoot 4 wheels. lower your camera angle to view all four wheels of the car. cars look bold & aggressive when shot at this low angle, which helps to "ground" the car and make it appear more "solid."
10. know when to use filters. a polarizing filter on an SLR lens can reduce reflections on paint, windows, and chrome. learn how to use it. in addition, a neutral density graduated filter can help to keep skies rich in color and minimize loss of shadow detail of the subject. again, learn how to use it. the goal is getting it right first in camera and then no having to do heaps of post-production in photoshop later.
11. look for good light. photograph the car with the shadow on the other side of the car for the 'best' light. however, rules can be broken. this is a good one to break if you are creative :)
12. megapixels has nothing to do with making a good photo -- YOU do. don't believe the megapixel myth.
13. shoot when the sun is low. overhead sun casts heavy shadows leaving the sides of the car in the dark.
14. size matters. when you are ready to print, remember the aspect ratio of most cameras is 2 x 3. that means you'll get a "full-frame" 4 x 6 image with no worries, but cropping will occur if you intend to fill an 8 x 10 print. plan ahead with your composition if you know you are planning to crop a photo to a different ratio.
15. use good glass. professional-grade SLR lenses may offer improved contrast, sharpness, and minimal distortions over older point-and-shoot cameras. my favorite car lens: the nikon 70-200mm f/2.8 af-s vibration reduction. we invest in good lenses before we invest in cameras. a digital camera is obsolete after a few years, while good lenses can last for decades and not become obsolete. learn how to manage obsolescence.
16. light, composition, and a strong idea are the three ingredients for a *great* photo. a *good* photo has at least two of the three.
17. if you don't have good light, create it. lightpainting can yield some creative results talked about on the kern-photo blog here.
18. for low-light shots, use a good tripod with a timer or boost up the iso. this will greatly extend your working time past sunset. good cameras can shoot in almost no light and still pull off great results. practice and creativity is key here. a street light can be an effective lightsource. don’t forget about subtle ambient light as well.
19. zoom in and fill the frame. 10% car and 90% landscape isn't necessarily "good." again, another rule to break if you have that extra dose of creativity.
20. bring extra batteries & memory cards on location. flip used cards face-down in the case to remind you they've been used. nothing like getting all setup with perfect lighting and a clean car and something minor technical glich rams its face your way.
21. back-up. back-up. back-up. after every shoot & before i lay my head on the pillow, i try to have everything backed up in at least three locations (external harddrive, computer, and memory cards). keep the most important shots backed up to DVD off-site if possible.
in sum, we kept it simple and to the point, then followed it up with a light painting demo which was a "light-bulb" experience for many :)
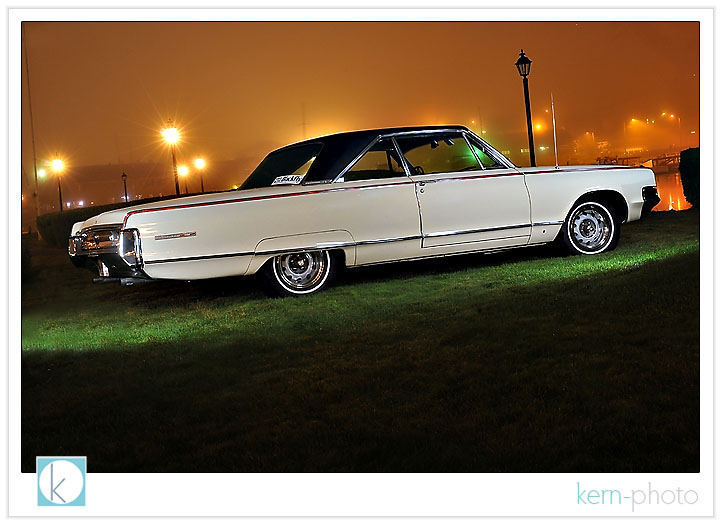
below is the final shot we did with the group watching with the before lighting painting and after (post questions on the comments section below and i will try my best to answer them):
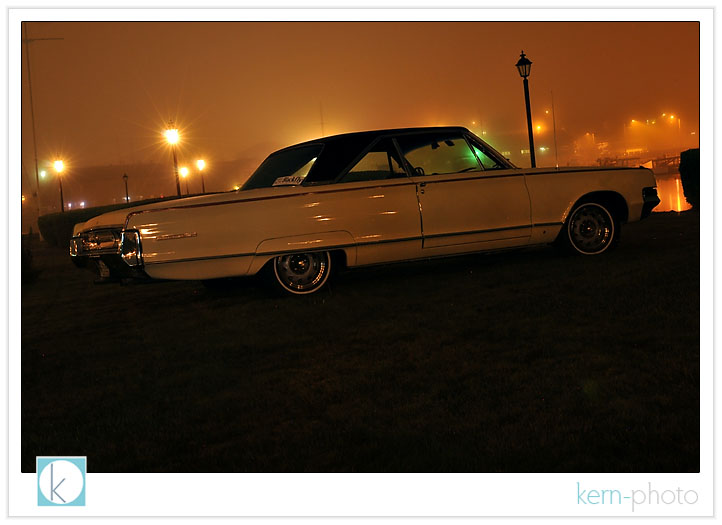
and after a 20 second exposure, lighpainted with about 5 pops of a lumedyne battery pack at half-power diffused via a small softbox. notice the subject changes while the background remains the same due to the lightpainting effect.
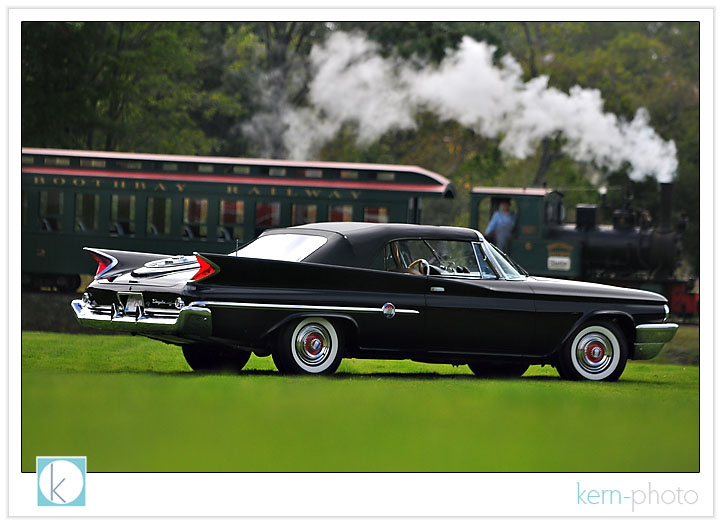
chrysler 300 D with the atlantic ocean in the distance:

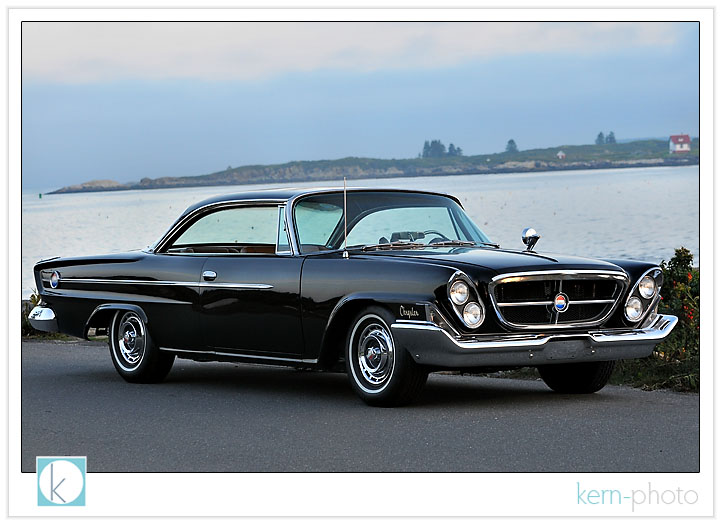
chrysler 300 G:
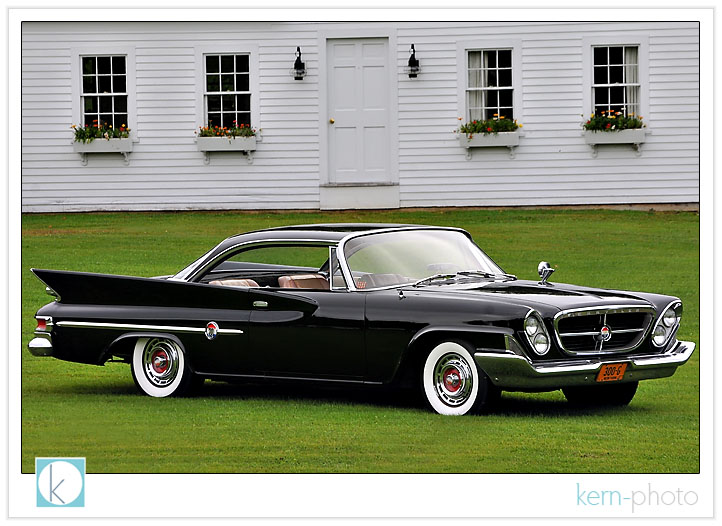
the nostalgic “forward look.”

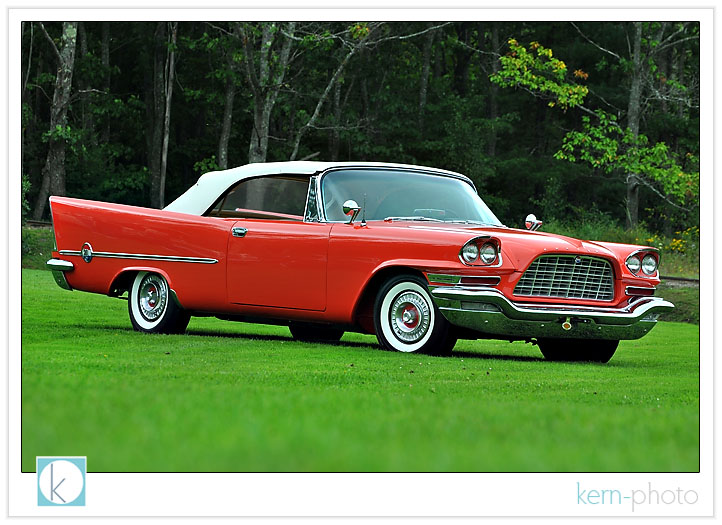
personally, one of my favorite models, the chrysler 300 C convertible:
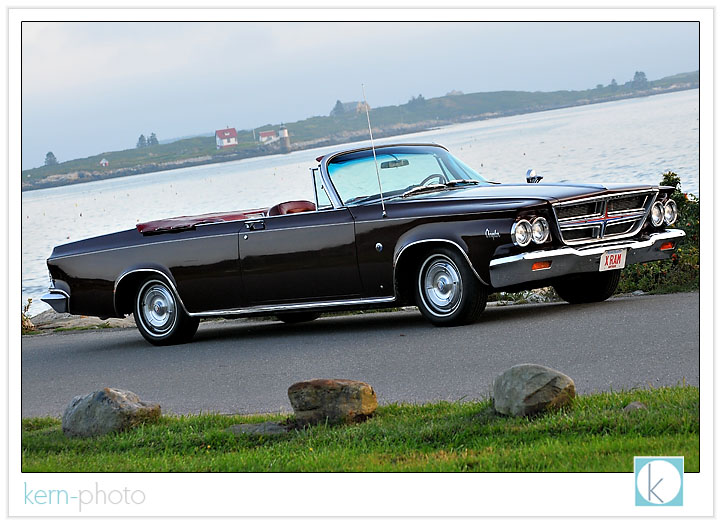
we waited for a few minutes for this shot of this chrysler 300 F to be just right.
clean light with a scenic backdrop:
to view more images on the event website, click HERE.
and to view a few images from the fall 2007 meet, click here, here, or here. and here’s a bunch of favorites from the 2006 fall meet in lawton, oklahoma.
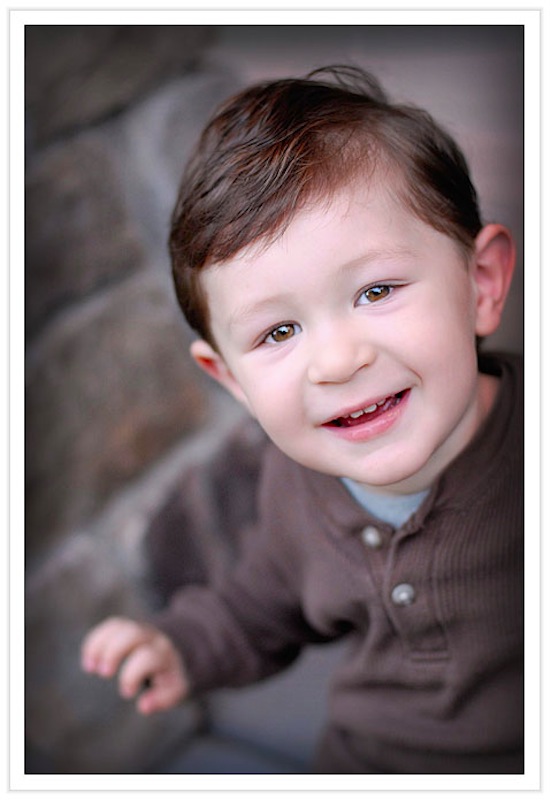
photographer headshots
‘nough said. the pressure is on, in a good way.
in our line of business, having a ‘good’ head shots helps bring our clients closer to us... giving them a glimpse into the warmth and humanity of us... humans. we are not just a name, buisness, but are fun loving people who love to use our cameras to bring out the best in people.
nicole marie needed some currently headshots for her photography business website. we met up last week for coffee and had a wonderful time talking shop. i enjoyed learning more about her, her family & business. she even allowed me to check out her spiffy canon 50 f/1.2 glass... tempting, but i still like nikon :)
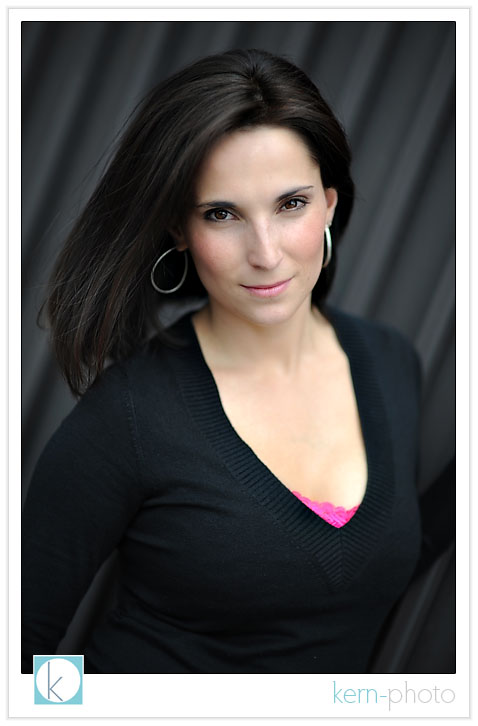
i told nicole i probably wouldn’t post the shots on the blog, but i was wrong. the bokeh of the 85 f/1.4 with the full-frame advantage of the nikon d-700 was too much to resist, so i had to post a few favs from our 15-minute mini-portrait session in lakewood;
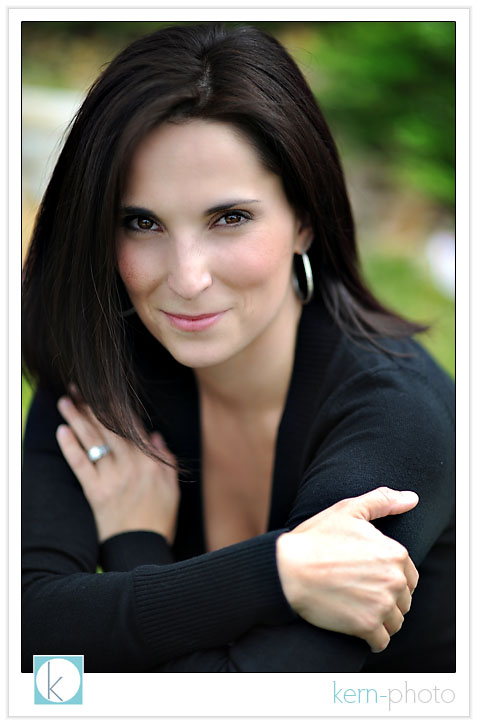

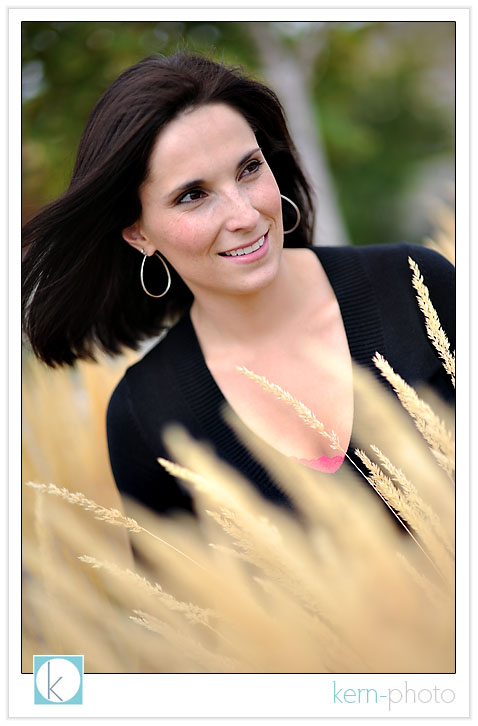
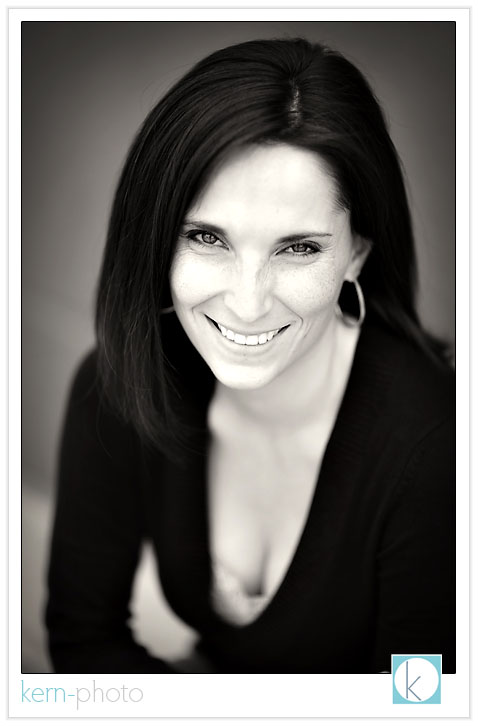
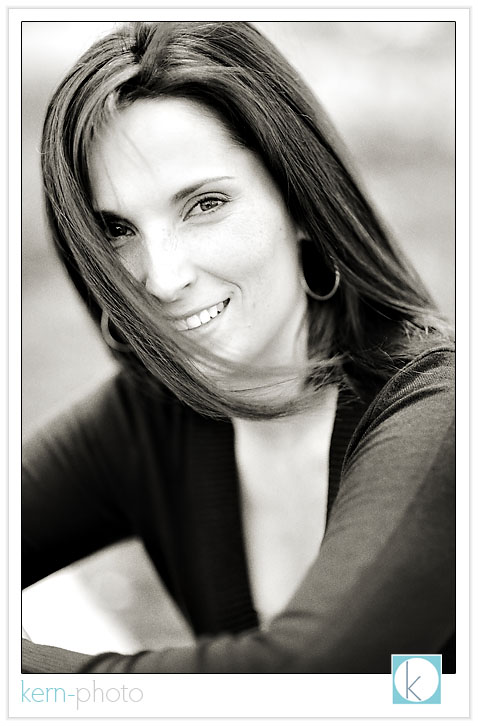

one of the final shots, smack dab in front of a kinda stinky dumpster... but it made for a simple backdrop that i thought worked.
is a headshot more than just a portrait? add your comments in the section below.
free to succeed in denver
david jay and becker were the inspiration behind the kern-photo coffee-shop class, which is all about paying it forward by giving back to the photography community.
the A+ learning experience wasn’t all about the things i heard, but the people and HOW they said them. they speak from the heart with aim to help. for those not starstruck by famous wedding photographers you meet on the street, let me offer an example: as an art history major in college, it was one thing to see a slide of painting in class of famous russian abstractionist vladimir kandinsky, then memorizing dates, places, and minutia in the importance of the artists work to the period. but it was completely another thing to actually EXPERIENCE his work. rounding a corner at the museum of modern art in new york and seeing it firsthand hanging on the wall, brush strokes and all.... the real deal.... WOW. that’s kinda like meeting david jay and becker, in my aspiring & enthusiastic photographer mind :)
take away messages from their talk included not letting our buisness control our lives, being happy at being ourselves, and ensuring 100% top-notch customer service to our clients. i’ll need a few more weeks to completely digest, rethink, and re-digest what was learned. however, it was a grand experience and worth every penny of time & effort.
some favorite moments of the evening including sitting next to buddy gino siller and sharing “guy moments”, being inspired by the husband-and-wife pearls of wisdom from katie & chris humphreys, energizing with my sisters from anotha motha paige elizabeth & shannon & wade kaple (had to steal that one, shannon :), hearing about erin cady’s move closer to denver, meeting lynsey peterson for the first time who was so awesome to have referred us a wedding without even meeting us, and talking about leading a balanced family life with family guys james christianson & jared wilson. there’s a wonderful sharing community among denver wedding photographers and i’m proud to be there to help.
i took only a few photos that evening, mainly because the emphasis was thinking and taking notes, not shooting. however, the whole experience was part of #87 on my 101 photo goals in 1,001 days.
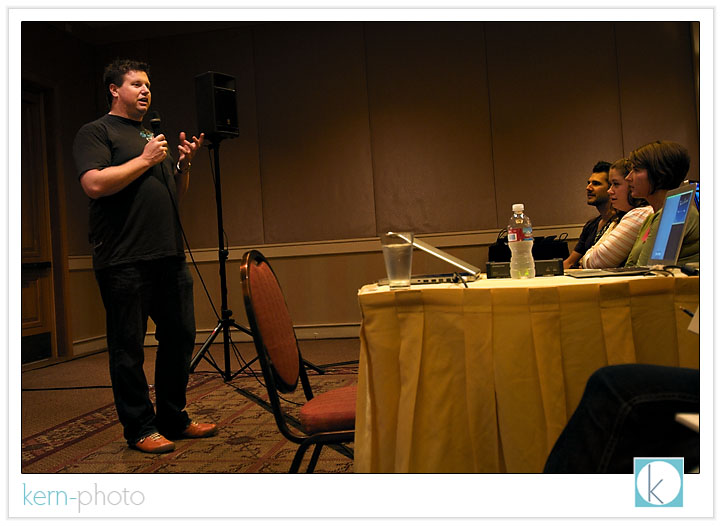
here’s david jay (dj), father of open source photo:
becker rivotted the crowd with his personal experiences of how he overcame being a “newbie” and learned to work with other wedding photographers instead against. that has made his buisness today one of the most profitable wedding photography buisnesses in the industry. spot d. j. in the far right.
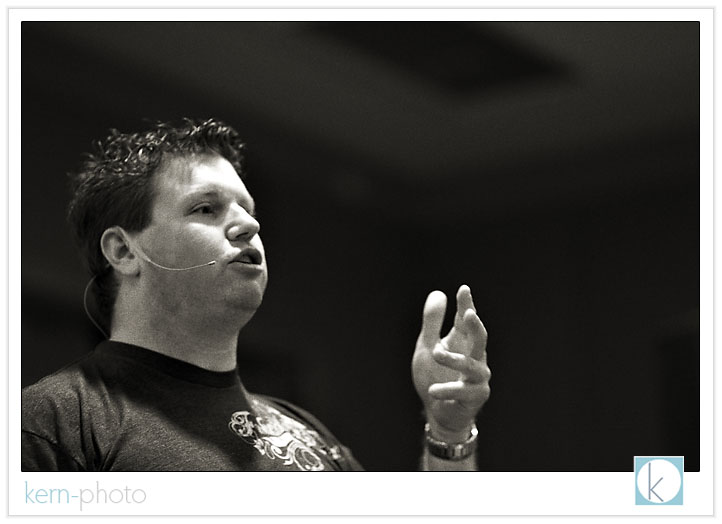
professor [b] speaks without a PhD, but with real world experience. in the wedding photography industry, that is what matters most. mark twain once said, “never let school interfere with your education.” true that!
paige elizabeth, shannon & wade kaple, nicole marie embrace the david jay experience.
crazy boys:
okay, okay... 1/20 second has it’s weakenesses. but i still love this cheesy moment with two heros :)
vania posted some rocktastic images from the event over at her blog. i love her blog title, “the begining of the super photographer mom.”
radiopopper review, published
that's goal #39 checked off my list of 101 photo goals in 1,001 days. a special kudos to tom boné, chief editor at nikonians, for his stellar editing. he didn't seem to mind... too much... that my text was in 'kern-photo' lower case :)
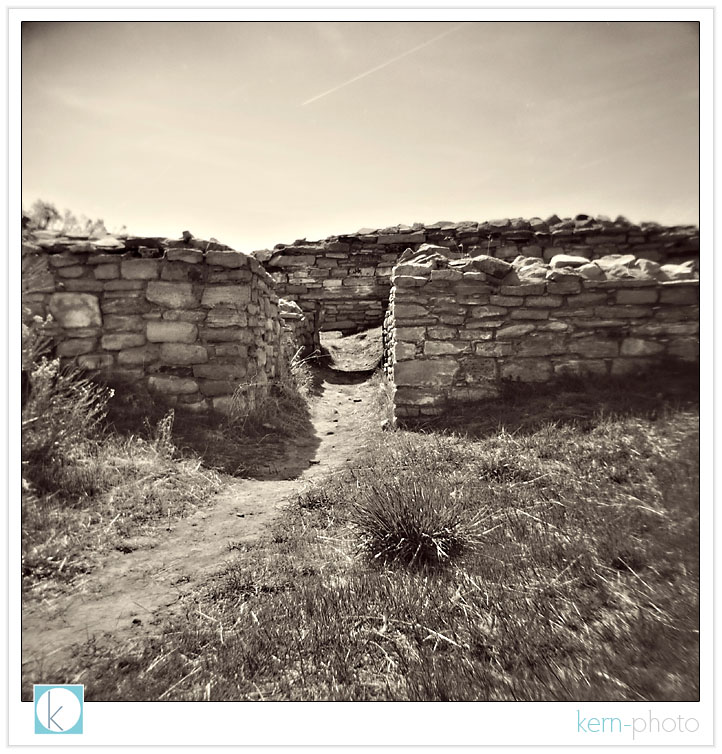
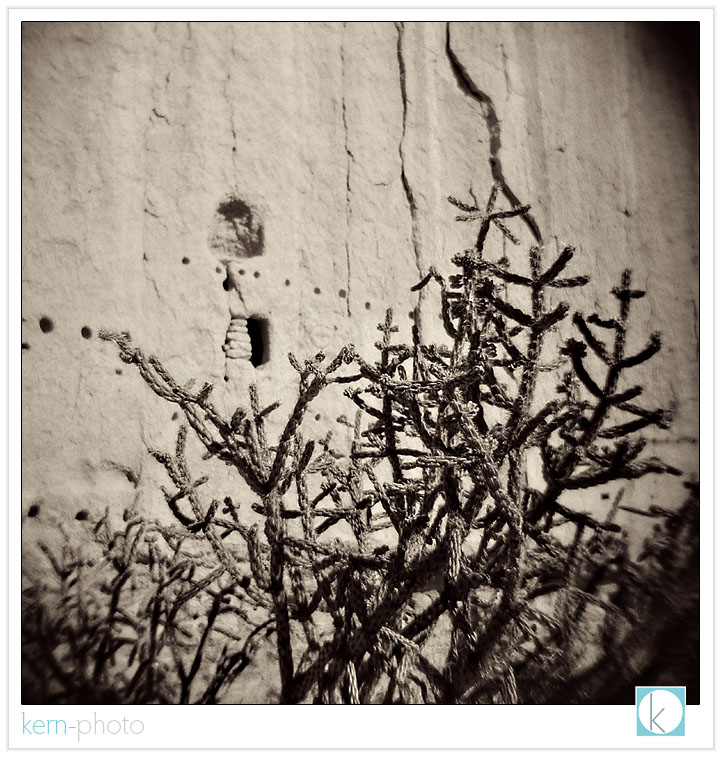
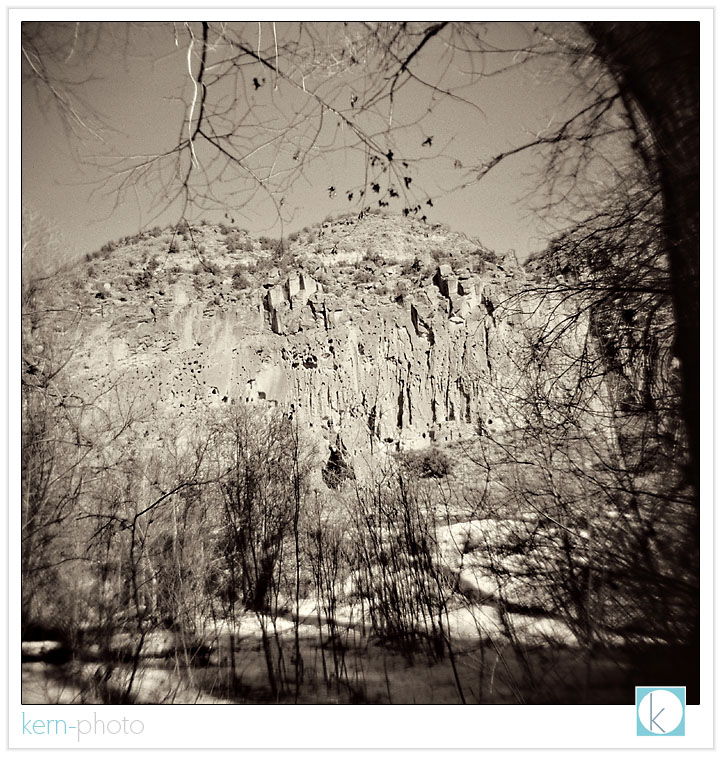
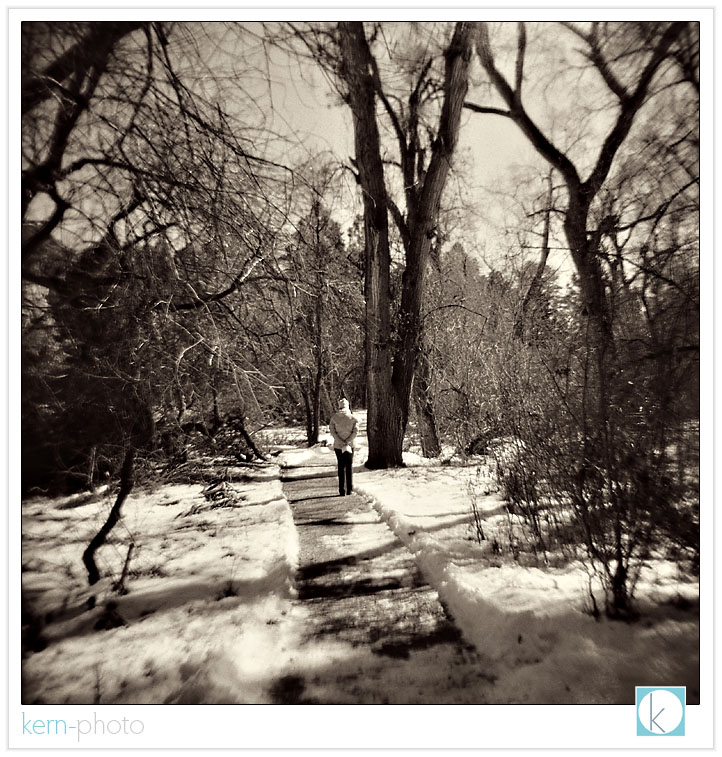
holga series: round 2
a roadside pit stop near the top of red mountain pass, colorado, shot with a holga:
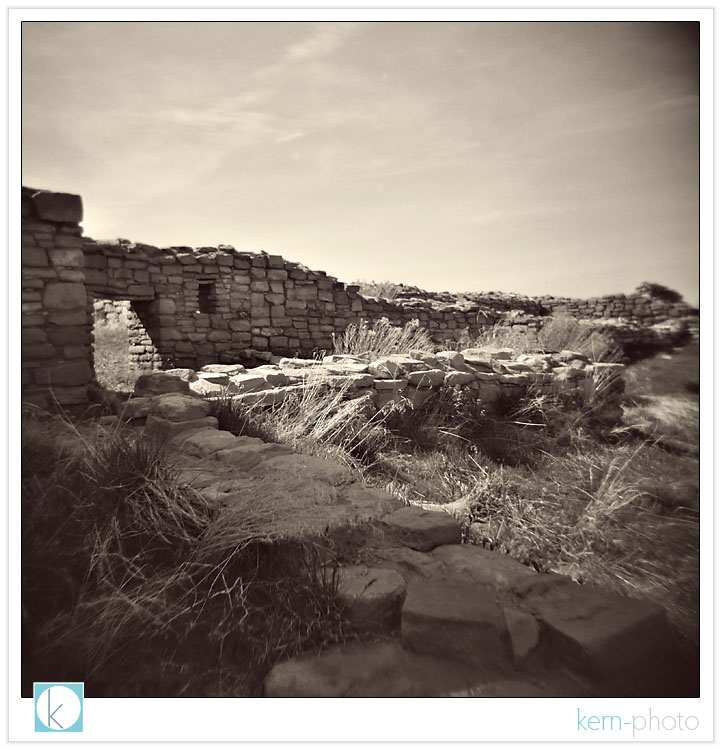
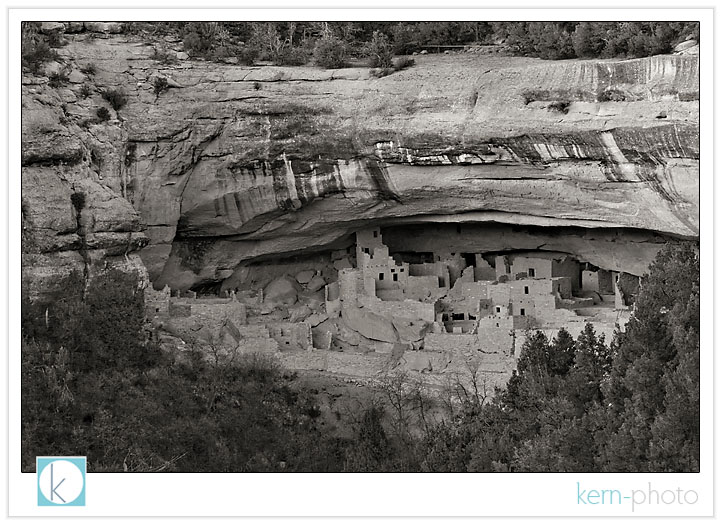
canyon of the ancients national monument are well preserved by tax payer's dollars:
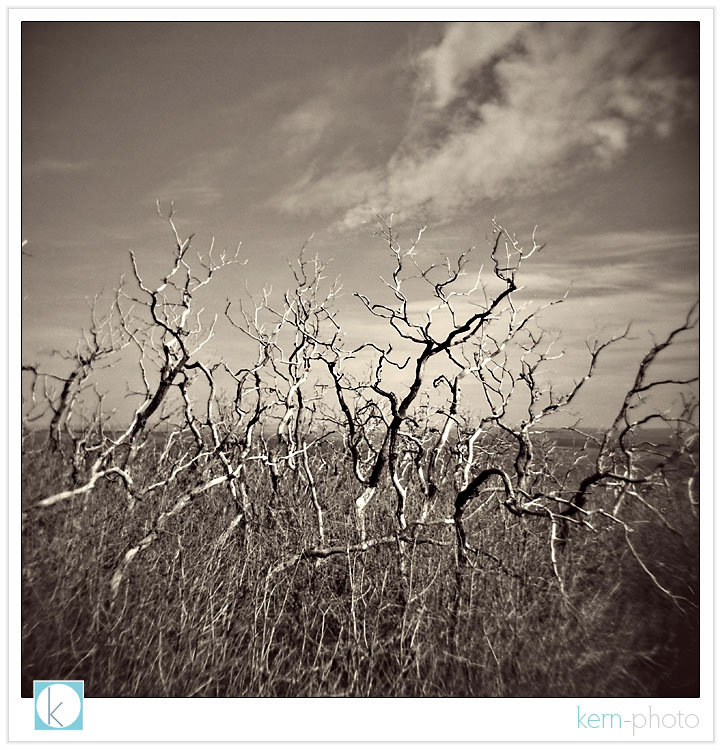
wildfires in 1996, 2000, and 2002 burned much of the park. for the first 20 or so miles of driving in, the not-so-green-table looked very much like this, as shot from the fire lookout at park point overlook:
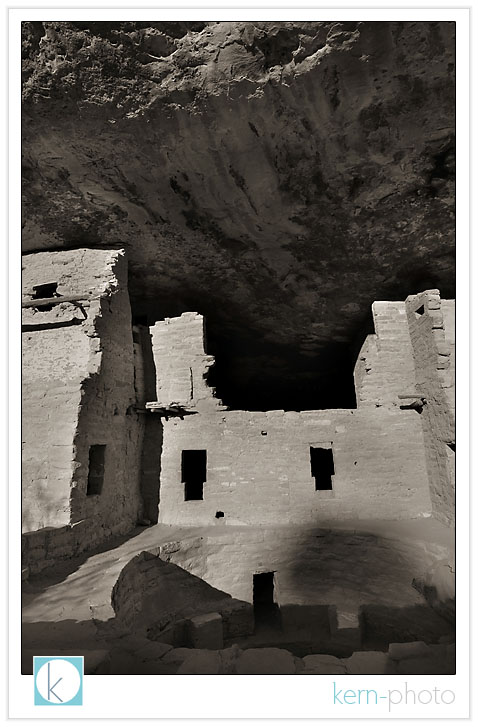
the spruce tree house, among the best-preserved cliff dwelling at mesa verde:
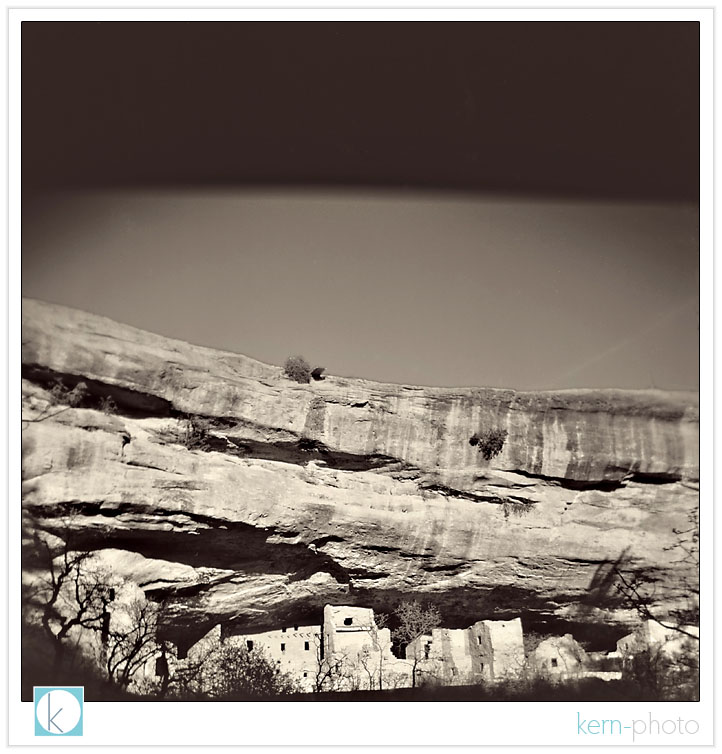
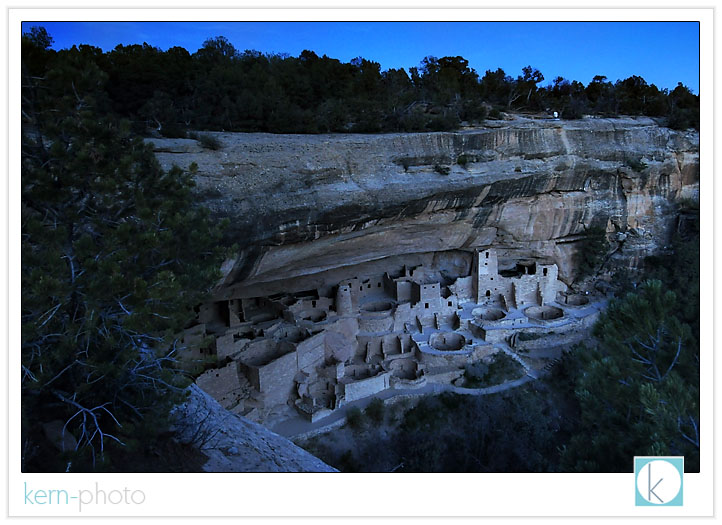
to avoid harsh shadows, i chose to shoot the largest cliff dwelling, cliff palace, at dusk using a tripod and my 70-200 f/2.8 lens zoomed to 200mm for 1/4 sec, f/11, iso 200. sorry, my holga just didn't have the low-light capability that the nikon d300 has. it boggles my mind to think ansel adams pulled some great stuff back in 1941 that still rival what a 100 megapixel camera could shoot today. if you scanned in one of his large format negatives at 300dpi, you'd get the about equivalent of about 100MP image. it just goes to show you megapixels don't matter.
and a 4 second exposure after sunset (f/6.7 and iso 800) was needed for this panoramic perspective using the nikon 12-24 f/4lens. it was super peaceful, quiet, and had the place all to myself for the better half of two hours. now, that is a luxury!
the balcony house, built some 1,400 years ago and 'found' in 1884, is an intriguing place to explore. my imagination had fun thinking about what it was like to live a thousand years ago, without the internet, global commerce, and reality-tv. while i was walking around, the rangers were so patiently answering visitor's questions. i overheard one of the small kids ask the rangers, "why did they built their houses so far from the road" :)
i probably would have asked the same question if i was 5 years old!
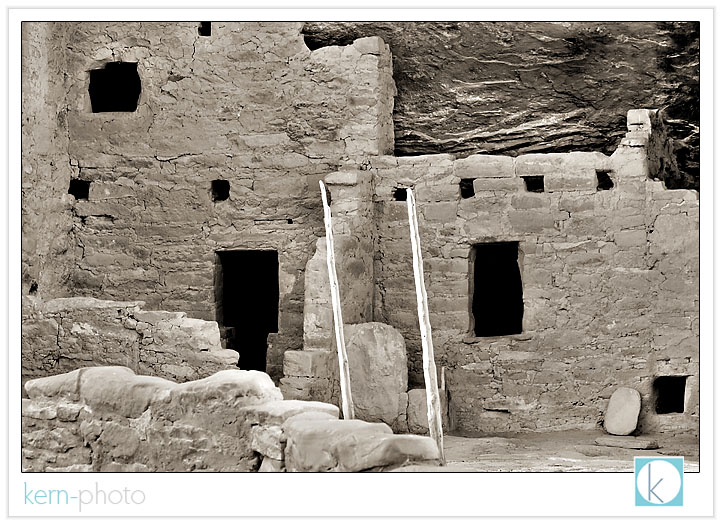


while many the the areas have been excavated and restored, there are many reminders of the ancestral puebloans of mesa verde like rock drawings, pottery shards. i enjoyed seeing the tiny foot holds cut into the rock and spaced apart like a grade 5.7 or so at the rock climbing gym! and to think kids ran up and down this rocks all day long carrying water, food, and toys!

some personal work
it seems those days are long gone for mainstream professional portrait & wedding photographers. however, the giddy landscape photographer hobbist in me still loves to shoot medium format film. perhaps it is a step back to simpler shooting, the greater dynamic range, the "happy light leak mistakes," or just the thrill of not-so-instant gratification of seeing photograph captured months ago.
for a few extra bucks, pictage scans in the images at a decent resolution and allows me to quickly download them directly from their servers via ftp. sure, the whole process of buying film, mailing it in, paying for the cost of developing may cost a bit more than shooting digital. but i will say that the entire process of shooting film medium format film on a low tech camera forces me to think different. creatively different.
talk to experienced film photojournalists: they shoot very differently at the beginning of a roll of 36 than they do at the end of the roll.... especially when they haven't captured a 'worthwhile' moment.
similarly, when shooting with a roll of 12, i find myself thinking long and hard before pressing the shutter. the funny thing i'm discovering, is the "keepers worth printing" are almost at a 90% rate.... waaaaaay higher than the percentage from shooting digital. for personal work, i actually print maybe 2% of what i shot digital. gulp.
chromatic aberations, light leaks, double exposures, and soft vignetting: these are among the hallmarks of the $30 plastic holga. here are a few from my latest 3 rolls of fujifilm fujicolor pro 400h (120mm). you have the option to get 16 images in a 5x6 format, or 12 square images larger in size (my preference).
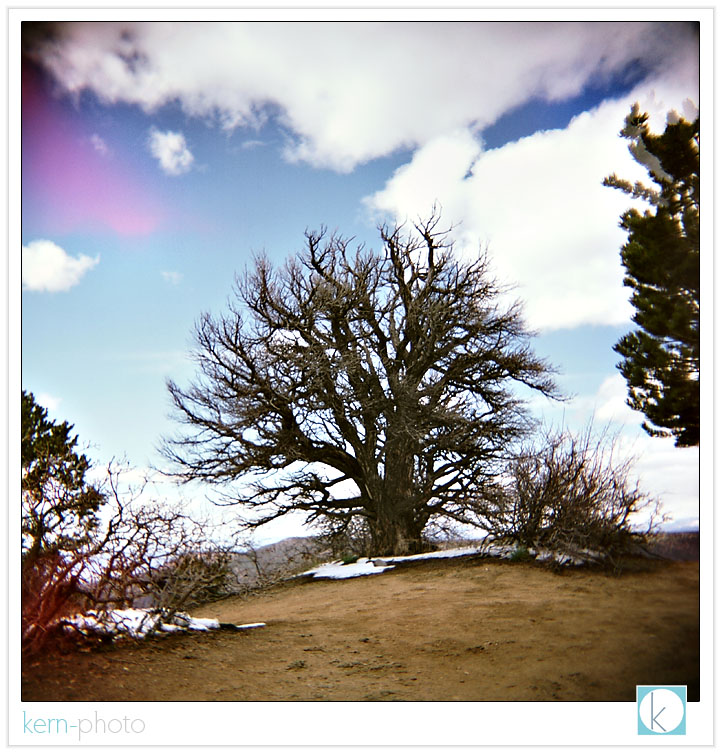
shot months ago, but posted for the first time below, here's the black canyon of the gunnison national park in colorado, as seen through my holga:

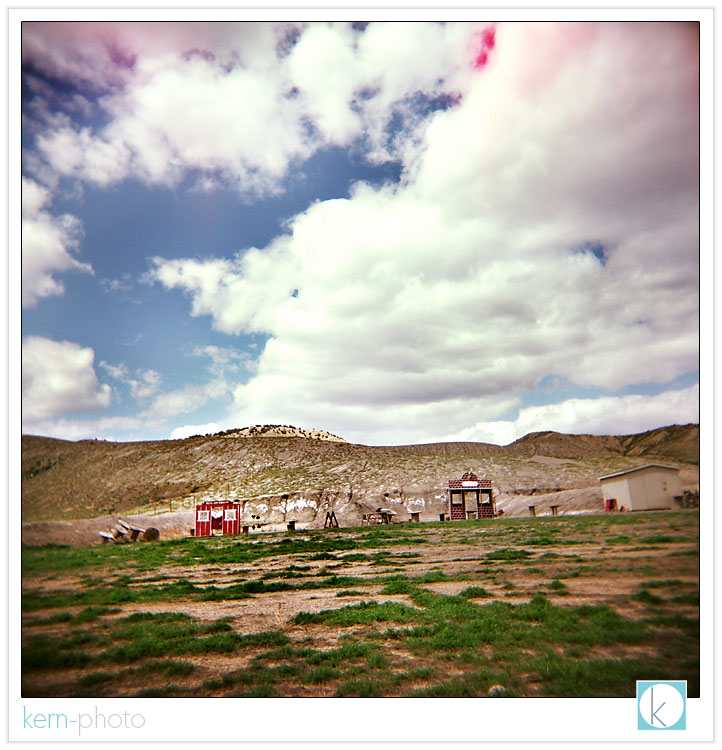
a shooting range just outside the park entrance... gotta love the dynamic range straight out of the camera:
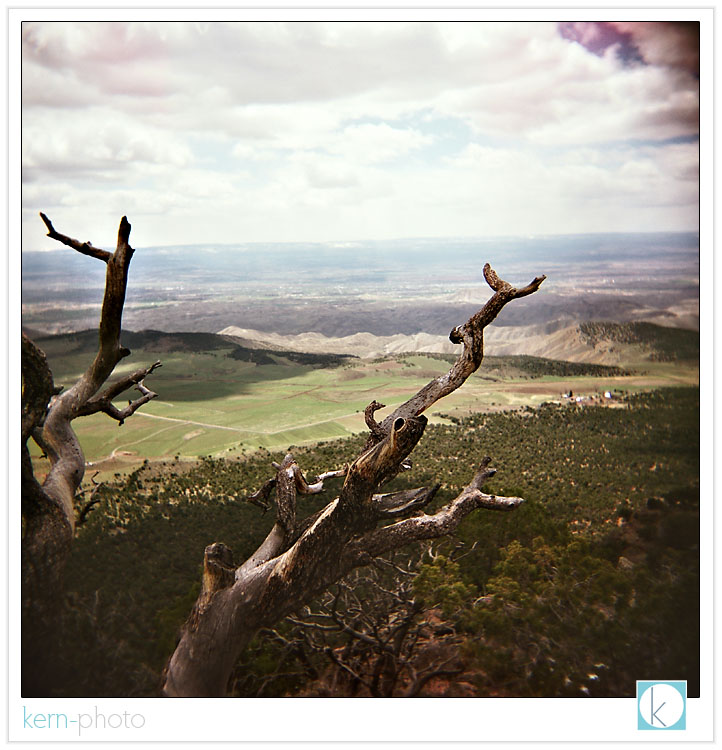
view of montrose from a short hike in black canyon of the gunnison national park
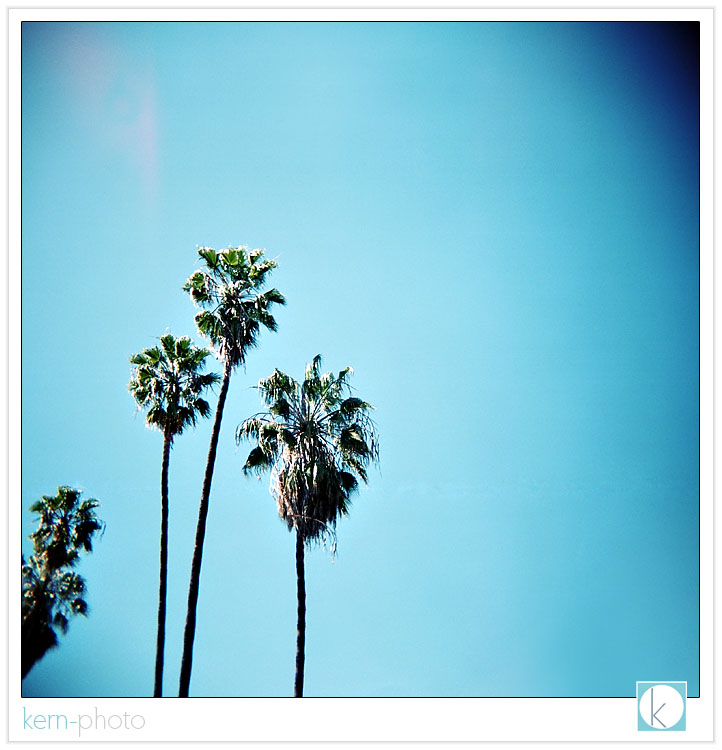
palm trees in avalon, california
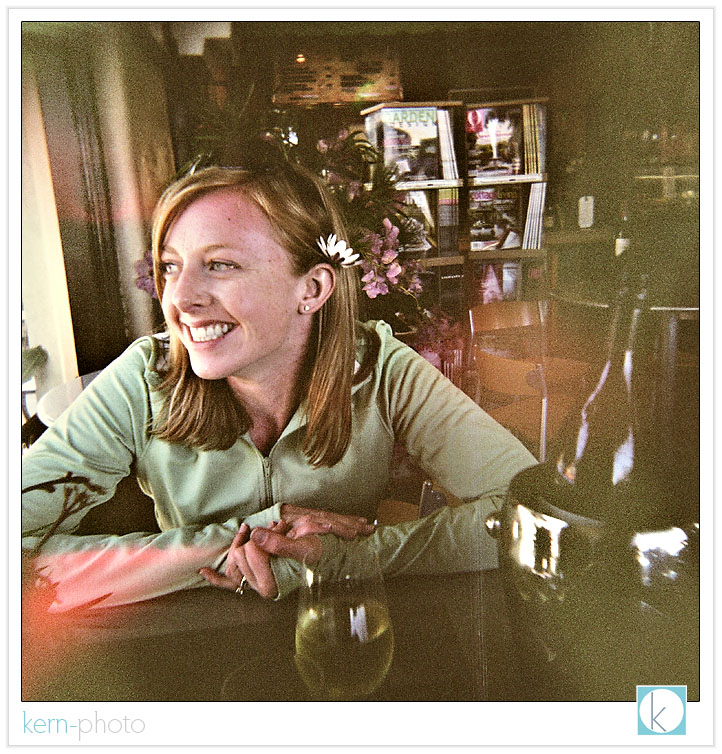
love the grain in this photo of nicole, taken after enjoying a bottle of riesling and chocolate cake on a hot day in avalon, catalina island:
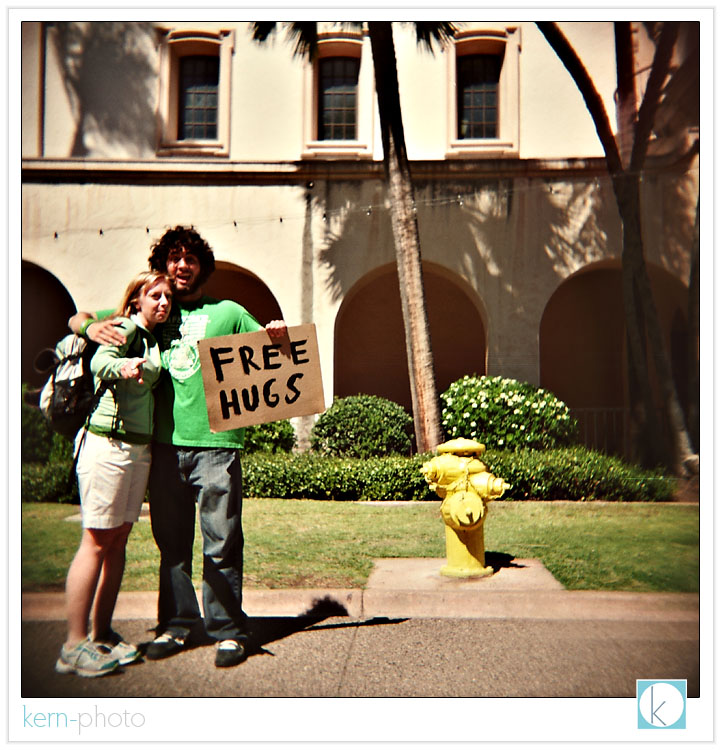
nicole gets a "free hug" at balboa park in san diego, california. behind me, the museum of photographic arts, showcases some awesome photographic art and has a killer artsy bookstore and cool photobooth inside. it is a must see if you are in the area!
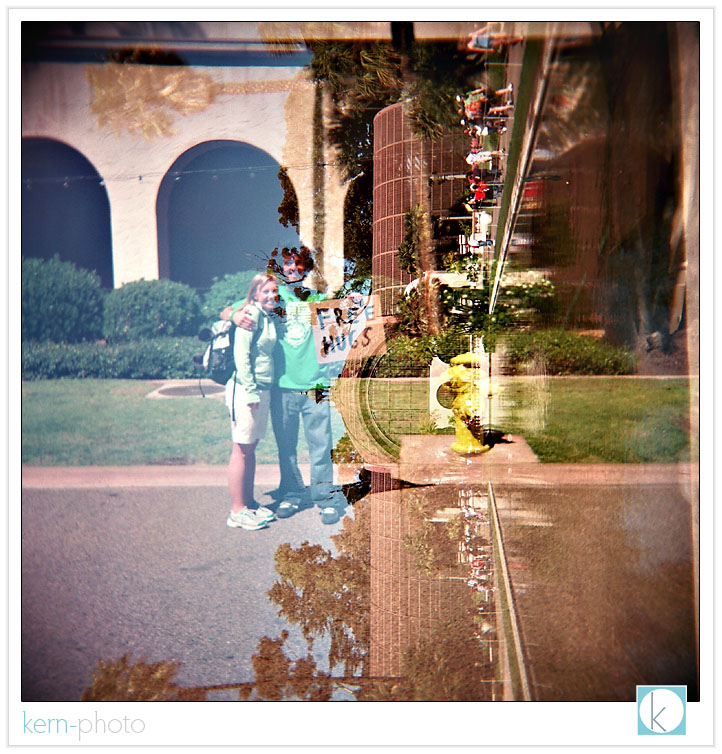
an extra cool 'happy mistake' resulting from an accidental sideways double exposure:
stay tuned in a few days for a series of landcapes of mesa verde national park, among other colorado locales also shot with the holga-nator.
mounting a radiopopper on a puffer
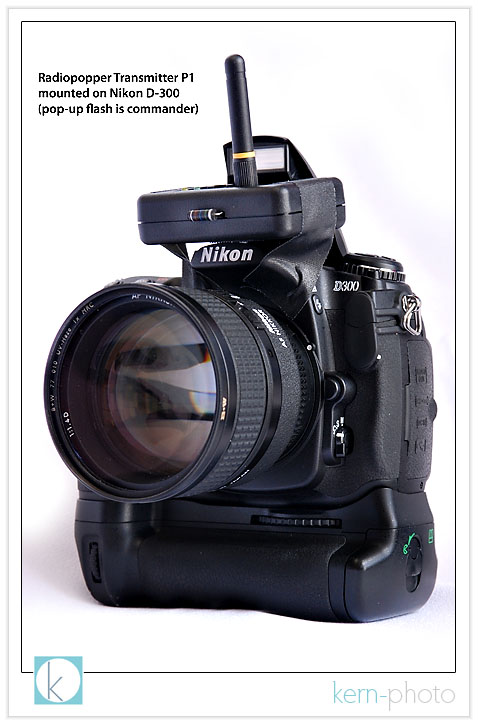
with a little macgyver inspiration, some glue, velcro, and a spare battery cover we're able to do the unthinkable: use our wonderful in-camera pop-up flash as a commander to trigger an off-camera flash using absolute brilliant radiopopper p1 functionality.
paper clips and chewing gum not needed on this mission :)
the radiopopper p1 owner's manual states: "The P1 system was never designed to work with the so called “pop-up” flash on some Nikon cameras, but it does indeed function and activate. Mounting is somewhat “improvised” at the user’s discretion. A mount may be available in the future. Improvised mounting should attempt to place the external pickup sensor directly behind the flash tube inside the pop-up flash."
uh, "may be available," makes me impatient. so, i macgyvered an "improvised" mount to change the phrase "is available." btw, this works waaaay better than the piece of black gaffer's tape illustrated in my full radiopopper review. you all are smart, so with a few photos, you'll be off making your own radiopopper bracket in no time.
the ingredients are rather simple:
here's the skinny:
1. the plastic welder can be found for about $5 at your local hardware store. super glue is not recommended, as the hold is not as strong. you do not want to rip off your bracket while trying to remove your velcroed radiopopper p1 transmitter. schmear it on good. allow plenty of time to dry.
2. the rechargeable lithium-ion plastic battery cover is the secret. it is supplied with any new nikon d50, d70, d70s, d80, d100, d200, and d300 camera which all use the same e-nel3e (if you purchase a spare, it ships with that, too) . i never use mine since my batteries are either in the camera on a recharger. the reason battery cover is ideal: it ain't too big or small, is rectangular, and has a nice 1/4" lip to bolster the surface area you'll want when you are gluing. you have limited real estate on the base of the transmitter and do not want to cover up the screws sealing access to the single AA battery compartment (poor design). using an sharp blade, cut the battery cover 1/3 lengthwise. you'll want to use the remaining 2/3 portion for the mount. if you can think of something cool to do with the remaining end, be sure to contact us and comment in the blog below.
if you do not have a battery cover, those little, clear compact flash card cases work almost just as well. i say almost because they are a little larger and do not make as snug of a fit as the battery cover. you'll want a close fit to ensure a solid gluing surface.
3. industrial-strength velcro... you might as well purchase some industrial-strength velcro while you are at the hardware store. you can buy it by the foot for about $1 or so. don't get the cheap stuff, which picks up lint and over time the strength of the fastener will decrease. adhere the "fuzzy end" on your old battery cover and the "hook end" on your poppers. if you want mounting velcro on another flash, use the "fuzzy end" as well. if you don't , the "hook end" of the velcro will stick to the inside of your camera bag in a big way :)
before & after:
after the newly-cut battery cover was glued to the puffer bracket, i used some black acrylic paint with a small brush and painted the underneath to conceal the "clear" color and the ugly dried paint, making the whole shebang a bit more uniformly "black."
now, it is ready for mounting :)
you can use the puffer as it was intended or remove it. however, if people are paying you to take their picture, i would gently recommend removing the white diffusion dome :)
my initial thoughts on the puffer:
1. you get what you pay for. too bad you spend $8 to ship $19.95 in plastic.
2. the plastic is brittle. i would not use in cold conditions.
3. the puffer doesn't stay secured very well on its own, so it might need some strong glue to adhere it. however, that would make it prone to break if you toss it in a bag. totally up to you.
4. the puffer works decent to diffuse the a
5. i experienced some trouble with quality assurance & control at gary fong, inc's customer service department. after placing my order (initially, shipping was *free*), i got a phone call the following day informing me that their "system" goofed and didn't charge shipping and that i now needed to pay the shipping charges of $8. huh? a few hours later after speaking with a supervisor, they agreed to reduce the shipping charges to $4. cool. then two boxes show up on my doorstep a few days later with two full-priced invoices enclosed. i only ordered one unit. after another phone call, the customer service rep was very kind and professional. they allowed me to keep the second unit at no cost, far more pleasant than a trip to the post office and return postage.
the bracket, on the other hand, is worth the $20. my guess is the plastic mold used in manufacturing cost lots of pretty pennies. it would be difficult to macgyver that from scratch.
overall, this solution seems to work. i would say that this whole set-up is not a bombproof as a pocketwizard set-up, but at least it works. and remember, the "ideal" scenario would be to mount the transceiver to another speedlight and mount that on the camera. but for strobists on a dime, this solution should buy you time until you can afford the complete joe "nikon likes me" mcnally setup for several thousand dollars.
_______
and for giggles, here is a list of problems solved by the REAL macgyver. if you missed it, be sure to watch last week's SNL pee-your-pants hilarious "macgruber" skit here.
_______
if you've found this review help, feel free to add your comments below. think of it as our tip :)
radiopopper p1 review

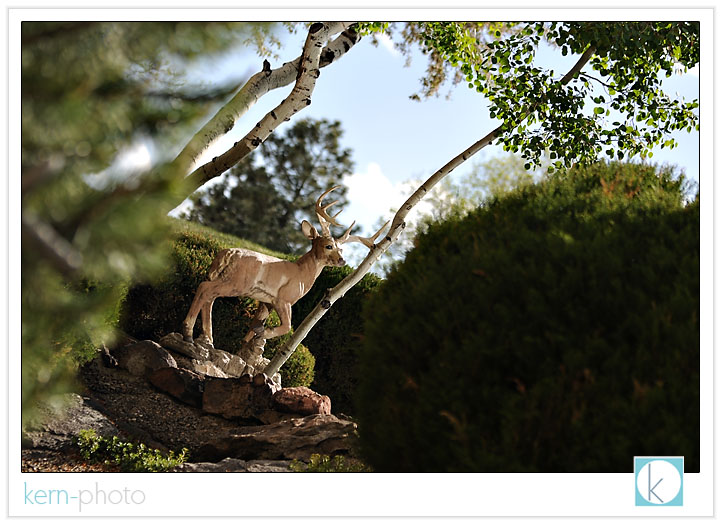
*PHOTO GEEK-ALERT*
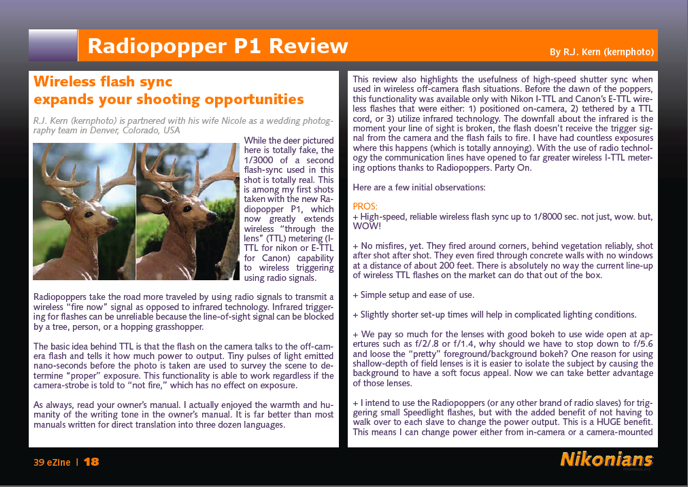
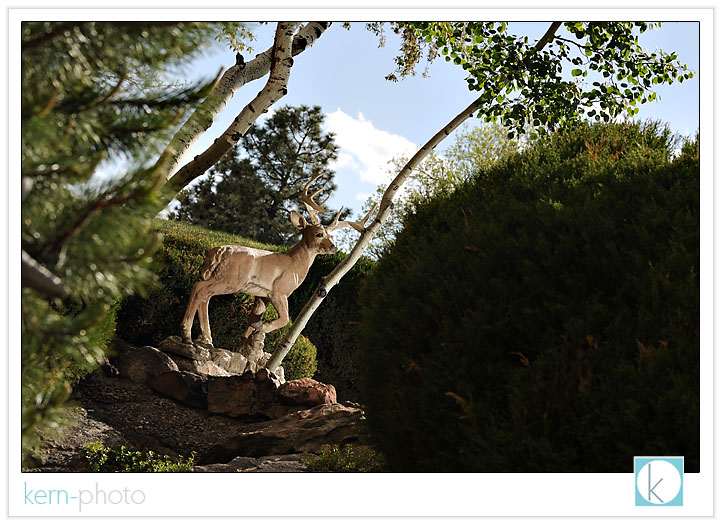
while the deer pictured above is totally fake, the 1/3000 of a second flash-sync used in this shot is totally real. this is among the first shots taken with the new radiopoppers p1, which now greatly extends wireless "through the lens" (ttl) metering (i-ttl for nikon or e-ttl for canon) capability to wireless triggering using radio signals.
radiopoppers take the road more traveled by using radio signals to transmit a wireless "fire now" signal as opposed to infrared technology. infrared triggering for flashes can be unreliable because the line-of-sight signal can be blocked by a tree, person, or a hopping grasshopper.
the basic idea behind ttl is that the flash on the camera talkings to the off-camera flash and tells it how much power to output. tiny pulses of light emitted nano-seconds before the photo is used to survey the scene to determine "proper" exposure. this functionality is able to work regardless if the camera-strobe is told to "not fire," which has no effect on exposure.
check out more radiopopper reviews here. and if you want to read more specifics about the p1 system and installation guidelines, head over to radiopopper and sleuth out the published owner's manual and Installation video (Quicktime, 6 min, 14Mb). btw, i am not endorsed by radiopoppers and this review simply serves as my first impression of these new creative lighting tools.
as always, read your owner's manual. i actually enjoyed the warmth and humanity of the writing tone in the owner's manual, far better than most manuals written for direct translation into three dozen languages.
this review also highlights the usefulness of high-speed shutter sync when used in wireless off-camera flash situations. before the dawn of the poppers, this functionality was available only with nikon i-ttl and canon's e-ttl wireless flashes that were either: 1) positioned on-camera, 2) tethered by a ttl cord, or 3) utilize infrared technology. the downfall about the infrared is the moment your line of sight is broken, the flash doesn't receive the trigger signal from the camera and the flash fails to fire. i have had countless exposures where this happens which is totally annoying. however, using radio technology, the communication lines have opened up far greater wireless i-ttl metering options now thanks to radiopoppers. party on.
here are a few initial observations:
PROS:
+ high-speed, reliable wireless flash sync up to 1/8000 sec. not just, wow. but, WOW!
+ no misfires, yet. they fired around corners, behind vegetation reliably, shot after shot after shot. they even fired through concrete walls with no windows at a distance of about 200 feet. there is absoutely no way the current line-up of wireless ttl flashes on the market can do that out of the box.
+ simple setup and ease of use.
+ slightly shorter set-up times will help in complicated lighting conditions.
+ we pay so much for the lenses with good bokeh to use wide open at apertures such as f/2/.8 or f/1.4, why should we have to stop down to f/5.6 and loose the "pretty" foreground/background bokeh? one reason of the whole shebang about using shallow-depth of field lenses is it is easier to isolate the subject by causing the background to have a soft focus appeal. now we can.
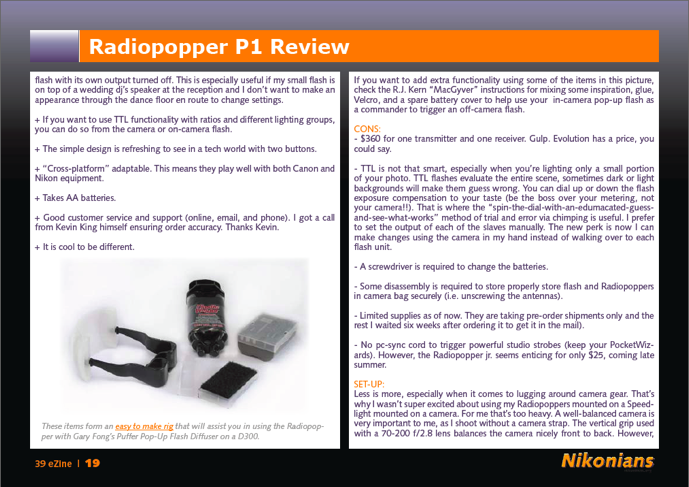
+ i intend to use the radiopoppers like pocketwizards (or any other brand of radio slaves) for triggering small speedlight flashes, but with the added benefit of not having to walk over to each slave to change the power output. this is HUGE. this means i can change power either from in-camera or a camera-mounted flash with its own output turned off. this is especially useful if my small flash is on top of a wedding dj's speaker at the reception and i don't want to make an appearance through the dance floor en route to change settings :)
+ if you want to use ttl functionality with ratios and different lighting groups, you can do so from the camera or on-camera flash.
+ the simple design is refreshing to see in a tech world (sorry, equipment measurbators). it has two buttons.
+ "cross-platform" adaptable. this means they play well with both canon and nikon equipment.
+ takes AA batteries.
+ good customer service and support (online, email, and phone). i got a call from kevin king himself ensuring order accuracy. thanks, kev.
+ it is cool to be different.
CONS:
- $360 for one transmitter and one receiver. gulp. evolution has a price, you could say.
- ttl is not that smart, especially when you're lighting only a small portion of your photo. ttl flashes evaluate the entire scene, sometimes dark or light backgrounds will make them guess wrong. you can dial up or down the flash exposure compensation to your taste (be the boss over your metering, not your camera!!). that is where the spin-the-dial-with-an-edumacated-guess-and-see-what-works method of trial/error via chimping is useful. i prefer to set the output of each of the slaves manually. the new perk is now i can make changes using the camera in my hand instead of walking over to each flash unit.
- a screwdriver is required to change the batteries.
- some disassembly required to store properly store flash and radiopoppers in camera bag securely. (i.e. unscrewing the antennas). similar prep-time with pocketwizards and their cords.
- limited supplies as of now. they are taking pre-order shipments only and the rest i waited 6 weeks after ordering it to get it in the mail).
- no pc-sync cord to trigger powerful studio strobes (keep your pocketwizards). however, the radiopopper jr. seems enticing for only $25, coming late summer.
SET-UP:
less is more, especially when it comes to lugging around camera gear. that's why i wasn't super excited about using my radiopoppers mounted on a speedlight mounted on a camera. too heavy. a well-balanced camera is very important to me, as i shoot without a camera strap. the vertical grip used with a 70-200 f/2.8 lens balances the camera nicely front to back. however, mount an sb-800 AND a radiopopper and you've added more weight in a different direction, making the camera harder to hold.
that's another reason i dig the pop-up flashes is because they can serve as a commander to other off-camera speedlights. if you got it, why not use it?
and that is exactly what i did with during my initial testing. no problems encountered :)
why else would someone want a big speedlight flash (turned-off) on the camera just to trigger another flash? doesn't that defeat the purpose of an "off-camera" flash?
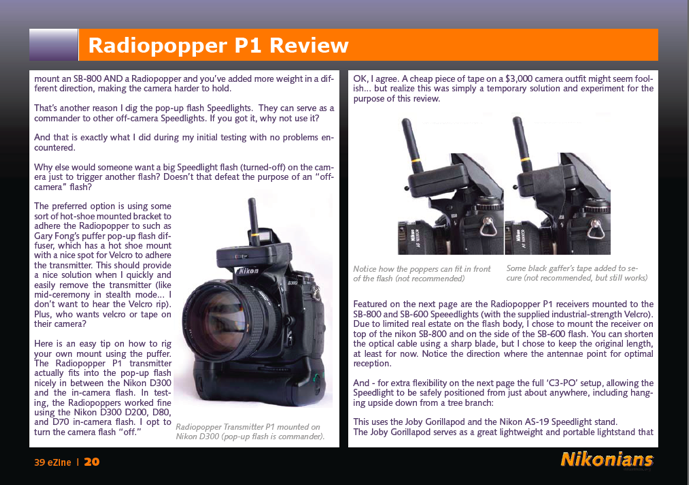
the preferred option is using some sort of hot-shoe mounted bracket to adhere the radiopopper to such as gary fong's puffer pop-up flash diffuser, which has a hotshoe mount with a nice spot for velcro to adhere the transmitter. this should provide a nice solution when i quickly and easily remove the transmitter (like mid-ceremony in stealth mode... i don't want to hear the velcro rip). plus, who wants velcro or tape on their camera?
here's the skinny on instructions on how to "macgyver" your own mount using the puffer.
the radiopopper p1 transmitter actually fits into the pop-up flash nicely in between the nikon d-300 and the in-camera flash. in testing, the radiopoppers worked fine using the nikon d-300, d-200, d-80, and d-70 in-camera flash. i opt to turn the camera flash "off"
ok, i agree. a cheap piece of tape on a $3,000 camera outfit might seem foolish... but realize this was simply a temporary solution and experiment for the purpose of this review.
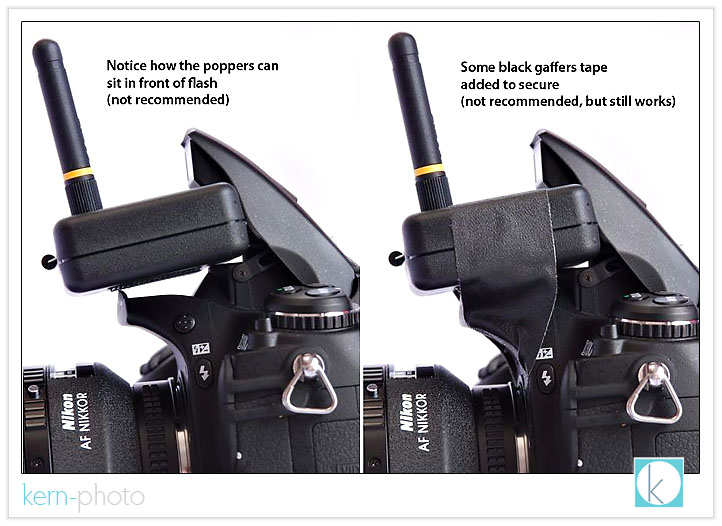
this is a far better alternative... to learn more about this, be sure to check out instructions here on how to "macgyver" your own mount using the puffer as featured below.
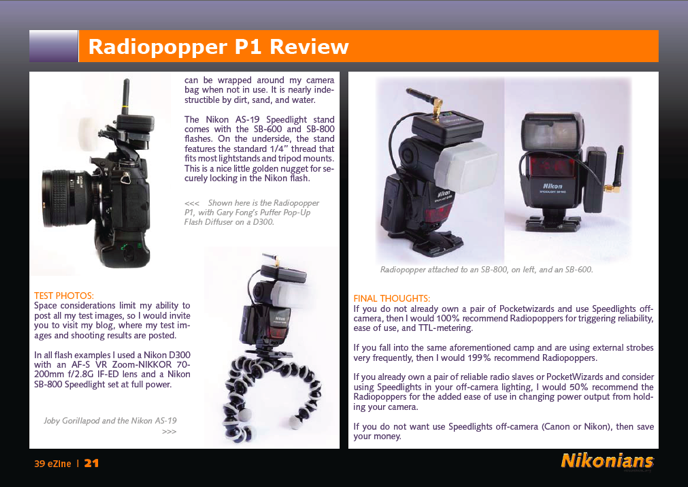
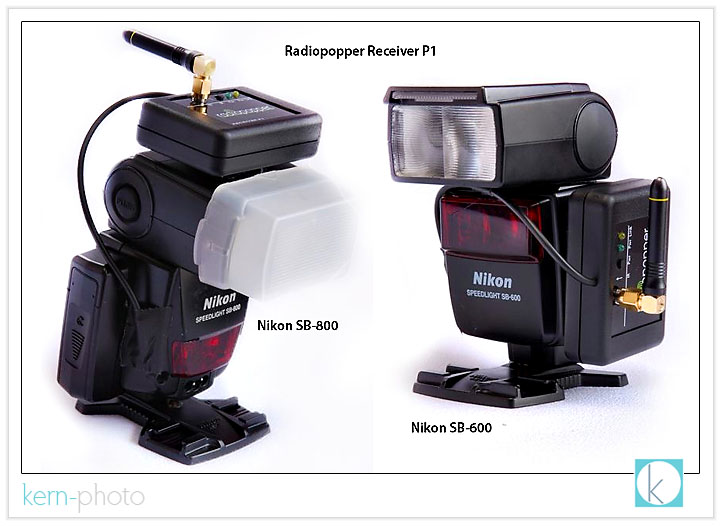
featured below are the radiopopper p1 receivers mounted with the supplied industrial-strength velcro. due to limited real estate on the flash body, i chose to mount the receiver on top of the nikon sb-800 and on the side of the sb-600 flash. you can shorten the optical cable using a sharp blade, but i chose to keep the original length, at least for now. notice the direction where the antennae point for optimal reception.
introducing the full 'C3-PO' setup, allowing the speedlight to be safely positioned from just about anywhere, including hanging upside down from a tree branch:
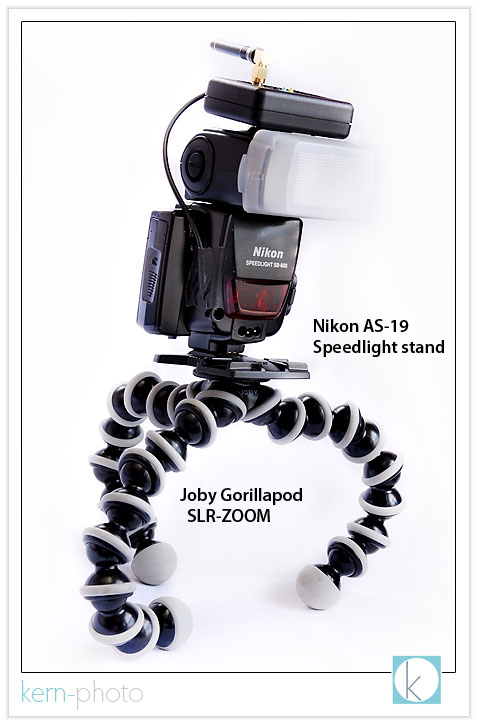
while the joby gorillapod serves as a great lightweight and portable lightstand that can be wrapped around my camera bag when not in use. they are nearly indestructible to dirt, sand, water. wish i could say the same about more photo equipment :)
the nikon as-19 speedlight stand comes with the sb-600 and sb-800 flashes. on the underside, the stand features the standard 1/4" thread that fits most lightstands and tripod mounts. this is a nice little golden nugget for securely locking in the nikon flash.
TEST PHOTOS:
in all flash examples i used a nikon d-300 with a 70-200 f/2.8 lens and a nikon sb-800 speedlight set at full power. the flash is positioned on the ground behind the dark bush just to the right of mr. deer and is using the 'C3-PO' setup pictured above. i was able to obtain 100% triggering reliability, which was an absolute first when triggering wireless speedlights off-camera. that was so freeing!
below: f/2.8 at 1/1500 sec with a focal length of 75mm (notice the "pretty" foreground & background bokeh)
below: f/8 at 1/250 sec, with a focal length of 75mm (greater foreground & background detail makes it more difficult to isolate subject)
here's a closer detail shot zoomed in to 200m (300mm effective focal length on the d-300).
LEFT: f/2.8 at 1/1500 sec (NO FLASH)
RIGHT: f/8 at 1/250 sec (NO FLASH)
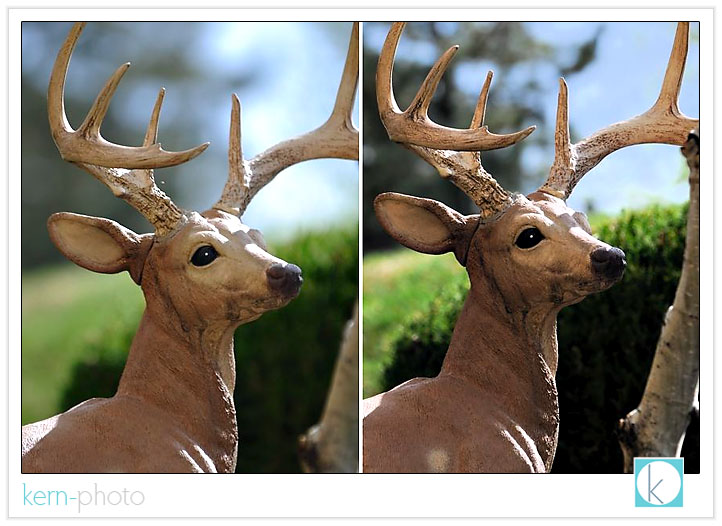
to my taste, the image on the left without flash would be preferred. notice what the image on the right brings to the table... more (unwanted) detail.
now it is time to compare apples to apples using a flash... this is where it would be impossible to create an image above 1/250 or 1/500 with standard pocketwizards (cameras max shutter sync varies.... the d-70 has 1/500 sec flash-sync while the d-3 and d-300 have only 1/250 sec). check this: compare the background on the u
LEFT: f/2.8 at 1/1500 sec with FLASH at FULL POWER (1/1) which creates less out of focus detail than if we use...
RIGHT: f/8 at 1/250 sec with FLASH at FULL POWER (1/1) and gets greater background detail :(
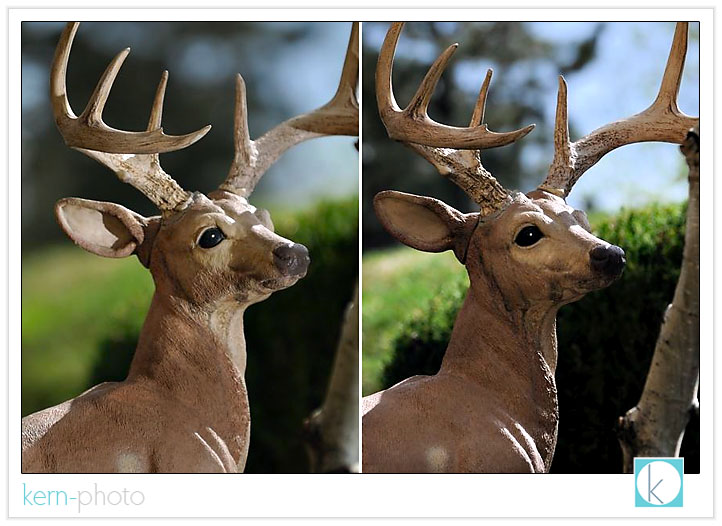
now here comes a mini-lightbulb experience: notice the two shots below the backgrounds are similar, except one is slightly darker than the other. why? even though they are both shot at f/2.8, the image on the left was shot at a shutter speed of 1/750 (with no flash) and the one on the right was shot at a shutter speed of 1/1500, one stop faster. because they both were shot at f/2.8, the quality of the background highlights out of focus (remember bokeh?) remains the same, especially in the green areas. because these were shot handheld (not on a tripod), slight differences in the blue and black colors in the background result from a slight shift in shooting position. the only difference is one appears slightly darker than the other because of the shutter speed change.

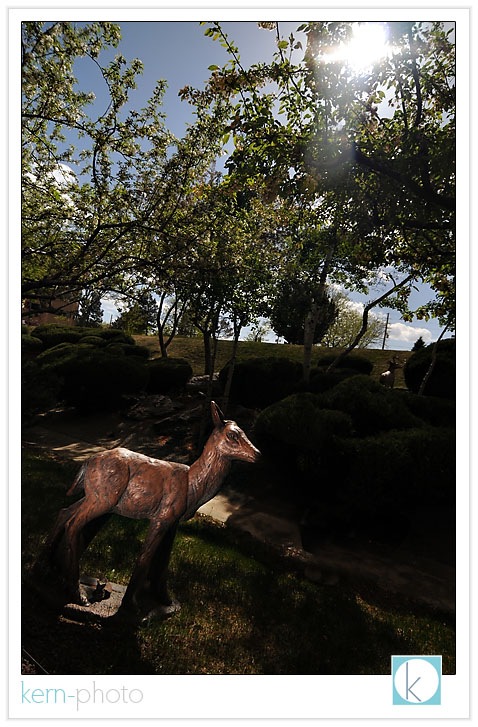
pictured below, bambi serves as a decent lighting model despite harsh overhead sun conditions. however, we can isolate bambi from the background a little easier by overpowering the ambient light triggering our speedlights with radiopoppers shooting at f/4 and 1/8000 sec with ISO set 400 to boost the flash power a tad (flash still set at full-power). notice that the sun is not completely overpowering, as we can still see rim light on bambi and abundant ambient light in the background:
a few more things to think about:
1 - mr. deer & bambi didn't move the whole time, which made it nice for comparison photography for the purpose of this review. however, if we were trying to stop action, the faster shutter speeds would really come in handy, like freezing water drops mid-air or photographing in super windy conditions.
2 - flash isn't always a good thing, especially in real wildlife photography. i'm not sure if i would want to use a flash on a real deer. i might not make it home in one piece. to paraphrase yoda, "know when to use the force, you should."
FINAL THOUGHTS:
if you do not already own a pair of pocketwizards and use speedlights off-camera, then i would 100% recommend radiopoppers for triggering reliability, ease of use, and ttl-metering.
if you fall into the same aforementioned camp and are a strobist, then i would 199% recommend radiopoppers.
if you already own a pair of reliable radio slaves or pocketwizards and consider using speedlights in your off-camera lighting, i would 50% recommend the radiopoppers for the added ease of use in changing power output from holding your camera.
if you do not want use speedlights off-camera (canon or nikon), then save your money.
__________
ps- for those strobists who just wanna know, here's the lighthing setup for photographing the speedlights: shot sans flash using a single 40" reflector positioned about a foot away with a white sheet underneath. the setup was about 2 feet from western facing window with blinds closed slightly and outside with sun set at full-colorado-power. 1/8 second exposure at f/8 for depth of field using iso 400 on a nikon d-80 with a focal length of 70mm and iso set to cloudy. whew.
why trash the dress?
sara & eric's trash the dress session rocked! they both had a wonderful experience and wanted to share their experience with other brides considering doing the same. here's what she wrote:
Before my wedding I don’t think I would have considered a “trash the dress” photo session. I thought of my bridal dress as a pristine object to be cherished. At our wedding we danced hard and truly enjoyed ourselves. My dress ended up soaked in sweat. The underneath was filthy from being drug around the reception all night. Tidbits of food and drink had been spilt on it, and there were footprints on the train left behind by guests. It still looked great, but I was definitely going to have to get it cleaned. When R. J. suggested a “trash the dress” photo shoot, I figured “Why not get it a bit dirtier before I get it cleaned?” He also explained to me that the name isn’t truly fitting of the essence of the photo shoot. It’s not about destroying a dress. It is about capturing the bride and groom in a unique and natural situation doing something different and perhaps wild. If the dress gets a little dirty along the way, don’t worry about it! I loved the idea of being more free for some photos and figured despite what R. J. said that my dress would end up truly filthy. Surprisingly it didn’t get much worse than it already looked. The sand from the beach brushed right off.
Looking back I am so grateful that my husband and I did this extra photo session after our wedding. Our pictures from the wedding day are beautiful (different photographer) but they are also very stiff. On our wedding day, as the bride and groom, we were preoccupied with the stress and emotions of the “big day.” Our time was very restricted with all of the events, the guests, and the celebration. Our focus wasn’t on capturing quality photos with everything else going on. A “trash the dress” photo session was a chance for us to relax, just to focus on each other, to feel beautiful and to have fun getting our photos taken. We weren’t thinking about anything else. My husband and I chose a six hour package. We are so glad we went with such a large package because the time flew by so quickly. We ended up with a great variety of shots even after the sun went down.
R. J. is very friendly and really comfortable to work with. He’s the kind of guy you feel like you’ve known for years. He is full of energy and extremely enthusiastic about his work. He made my husband and I feel very pampered and appreciated. The photo shoot is a whole experience and not just about the end product. He truly made us feel like models, and I have never felt more beautiful. We have wonderful memories from the day of our shoot, along with all the gorgeous photos.
________
want to learn more? contact us to learn about pricing and availability. also, be sure to check out trash the dress, a website dedicated to sharing some of the great work in this growing niche of progressive wedding photography & portraiture.
nikon d300 review
is it worthy of being named the 2007 camera of the year?
yes, and here's why:
- 12.3MP is about all we will ever need, unless nike wants us to shoot a billboard
- greater dynamic range helps retain important highlight and shadow detail
- faster auto focus (51 points)
- much better weatherproofing
- higher ISO performance (ISO 1600 looks like 400 on the d-200)
- bigger & badder LCD monitor... we're talking star wars movie theater screen huge!
- better battery performance (shoot all day & night)
- 100% view finder coverage which means we now get what we see and not 95%
- 8 frames per second responds like a v-8 ford mustang
- the self-cleaning sensor cleans up after us :)
- batteries included.... the d-80, d-200, and d-300 batteries and chargers play nicely together.
- the rubber pc-sync leash prevents loss to the little screw cover, which has always been annoying on our d-200
the list price of $1,799 (or a tad over $2,000 w/ vertical grip and extra battery) isn't cheap, but for the cost of ONE $5,000 d-3, you could can have TWO d-300s and an extra $1,000 for a decent vacation for two anywhere southwest flies (vegas, baby!).
the 1.52x digital crop factor on the d-300 may be a negative consideration to some, especially when using a 50 f/1.4 or a 85 f/1.4 where you may want a tad wider angle of view, say, with the nikon d-3. however, we embrace the digital crop :)
get this: some of our favorite lenses actually work better on the d-300 than either the d-3 or the d-200. call it better reverse engineering or luck, but the nikon 10.5mm fisheye f/2.8 has less chromatic aberrations, the 12-24mm f/4 holds superior sharpness and color for those scenics, and the 70-200mm f/2.8 becomes a 300mm monster, a perfect
the handy pop-up flash comes in handy to trigger those nikon's wireless i-ttl flashes, which means we don't need to have an sb-800 on camera to trigger another off-camera, which the d-3 requires. our mini-flash will get used far more once we receive our radio poppers, which production shipping starts today :)
sexy accessories for the nikon d-300 include the mb-d10 power grip, which now has one battery in the grip and a second battery in the camera. sa-weet. no longer do we have to remove the camera's battery compartment cover to add the grip. as an added bonus, the vertical grip can be added or removed from the camera quickly, which is great for traveling incognito.
with grip, the d-300 exudes confidence that it won't slip out of my hands (knock on wood), which is important since i hate shooting with a neck strap. in fact, the neck strap hasn't made it out of the box yet... and won't. the vertical grip does add some nice weight and bulk to the camera, which helps to balance out monster lenses, but is also good for pulling off slow(er) shutter speeds 100% hand-held.
an extra bonus: it comes with a battery clip holding AA batteries which serves as an extra battery back-up and boosts the frame-rate to rip 8/second.
for a more thorough write-up of all the nitty, gritty details, sleuth out the nikon d-300 review by our favorite ken rockwell.
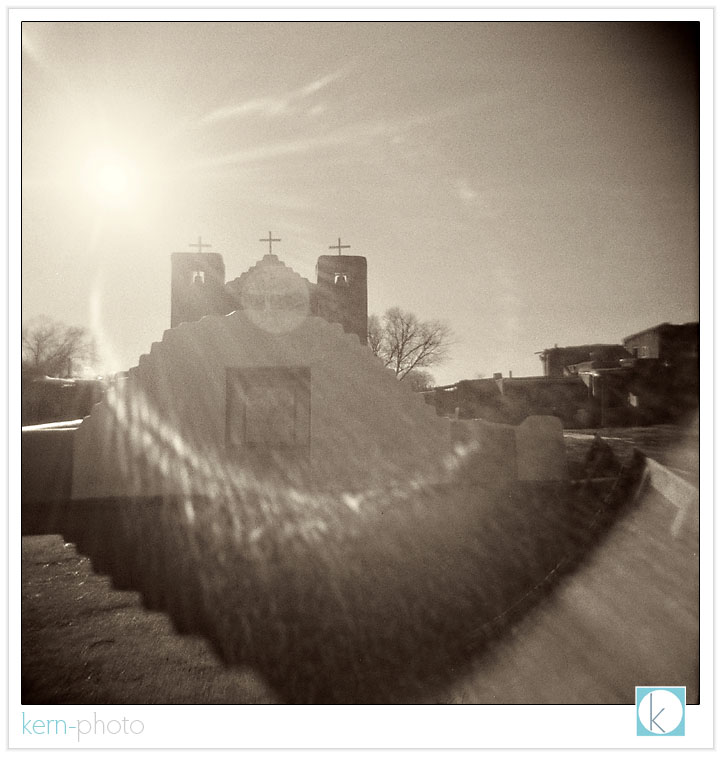
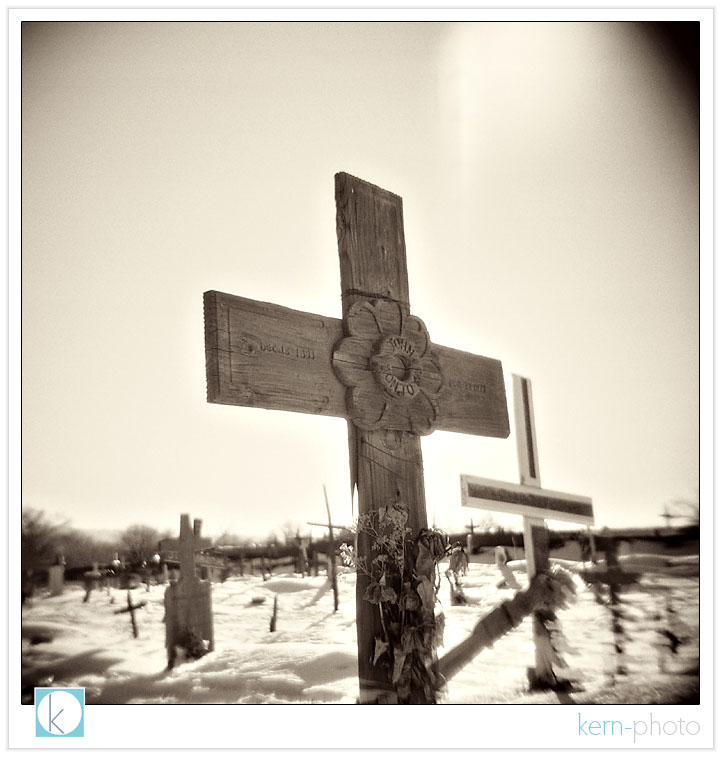
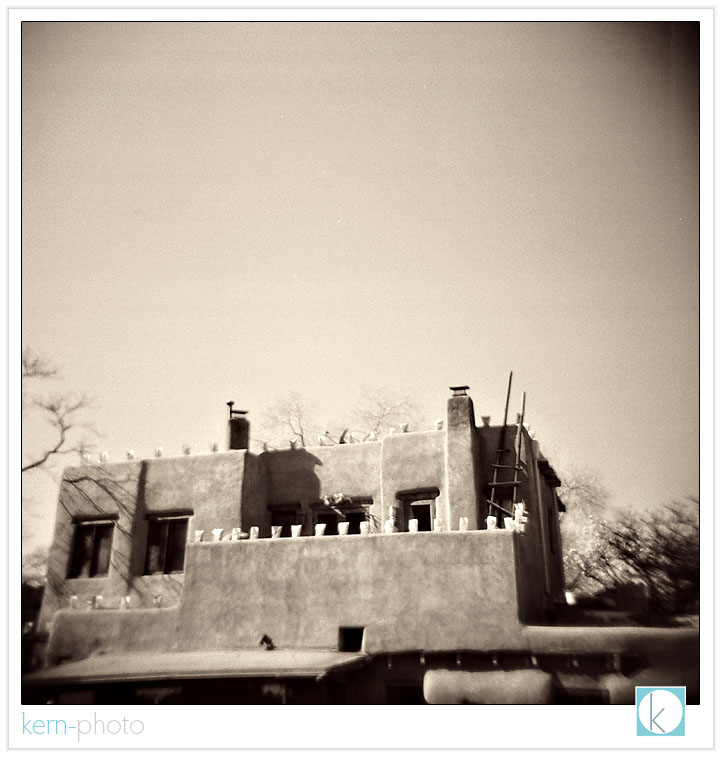
holga landscapes 101
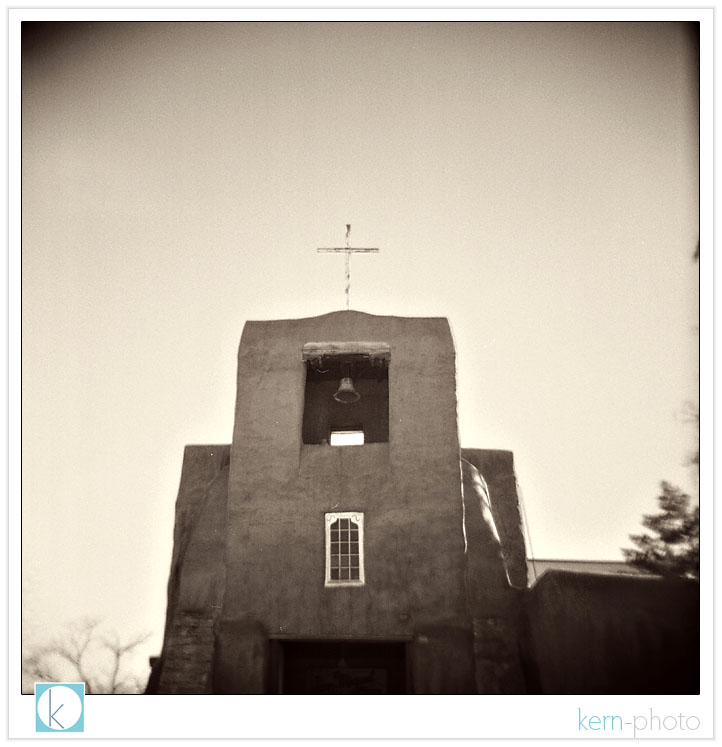
pueblo de taos church (taos, new mexico)
pueblo de taos village 1.
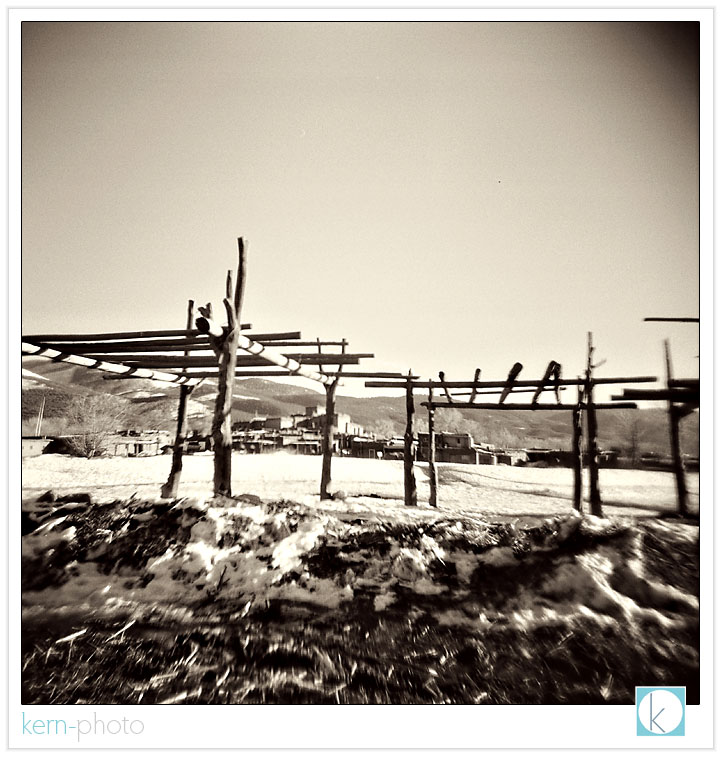
pueblo de taos village 2.

pueblo de taos village 1.
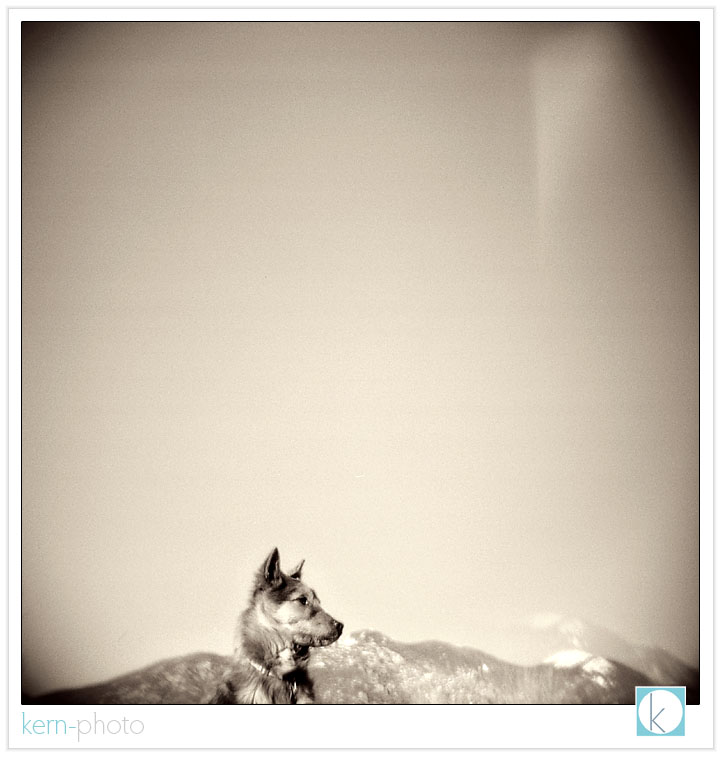
reservation dog.
cemetery at pueblo de taos 1.
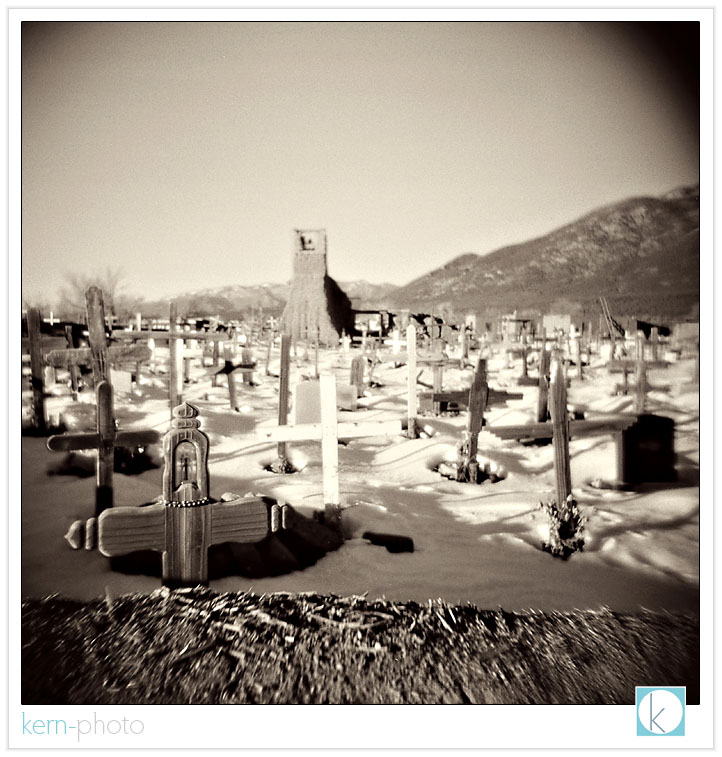
cemetery at pueblo de taos 1.
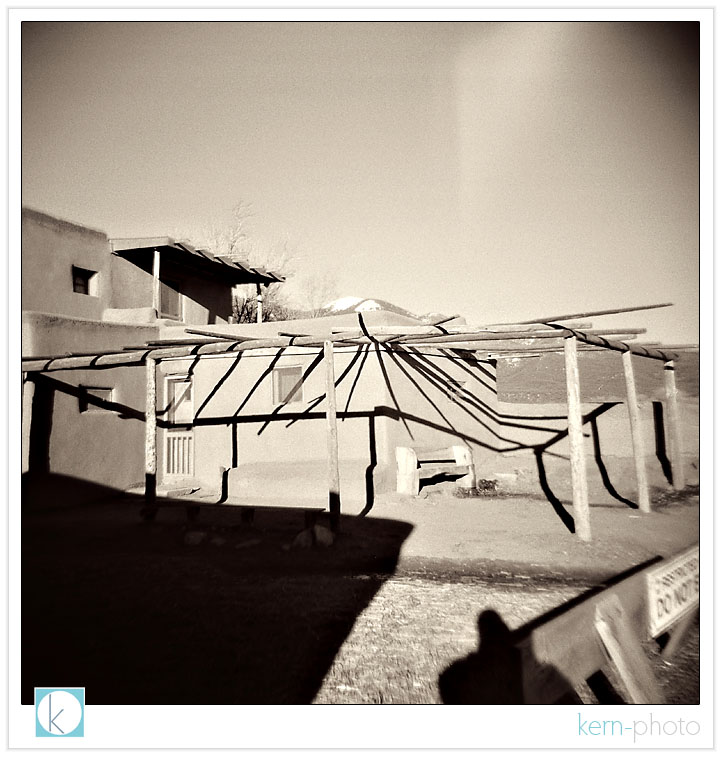
pueblo de taos home front 1.
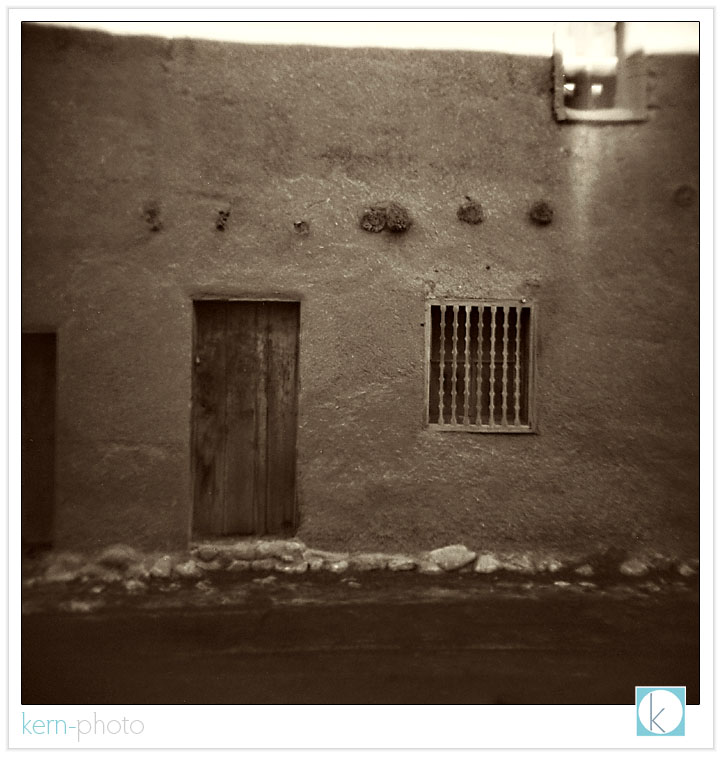
pueblo de taos home front 2.
pueblo de taos church 1.
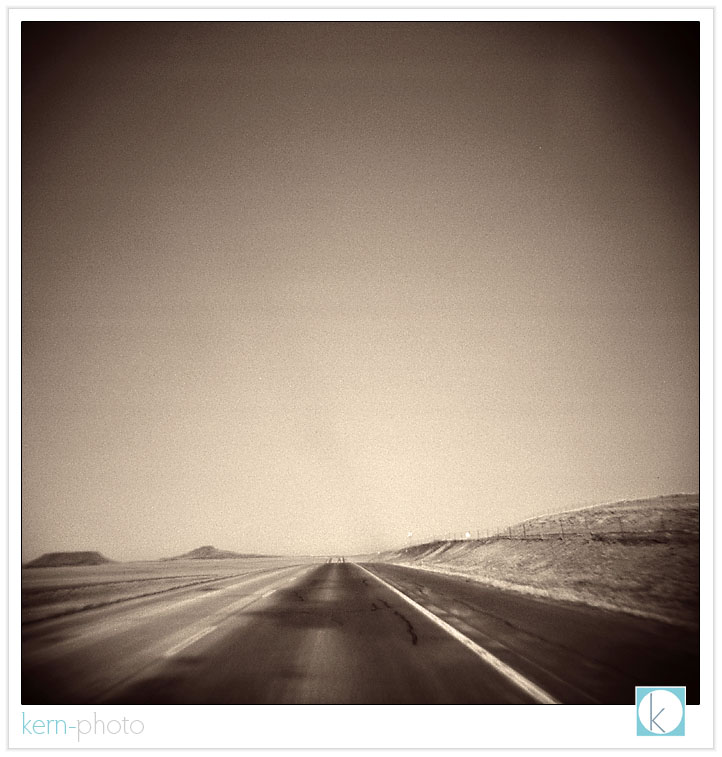
25 minutes prior to speeding ticket (salida, colorado).
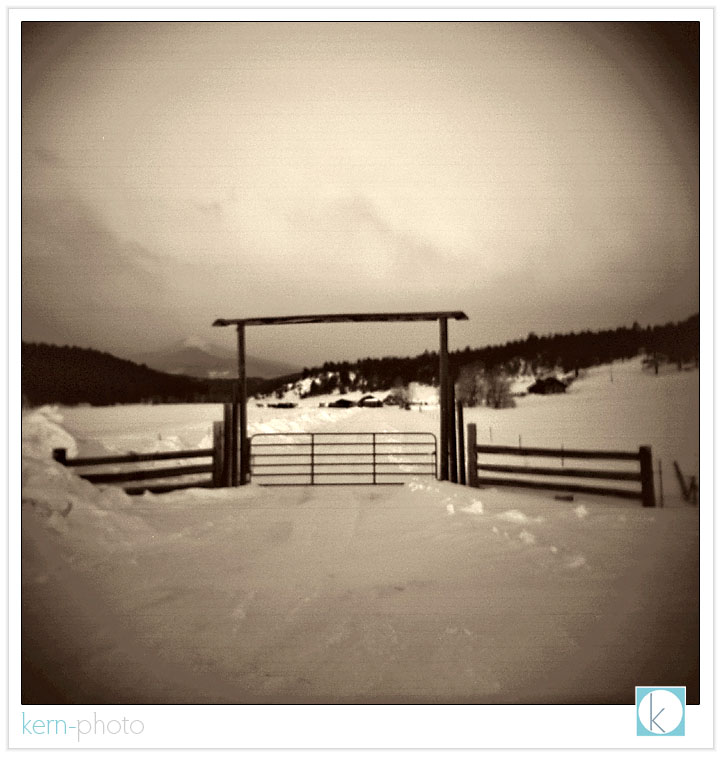
ranch in salida.
bandeleir national monument 1 (colorado).
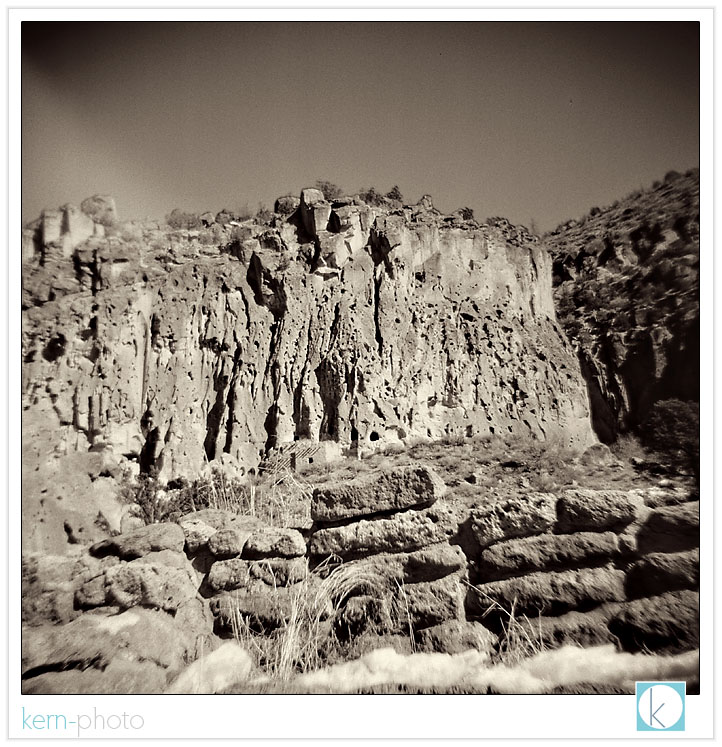
bandeleir national monument 2.
bandeleir national monument 3.
nicole on trail in bandeleir national monument.
i'd like to think each of these 16 photos could stand alone printed on a 30" x 30" gallery canvas, thanks to the wonderful resolution of medium-format film :)
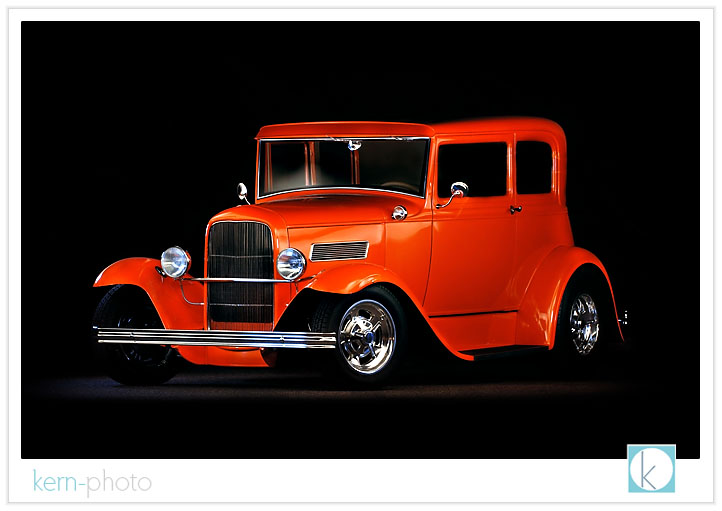
1931 ford light painting
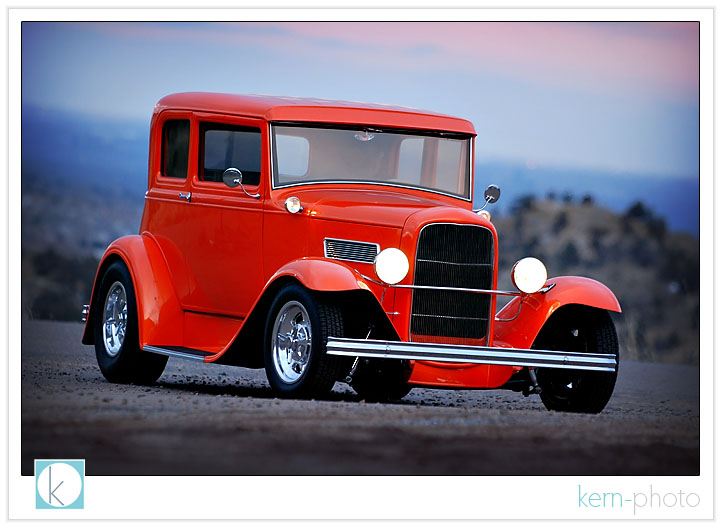
howard's 6.5 years of patience invested in his beautiful restoration shows. gotta love that painted tangelo pearl color, too!
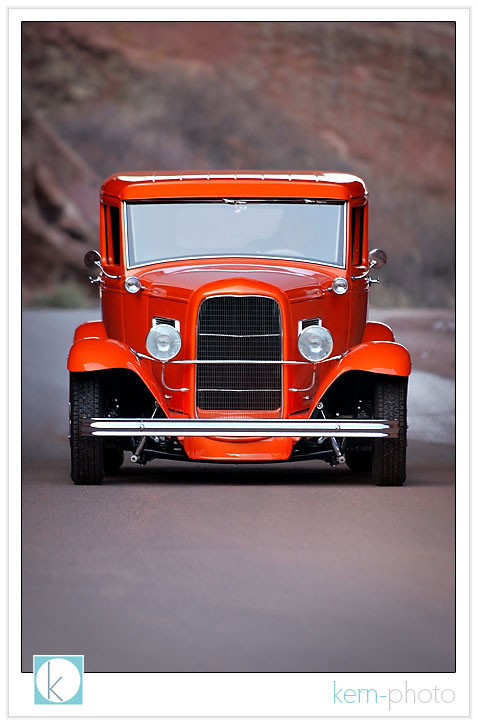
shot in broad daylight in a mini-cave at red rocks amphitheater. photo stats: f/2.8 at 1/125, using a 70-200 at 140mm, ISO 400, handheld
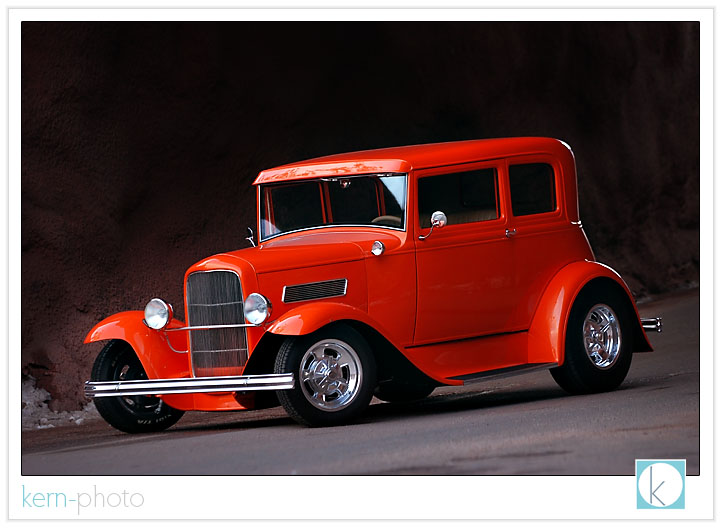
i love the sunset appearance, juxtaposed nicely with the tangelo :)
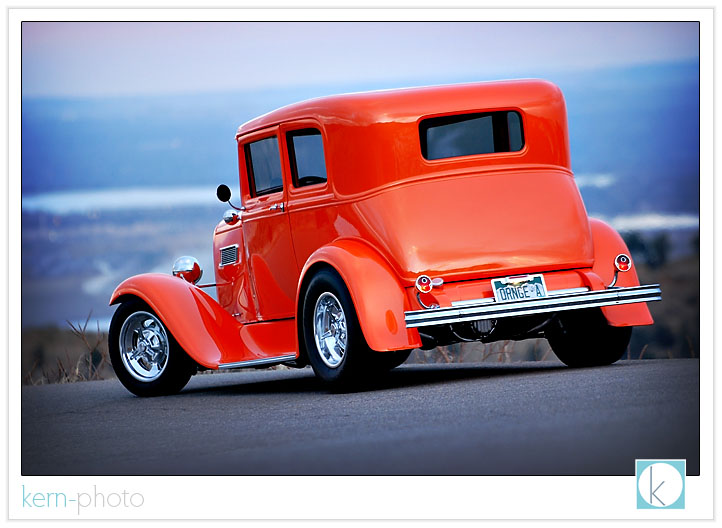
and from the rear, showing off the agressive forward rake (a trait of hot rods in those days :)
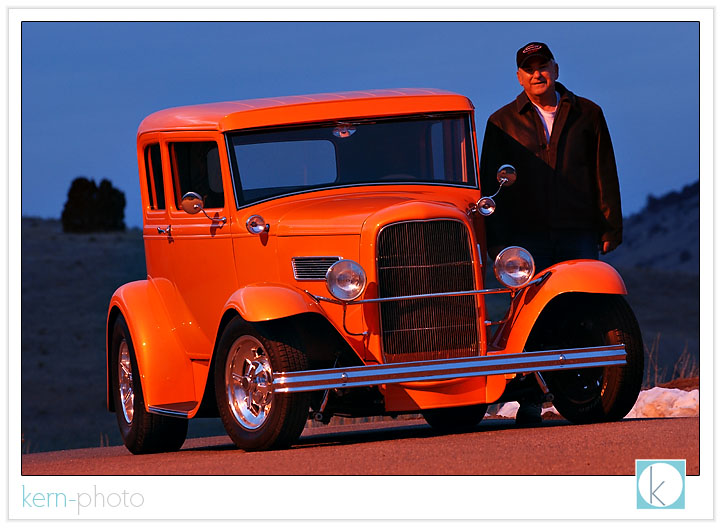
and here's howard with his toy: (shot in broad daylight. f/8 at 2 secs, 200mm, ISO 400, on tripod)
a little artsy shot to spice things up:

then we added a little flash flavor:
the secret formula for the shot above goes something like this: red rocks at night + 1 strobe manually triggered about 8 times + 1 mini soft box for diffusion + nikon d80 at f/13, iso 200 + 30 seconds = our favorite shot. for those inquiring minds, here's the shot straight out of the camera (note remnants of my light painting):
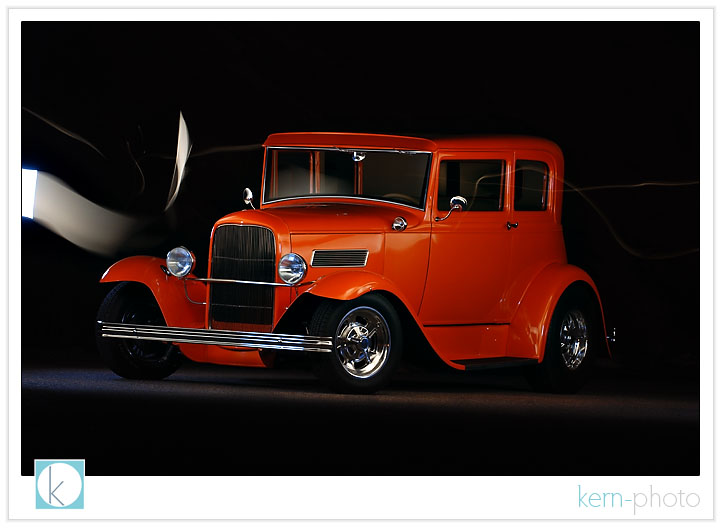
this mini-project also happened to to be #12 on my list of 101 photo goals in 1,001 days. inspiration for the light painting came from the video featured below. if you are interested in getting your car shot, contact us by clicking here.
tips for interior design photography
many of the images found in expensive interior design catalogs are created by photographers using large studios and tons of lighting equipment to mimic the look of natural light. however, when photographing the interior of homes, one may still accomplish a similar look with a minimal footprint.
key ingredients to obtaining simple, clean interior design lighting include using a sturdy tripod and learning to use flash to light interiors. with proper tools, you can shoot with little ambient light and still create an image that looks creatively different. striving to keep it simple and do more with less, here are our top ten tips to photograph interior design and architecture:
10. hide lights with a small tripod. we like the cheap 6-8 inch ones because the small footprint makes them easier to conceal.
9. higher ISOs give flashes more power. 400 seems to work well.
8. think about sharpness and depth of field. you probably knew that, however if you stop down too much, say to f/22, you risk diffraction (bending of light) that can lead to softer images. using a 12mm lens on digital body (18mm on film camera) you do not have to be stop down as much to obtain a workable depth of field than say that of a 50mm lens. if you want an extreme shallow depth of field good for isolating details, shoot wide open (f/1.4) with a medium telephone lens (like in the range of 85mm to 200mm) and move close to your subject. getting close to your subject to further decrease depth of field.
7. diffuse your flash. don't go for the deer in the headlights look which will result in harsh light with deep shadows. experiment by using a small softbox or umbrella bounced against a white wall, which can create wonderful, clean light.
6. bounce light off of a wall. if possible, the wall bounce creates a much larger apparent light source and yields softer shadows. a little light source from a small flash head will create harder light. a bigger light source bounced off a wall will yield softer light, similar to that of a soft-box. when you walk into a room, look for walls that may not show up in the photo.... those will be perfect for bouncing.
5. gel your flashes. save time in post-processing by balancing your light temperatures in-camera. for example, if you are shooting a room with incandescent ambient light, use an orange gel on your flash and change your camera's white balance to incandescent (the one that looks like a light bulb). this will trick the camera and will make your flash and the ambient light look the same shade of white. read your owner's manual to learn more. experiment using blue gels and mixing up the in-camera white balance for some creative effects.
4. avoid color casts. if you bounce off a blue wall, expect your light to be cool and blue. bounce off a red wall, expect the bounced light to be unnaturally warm. also, expect to use more power in rooms with dark walls and ceilings, since the light won't be bounced around as much.
3. start small first. if you’re accustomed to shooting with one on-camera light, the best way to ease into shooting with off-camera lights is to start small. try a small bedroom, turn off your on-camera light and use only the remote one, placed a few feet away and bounced off the wall, to get used to the idea. then discover tricks of “hiding” the light source from the camera like under a table or behind a big chair. then, add in the on-camera light with a diffuser for fill.
2. place off-camera strobes a foot taller than furniture. this creates a more natural feeling for lighting and shadows and can closely mimic window light. bouncing off the ceiling creates a less-natural effect, kind of like the ceiling is one giant room-sized skylight.
1. expose for the exterior. start with ambient-only exposure and meter manually. this means if you want to make the light outside the window appear natural, you may need increase exposure time to 2 or 3 seconds if you are shooting at twilight or to 1/60th if want to make the light outside the white "blown-out" window look like daylight. the next step is to use your off-camera lighting (strobes or flashes) to bring the interior or main subject to a similar exposure level. do not be afraid to chimp to see if your effect is working. while it may seem counter intuitive to expose the outside light first, by doing so, you allow for far greater lighting freedom of your subject.
ps- triggering lights via the wireless nikon and canon setups can be problematic as the signals will not bend around corners, as they are line-of-sight only. radio triggers like pocketwizards or other brands of radio slaves are generally far more reliable.
extra credit: one of the most difficult concepts for first timers to wrap their head around is this: shutter speed will control the windows/ambient light and aperture will control the strobes. this same philosophy may be applied to many different styles of photography.
teri carr at atmosphere homestyle proudly displays some of her interior design work. teri invited me last week to photograph some of her interior design work. as part of our time together, i shared with her some of our lighting tricks. we also produced a small body of photographs for her interior design portfolio.

here, a small flash with an umbrella was bounced off a wall to the right. notice the outside light closely matches with the inside light. in addition, a orange gel was placed over the flash to balance the incandescent light from the lamps. camera wb set to incandescent.
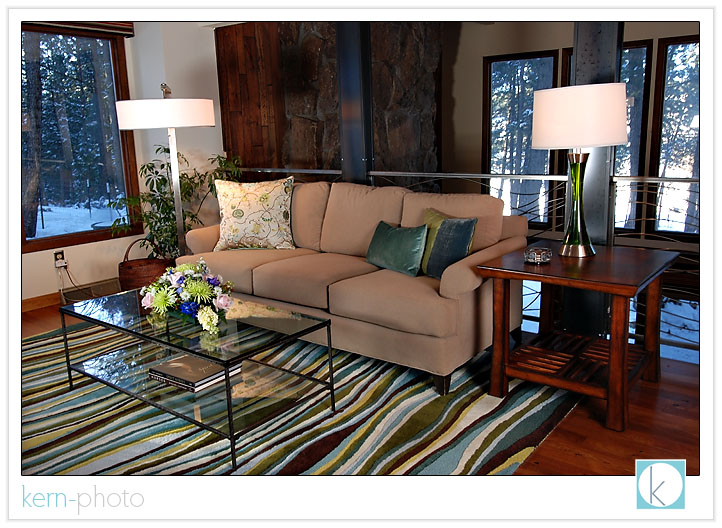
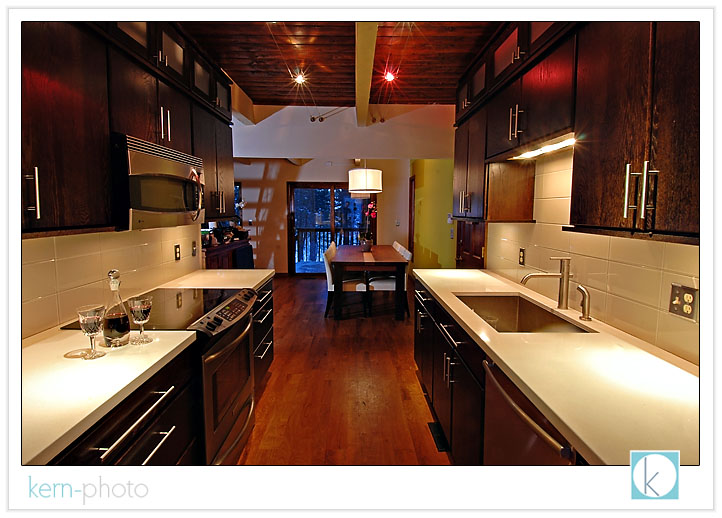
this shot was taken with a tripod with 3 second exposure and a flash triggered remotely around the corner to make the green wall pop in the background. notice the stairwell shadow in the background and shadows cast by the chairs at the table. our nikon 12-24 f/4 lens was used to capture the wide-angle of the kitchen.
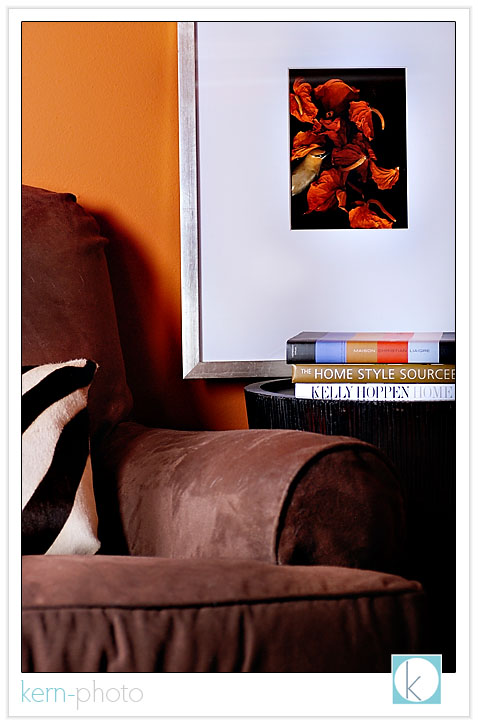
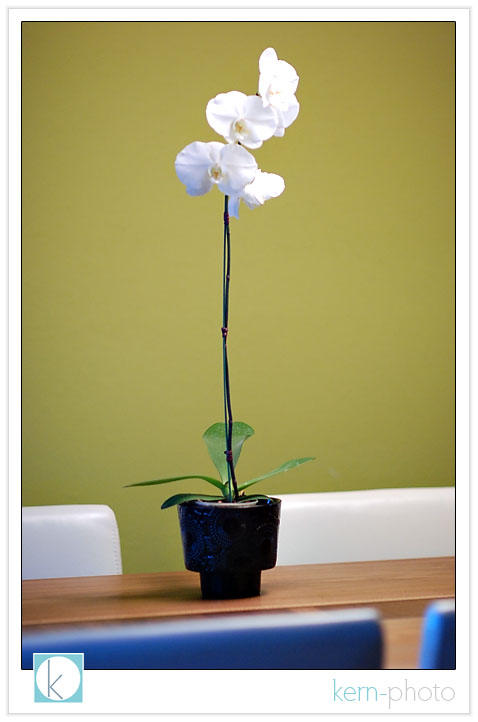
a flash isn't always necessary to use inside. this shot was taken with no flash and no tripod using only available light found in an overhead fixture. we like the simplicity of the green background and the single white orchid.
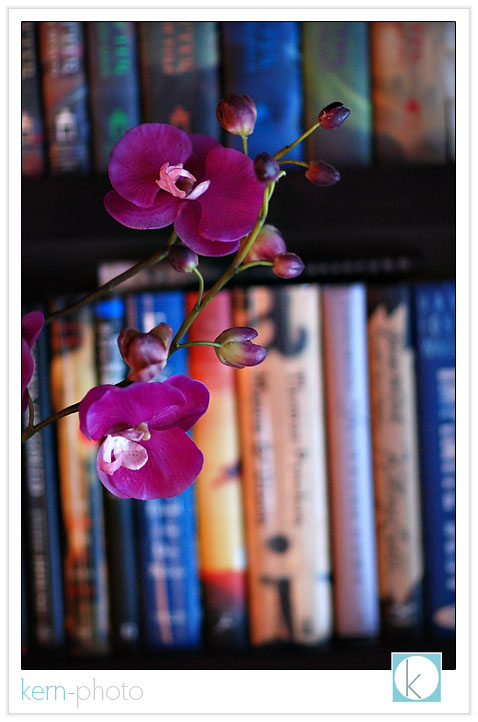
using shallow depth of field (f/1.4 on an 85mm lens) makes it easier to blur out the background of this flower lit from a north-facing window to the camera right.
one of the nice perks to interior photography is the comfort of being warm and dry, a pleasant perk compared to landscape photography our soul and gear are up against rain, snow, and wind :)
[b] school on iTunes
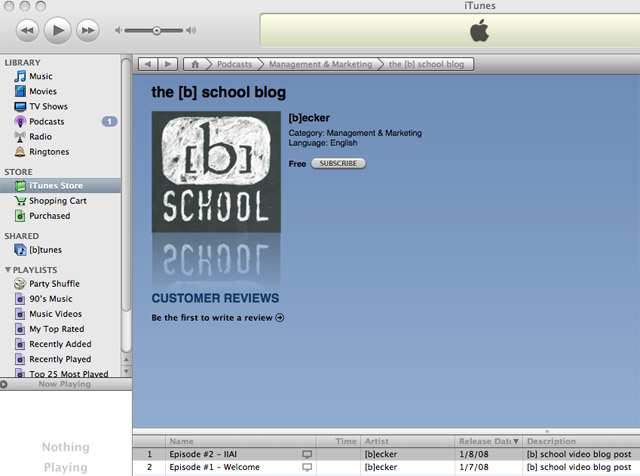
CLICK HERE TO AUTOMATICALLY SUBSCRIBE TO THIS PODCAST ON ITUNES
(iTunes must be already installed on your computer)
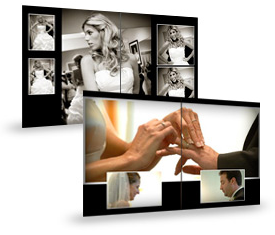
how we process digital negatives
with digital photography, while the technical processes of picture-taking hasn't changed much, but the workflow has. just because a photo is taken, doesn't mean it is ready for printing. our creative post-processing techniques are an important component of our 'fresh. modern. fun.' style. any final print undergoes scrutiny before headed to the printer. that means stray hair removal, minor blemish retouching, contrast-adjustment, color-correction, sharpening, etc are all completed before a final print is made.
each image is different and requires a different artistic touch to refine. similar to food, if you put the same amount of salt on every dish, sometimes it might taste better, while other times it might taste awful. same goes with photography. we take care in every print to ensure it represents our best work. not everyone 'gets' digital photography, so we wanted to share a little bit of the behind-the-scenes magic of what makes your kern-photo print special.
vivid, sharp, bright images is what we love... and there is potential in every photo to bring out the best. however, we have a few tricks to really make the images pop. apart of our digital workflow helps streamline the process. we start with a digital 'raw' negative (step 1.) which becomes a corrected proof (step 2.) before a print-ready image (step 3). when you receive your digital negatives, they will be in the corrected proof stage (step 2). if you order prints from us, rest assured you'll get images that meets (step 3) the kern-photo highest standards.
stay tuned for a more in depth look at how we use the latest photoshop technology (adobe cs3) and custom built processing techniques (actions) to obtain our signature look.
but for now, here are a few examples of the general steps taken to process an image:
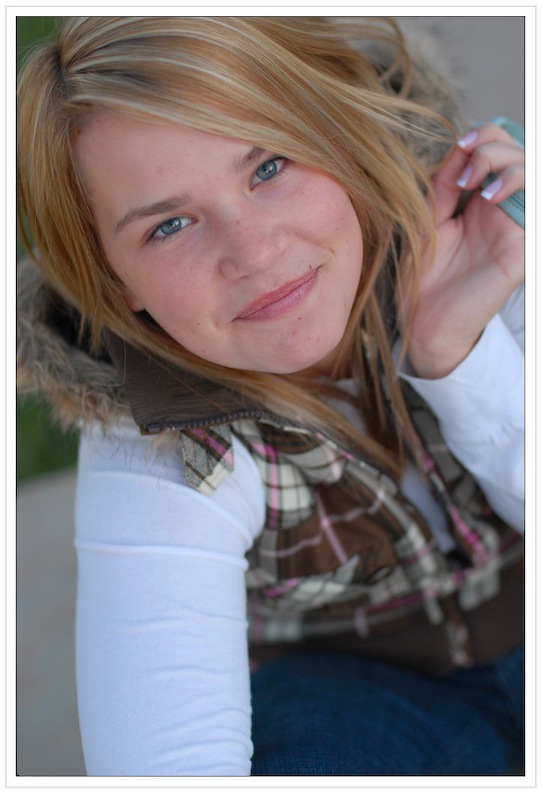
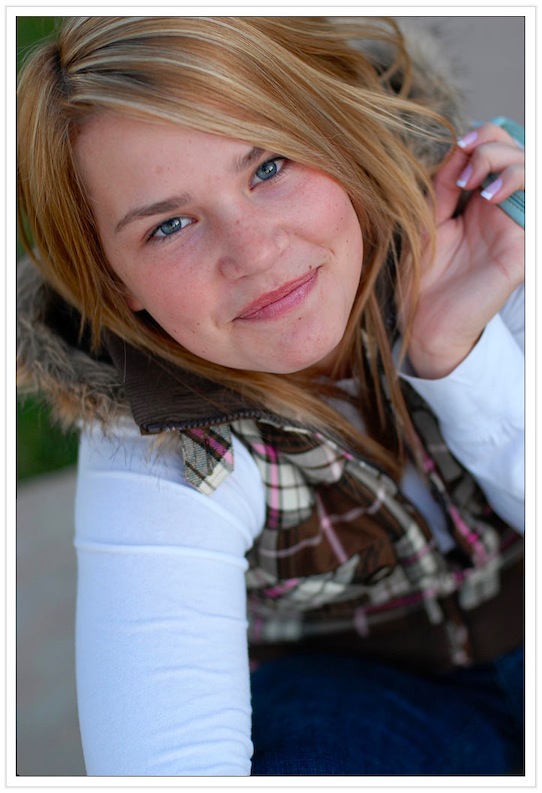
step 1. the digital 'raw' negative (straight out of the camera)
step 2. the corrected proof (color-corrected, exposure increased, contrast added)
step 3. the final print-ready image (skin re-touched, a bit of warming, eye-pop, and magic sharpening)
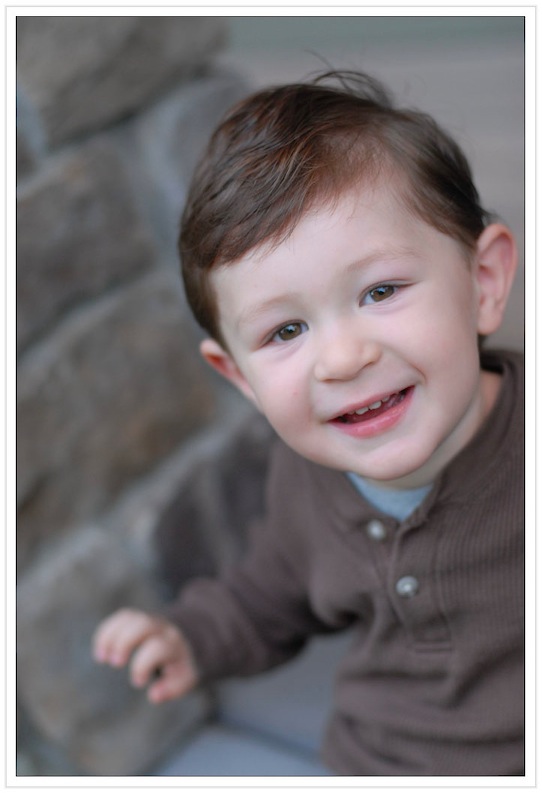
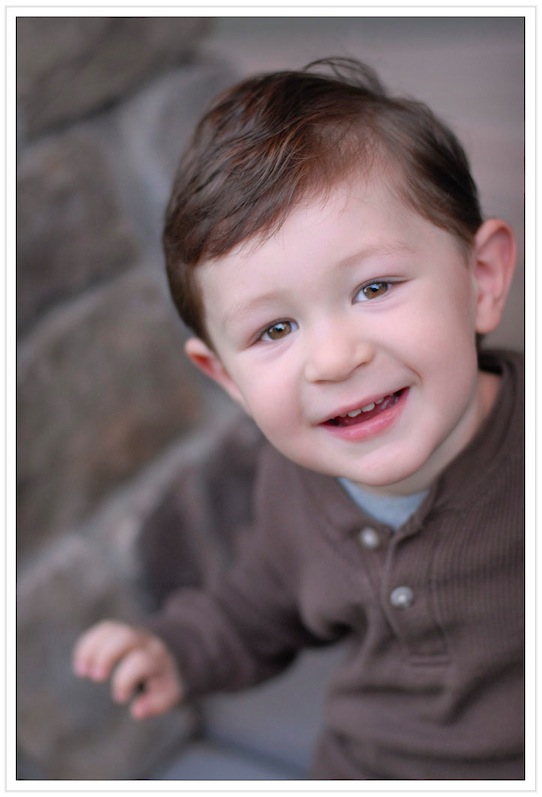
step 1. the digital 'raw' negative (straight out of the camera)
step 2. the corrected proof (color-corrected, slight contrast added)
step 3. the final print-ready image (skin re-touched, eye-pop, a bit of warmth, and magic sharpening)

step 1. the digital 'raw' negative (straight out of the camera)
step 2. the corrected proof (color-corrected, slight contrast added)
step 3. the final print-ready image (skin re-touched, eye-pop, and magic sharpening)
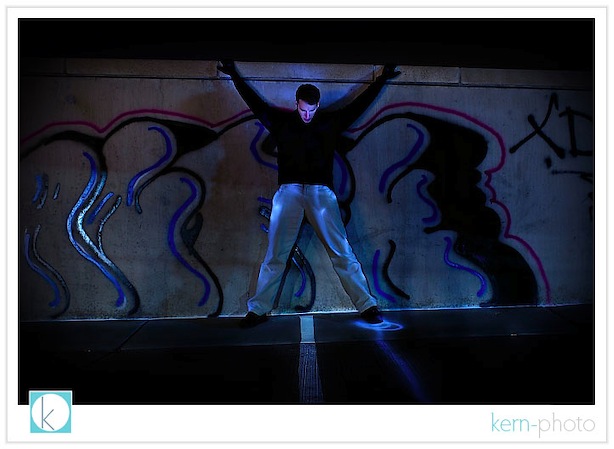
strobist meet-up
last night about handful of photographers met on the rooftop of a random parking garage in boulder to test our mettle. we each had 30 minutes to try out an idea and explain our thought process and share the resulting image. we used each other as models. my self-assignment was inspired by john michael cooper's (and soon to be my) favorite technique of painting with light. he demonstrates the whole shebang here. there's a wild surprise at the very end :)
below is my best shot from tonight using a nikon d-80 with a nikon 28-70 f/2.8 lens at 28mm, 30 second exposure at f/4.8, iso 200 on tripod, incandescent white balance, lightpainted with two halogen flashlights, and a manual triggered off-camera nikon sb-800 flash in a small softbox (which revealed subtle asphalt texture and two cigarettes on the pavement, difficult to see on the web version of the image). photographer john heisel was the 'dead' model. running back to the camera near the end of my exposure, i drew a line on the pavement with my flashlight which created the circle and line of light near his left foot.
pictage studio spotlight
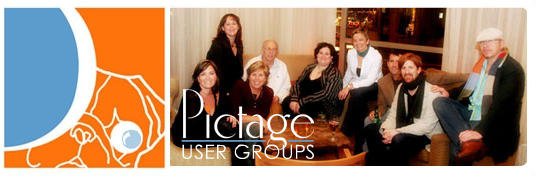
hey photographers! we'll be featured during the studio spotlight at the next denver pictage user group meeting (PUG) held on march 5, 2008 @ 6pm at the blake street tavern in denver. we're excited to share a little bit about what makes kern-photo, well, kern-photo.
complete details here.
for those non-pictage users, PUGs are basically a great networking opportunity for fellow wedding & portrait photographers in denver who just happen to use pictage. best of all they are free to pictage photographers. we come together once a month and share, learn, and network. the PUGS are wonderful and just happen to be listed #7 on our list of 10 reasons why we use pictage.
each month focuses on a different studio (thus the name, studio spotlight), and then something to help out with the business or creative aspect of photography. at the next meeting, there will be some a discussions about digital workflow in photography... the good, the bad, and the ugly.
this should be an interesting, as we'd rather be shooting than driving a desk :)
why pictage?

we like to do what we do best (photography) and delegate the rest. yes, at times, it is difficult to let things go. however, as a small-buisness owners, we realize the importance of maintaining a sustainable work-life balance. we love to shoot and would rather avoid the stuff that makes us grow old and weary like color correction, building online galleries, printing, billing, order processing, and shipping (pictage does these things well).
customer service is and will always be our #1 priority and we encourage clients to call and speak with us about questions. we promise your call won't be routed to india and you won't have to press # to speak with an operator :)
for brides and photographers interested in learning more, we've compiled a list of ten things we value about pictage (followed by five things we'd improve):
10. accounting made easy.
after pictage prints and ships products to our clients, they handle all the sales taxes and billing, take their commission, and send us a check in the mail each month. the simplicity of this is HUGE. we're no accountants and are glad pictage deals directly with the states, counties, and cities that collect sales tax. they follow-up with invalid credit cards numbers and so on. this is a big weight off our shoulders.

9. free color-correction.
brides know the color of their dress ('white' versus 'pristine champagne') and we want to ensure they remember that in their wedding photographs. same goes with facial complexion. subtle differences in color are important. which is why we ensure proper camera settings, monitor calibration, and print profiles deliver the most accurate color in the final print. the final print matters. we work with pictage to ensure the final print exceeds expectations, guaranteed.
8. archival printing with great products.
all photos are printed on kodak's finest endura professional papers, the industry standard for print longevity. clients can order prints in a range of sizes and paper surfaces. since pictage functions as our primary photo lab, we do not have to worry about print fulfillment, which can eat up an entire weekend sitting in front of the computer. we also offer clients products such as save-the-date cards, thank you notes, and dvds.


the monthly pictage user groups are a great way to meet and greet other photographers and get our learning on. our monthly fee nearly justifies this single networking event. getting questions answered by people who have 'been there, done that' is critically valuable and helps us avoid re-inventing the wheel. each meeting is informal and focuses on a business practice discussion and a studio spotlight presentation, which is usually very inspirational. katie van buren is the denver pug organizer and does a good job of organizing the events. we usually meet at the blake street tavern on a wednesday night at 6:00 pm. best of all, the PUGs are free to attend! there are online community forums, live chats, training videos... but we usually opt out of those to minimize computer brain drain.
our senior albums, engagement albums, and proof books are all designed by pictage designers. clients can go online, swap out pictures or entire page designs and order them directly. we still design our wedding albums because we give them the extra special kern-photo touch.
5. secure online purchasing.
knock on wood, we've never been burned by a hacker tapping into our website and stealing privacy information.... mainly because we do not offer an online storefront on our website. we cringe at the thought of explaining to someone that a devious cyber-hacker broke into a credit card system and stole private information. while it has happened to other photographers (remember those paypal?), we refuse to let it happen to us and our clients.
4. hands-free marketing.
pictage handles our online marketing for us, including event announcements, gift credits, 2-for-1 print sales, and friendly reminders about sales and event expirations. friends & family that pre-register to view the event before it is released will receive a special gift credit up to $20 with no strings attached. this is another way a bride can share her images without burdened by print fulfillment and dozens of trips to the lab (or.... gulp... walmart).


3. slick online proofing.
this is way easier and quicker than the 'old-skool' 4x6s in an album. hard proofs get mixed up, lost, and can be difficult to share with out-of-town family. now, family and friends all over the world can view your wedding photos at home (but only if you want them too!). for clients who want a tangible proof, we do offer offer hard and soft cover proof books.
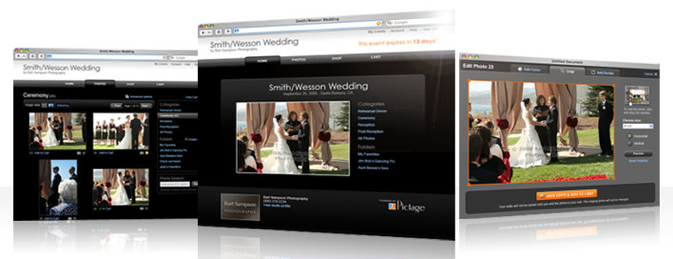
2. online galleries, the easy way.
once we ftp the high-resolution
digital negatives to pictage and the bride/groom
release the event to friends & family, the
mechanics of image processing is complete and
ready to run smooth. pictage has an streamlined
back-end workflow to build web-resized image
galleries, check out carts, and the works. that
means less time sitting in front of the computer
and more time shooting (or playing).

we have never paid a single credit card merchant fee with pictage! nada. zilch. with P3, pictage handles all of our credit card transactions online. that means we're not paying 3% to a credit card merchant for each transaction, which can add up when clients book a wedding for thousands of dollars. we can afford to pass the savings on to clients by offering lower priced packages :)
nothing is perfect. here are a few things we'd change about pictage:
1. apple's safari browsers not fully supported. what?!?! (fyi: it works fine on firefox and internet explorer)
2. slow ftp upload speeds. 50K/ second forces us into overnight uploading.
3. 'trusted by the world's happiest brides' .... not sure if we dig the slogan.
4. the P3 logo belongs in a chemistry text book.
5. the pictage training curve for brides & family can be steep. however, familiarizing clients with the process after the engagement session usually answers most questions.
now i lay me down to sleep
'imagine a photo shoot where each moment is a last moment, where there will be no second takes, where what you're doing means everything.'
this quote struck a powerful chord with me after reading it the website for 'now i lay me down to sleep,' a non-profit organization supports infant bereavement photography. named after the classic children's prayer from the 18th century, 'now i lay me down to sleep' has created a strong network of denver photographers dedicated to helping parents experiencing the pain and suffering of an early infant loss. click and HERE and HERE to read news stories of photographers and families they touched.i recently volunteered for the first time with 'now i lay me down to sleep.' it opened my eyes, to say the least. this powerful experience reminded me of the fragility of human condidition. the re-alignment of priorities comes easy when witnessing death.
on a personal level, my brother, peter, died when he was 10 days old. my parents have never shown me a photograph of him, and i do not know if one exists. while my parents rarely speak of him, i know it is difficult still for my parents talk about, let alone think about. my father, being an ob-gyn, witnesses such challenges on a regular basis with his patients. i spoke with my father about my recent experience with 'now i lay me down to sleep' and gained instant endorsement :) my father will be giving a presentation at an upcoming medical conference and plans to mention the potential power such a program plays in the infant bereavement process.
the parents, grandparents, and the family were very inviting and open to me being in their lives during this time of loss. as soon as we stepped into the hospital room, it seemed the parents were extremely grateful for that we were there, which was a big relief.
i shadowed photographer rosalyn sample at mountain hi photography since this was my first time photographing in a hospital under such conditions. rosalyn and the nurses were patient and helpful and were a valuable part of my experience. thank you! i felt honored and blessed to be gain access and i ensured i worked hard to ensure upmost respect with my interaction of the family. right off the bat, the father seemed excited for us being there. in conversation, he resonated a sense of warmth in describing how he intended to 'photoshop' the images so that they were a sentimental blend of color and black & white. i smiled and joined him in his enthusiasm. i was glad to offer up images :). fast forward to a few days later, i received a call from the family informing me that they would be using several of my images to print and display at the memorial service. i felt honored that i could be apart of that. i also knew the grace of God was with the child and the family.
i look forward to continued involvement with 'now i lay me down to sleep.' words can not describe the feeling of death, especially of an infant. however, i appreciate how the power of a simple photograph can help grieving parents.
if you are a photographer interested in participating, i encourage you to click here to apply. the approval process is rather simple, and once on-board, emails are sent as services are needed. it is completely voluntary to join. photographers do not charge for services and the clients receive all images on CD. such an assignment is not for the faint of heart, but totally worth it!
if you are not a photographer, but want to help, you may make a charitable-contribute and donate here.
to honor the couple's privacy, images will not be posted.
new pictage look & feel

ps- safari browsers are not fully supported, so you may be redirected to the old website. pc users, this doesn't affect you. if you are a mac user, we recommend firefox.
image X 08
but here's a preview of what to expect:
the iphone truth
in sum, the iphone has revolutionized the way i can get things done. i can sort through quick emails while waiting in lines, check for important flight times, delete spam, file away important emails, etc... thereby freeing up time rather than sitting in front of the computer checking email later in the evening. i can share portfolio images with clients without opening a computer. i can inspired by looking at favorite images. try out some new poses or textured backgrounds. google maps has already saved me on more than one occasion. the 2.0 megapixel camera rocks. listening to photo podcasts while doing mundane tasks has opened up a new world of learning (favorite podcasts include: lightsource studio photography, lenswork, f-stop beyond, and the nikonian's image doctors). the calculator is spiffy. sharing dash with the world and then seeing the weather forecast in two clicks is grand. checking updates of other photographer's blogs are a cinch with safari. and the list goes on.
i'm always giddy to know what apple will announce on tuesday's macworld expo. we already know apple came out with the fastest mac pro ever two days ago. what's next? new hd monitor? iphone update? smaller mac mini?
annie leibovitz vs. the queen mum
annie's stuff rocks. celebrity's are honored to have HER chosen as the photographer. her lighting is impeccable. see for yourself here.
show notes:
- annie wears sneakers to meet the queen. a photographer has to be comfy, right?
- annie states, "sit here like this. we'll do the rest." what a line.
- annie tells the queen mum to remove her crown. gulp.
- no less than 11 assistants.
- annie brings her daughter. (how sweet)
- annie's answer to the question, "did she like them?": "she approved them"
bokeh wonder
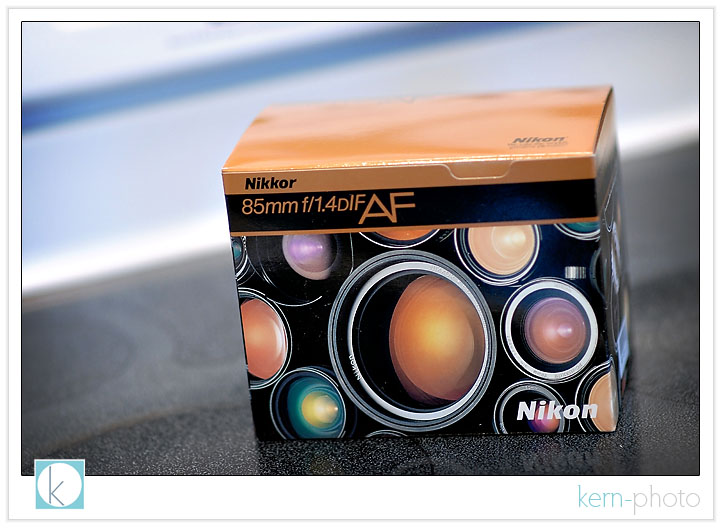
the latest nikon 85mm f/1.4: built like a tank. sharp as a tack, even when used wide open. with it, we are able to shoot sans tripod in practically low to no light. a classic photojournalist lens. hands down, nikon's best portrait lens features buttery smooth, creamy bokeh in the background (note the subtle blue blur in the background). bokeh = the quality rendering of the out of focus background, paramount in obtaining that elite elusive quality of an image and superior isolation of the subject, yada, yada, yada. our clients will surely appreciate the flattering quality of a shallow depth of field in their portraits. here is one of the first shots taken with this lens (nikon d-200, 1600 iso, 85 mm, 1/90 at f/1.4, handheld, no flash):
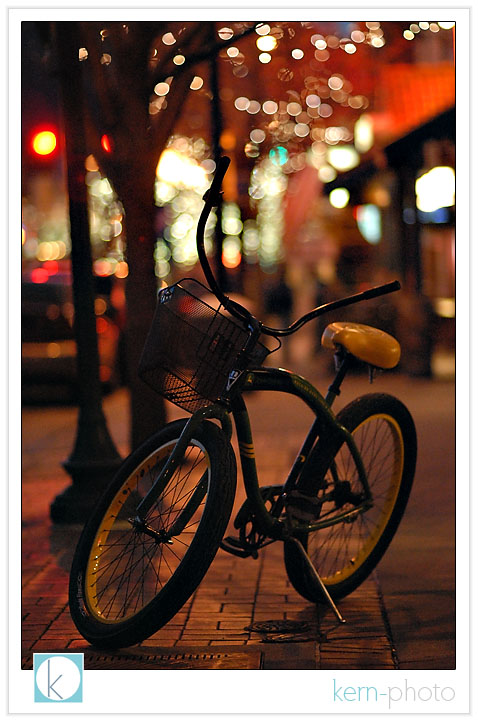
ps- nikon mounted this lens on the brand spankin' new $5,000 full-frame digital camera, the nikon d3, discussed here. yes, this lens is all that AND a bag of chips.
pss- special thanks to my wife, nicole, for enabling kern-photo to drop major coin on a fixed focal lens :)
coffee talk
10. caffeine gets those creative synapses firing
9. cool decor, super comfy chairs, and great big tables make for productive work spaces
8. clean, public restrooms
7. free parking
6. safe, comfortable, and (usually) easy to find
5. it's the bar of, like, the 2000s
4. art displayed on the walls... very cool inspiration
3. you can tell a lot about a person by what they order. nicole's favorite: grande no water 2% chai. r. j.'s top three favorite: 1) standard drip 2) quad shot espresso/americano 3) the biggest skinny mocha w/half the amount of chocolate pumps. all of r.j.'s aforementioned included splenda and/or half& half seasoned to taste.
2. free wi-fi
1. happy-hour priced drinks all day or night long! our clients are encouraged to order WHATEVER they want, without feeling guilty.